Montecresto
Montecresto el segundo
Lifetime Member
Supporting Member
Club Contributor
This repair was performed in three hours, with two persons in the optimum conditions of a well stocked shop and a vehicle lift. Had I not had the good fortune of having @Tramgauge to provide his shop, all the adequate tools, a lift and of course his help, it most likely would have been a full days job.
To begin with, I ordered the parts from Babbittsonline.com Here are the parts and part numbers and pricing:
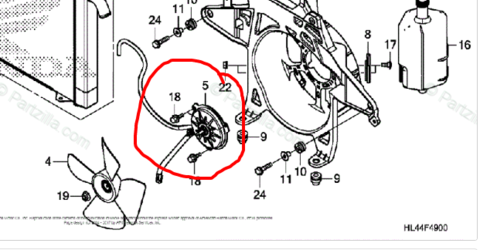
STAY, FAN MOTOR
Item #19015-HL4-A01
$47.11 1 $47.11
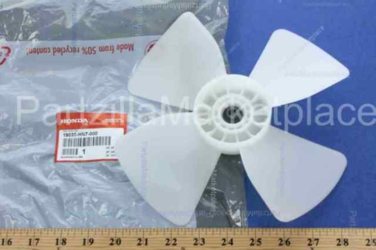
FAN, COOLING
Item #19020-HN7-000
$14.28 1 $14.28
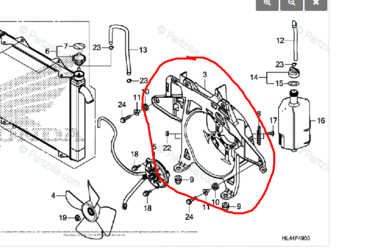
MOTOR ASSY., FAN
Item #19030-HL4-A01
$68.85 1 $68.85
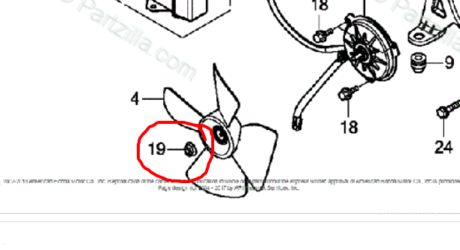
NUT, SERRATE (5MM)
Item #90315-MK3-003
$2.95 1 $2.95
Subtotal: $133.19
Shipping: $24.90
Salestax: $12.65
Order Total: $170.74
Tools:
Assorted screw drivers
Metric Allen wrench set
Metric box wrenches (mainly 10mm)
1/4” drive ratchet with varying length extensions and universal
Needle nose pliers
Supplies:
Di-Electric grease
Zip Ties
Lubricating oil
To begin with we looked it over real well trying to determine the shortest route in and out. In the end, we basically removed the entire front clip.
Tramgauge looking it over for the best place to start.
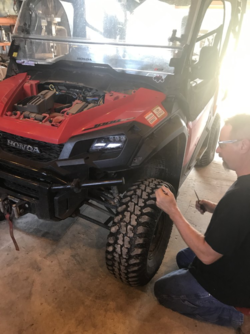
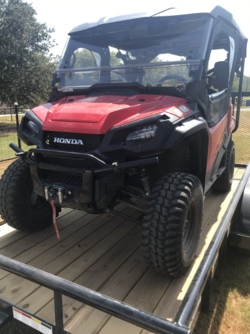
Removing the bumper was the first step. I have a winch installed in mine so we had to support the bumper tethered by all the wiring. If there’s no winch in the bumper and it can be removed outright, that would be the best as this was a bit in the way throughout the project.
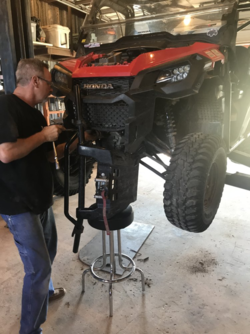
Removing the grill assembly which includes the headlamp trim and lower guard sides was next, all one piece and a bit tricky. It’s secured to the bumper with two allen head screws into spring nuts. There’s also phillip head screws up into the red (on mine) body/fender piece that were difficult to access, directly above the headlamps, and require a long throated screw driver. The color plastic does not need to be removed to perform this repair. Of course there’s a million push pins to remove along the way but that was the easy part.
The shroud can remain attached to the radiator. And I should point out here that the shroud is between the grill and radiator, not on the inside of the radiator like a car or truck. The piece on the inside that gets mistaken for a shroud is referred to as a “stay” by Honda, and actually is the frame that the fan motor is installed on and resembles a shroud.
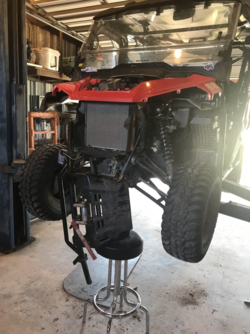
The next thing to remove was the bracket that the top radiator bolts secure to, which also bolts to the two vertical frame supports and continues out under, and bolts to both headlamp buckets. It’s all one piece and must be manipulated to get it out from under the color plastic and radiator and then can be set out of the way as well.
Next to remove is the left and right headlamp buckets. First the 3” round caps need to be removed from the back of the buckets to access and disconnect the lamp plugs. Then there are four Philip head screws to remove, two of which require a long shanked screw driver, then the buckets can be wiggled out and set aside.
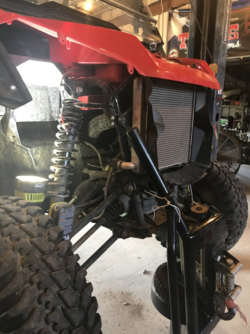
At this point, the radiator reserve tank is slipped off its bracket that attaches to the fan motor stay, the two remaining bolts are removed that fasten the radiator and stay assembly together and the stay can then be slipped out from behind the radiator. No hoses were loosened or removed, and the reserve tank was left sealed and hanging in place so no coolant was lost and the radiator can remain in place.
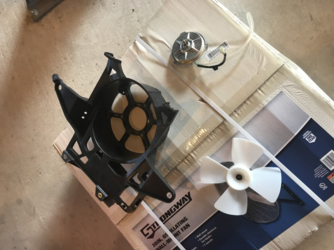
The new parts:
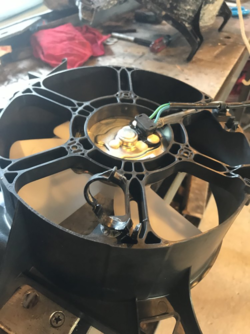
All assembled:
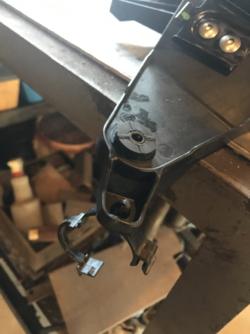
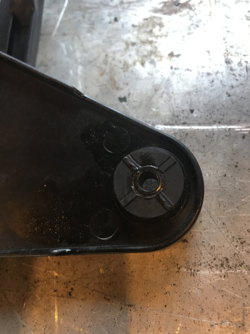
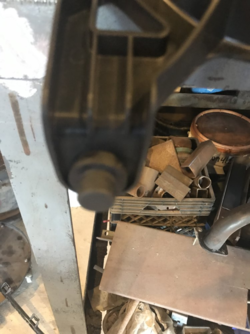
The reservoir tank bracket and four rubber grommets seen in the following pictures must be removed from the old stay and installed on the new stay. The reservoir bracket attaches with two Allen screws, the grommets just press in and out aided by some lubricating oil.
Reassembly was much easier as is usually the case, and quicker then disassembly. Started up, warmed up, test drove and everything operates properly.
To begin with, I ordered the parts from Babbittsonline.com Here are the parts and part numbers and pricing:

STAY, FAN MOTOR
Item #19015-HL4-A01
$47.11 1 $47.11

FAN, COOLING
Item #19020-HN7-000
$14.28 1 $14.28

MOTOR ASSY., FAN
Item #19030-HL4-A01
$68.85 1 $68.85

NUT, SERRATE (5MM)
Item #90315-MK3-003
$2.95 1 $2.95
Subtotal: $133.19
Shipping: $24.90
Salestax: $12.65
Order Total: $170.74
Tools:
Assorted screw drivers
Metric Allen wrench set
Metric box wrenches (mainly 10mm)
1/4” drive ratchet with varying length extensions and universal
Needle nose pliers
Supplies:
Di-Electric grease
Zip Ties
Lubricating oil
To begin with we looked it over real well trying to determine the shortest route in and out. In the end, we basically removed the entire front clip.
Tramgauge looking it over for the best place to start.

Removing the bumper was the first step. I have a winch installed in mine so we had to support the bumper tethered by all the wiring. If there’s no winch in the bumper and it can be removed outright, that would be the best as this was a bit in the way throughout the project.

Removing the grill assembly which includes the headlamp trim and lower guard sides was next, all one piece and a bit tricky. It’s secured to the bumper with two allen head screws into spring nuts. There’s also phillip head screws up into the red (on mine) body/fender piece that were difficult to access, directly above the headlamps, and require a long throated screw driver. The color plastic does not need to be removed to perform this repair. Of course there’s a million push pins to remove along the way but that was the easy part.
The shroud can remain attached to the radiator. And I should point out here that the shroud is between the grill and radiator, not on the inside of the radiator like a car or truck. The piece on the inside that gets mistaken for a shroud is referred to as a “stay” by Honda, and actually is the frame that the fan motor is installed on and resembles a shroud.

The next thing to remove was the bracket that the top radiator bolts secure to, which also bolts to the two vertical frame supports and continues out under, and bolts to both headlamp buckets. It’s all one piece and must be manipulated to get it out from under the color plastic and radiator and then can be set out of the way as well.
Next to remove is the left and right headlamp buckets. First the 3” round caps need to be removed from the back of the buckets to access and disconnect the lamp plugs. Then there are four Philip head screws to remove, two of which require a long shanked screw driver, then the buckets can be wiggled out and set aside.

At this point, the radiator reserve tank is slipped off its bracket that attaches to the fan motor stay, the two remaining bolts are removed that fasten the radiator and stay assembly together and the stay can then be slipped out from behind the radiator. No hoses were loosened or removed, and the reserve tank was left sealed and hanging in place so no coolant was lost and the radiator can remain in place.
The new parts:

All assembled:

The reservoir tank bracket and four rubber grommets seen in the following pictures must be removed from the old stay and installed on the new stay. The reservoir bracket attaches with two Allen screws, the grommets just press in and out aided by some lubricating oil.


Reassembly was much easier as is usually the case, and quicker then disassembly. Started up, warmed up, test drove and everything operates properly.

Last edited by a moderator:

