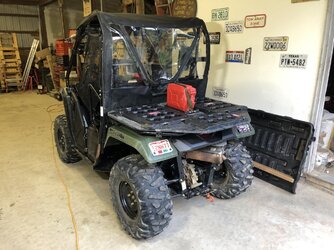
P500 Mighty P500 Build

Lee's Garage Index:

Forgot to leave a blank thread for the index so I'm hijacking the intro.

Index

  • New vehicle prep #2, 3, 5, 6, 7, 8, 9, 10, 11
  • Planning and other thinking #12
  • Tire pressure #16
  • Winch / plow mount #17, 18
  • Water sealing around the pedals #19
  • After market tires (not yet)
  • Windshield #23
  • Rack storage #21
  • Top and back #22
  • Navigation: mounting a tablet to the ROPS #29
  • Front locker install #31, field testing #32
 
Last edited:
Smitty335

Smitty335

Well-Known Member
Lifetime Member
Supporting Member
Oct 3, 2016
35,371
208,135
113
NWA Arkansas
Ownership

  1. 1000-3

  2. 1000-5
Tires:

On my outing to test the front locker I pinched a rear tire.
I was riding with 2 experienced p1k pilots so I dropped the tire pressure to 6psi to gain a little traction.
By the time I got home one of the rears was noticeably low on air.

I could see where the pinch was but it was not bad, just a slow leak.
So I tried to patch it on the inside.
Kind of a pain as the side walls are curved and fairly stiff.
The patch leaked or there was another leak I did not see, the tire went down ever so slowly.

When my wife saw this she told me to quit messing with it and order new tires.
If I would have known it was going to be that easy I would have backed over a screwdriver the 1st week I had the thing.

I did a quick survey to see what size and tire I wanted.
View attachment 270833
Then I ignored this and got what I knew I would be getting anyways.

View attachment 270834
I know, I've used this picture a few times already.
But the tires look good don't they?
That must be one bad A mud puddle! HA!
 
The Green Goat

The Green Goat

LGBTQ Compliance Officer -Lotta gays in this place
Lifetime Member
Supporting Member
Sep 7, 2020
1,859
13,486
113
Ohio
Ownership

  1. 520
That must be one bad A mud puddle! HA!
I'm glad I'm not the only one over here scratching my head wondering how he managed to do that...
 
lee

lee

Village Idiot
Lifetime Member
Club Contributor
Apr 4, 2013
2,359
13,324
113
Springfield Ohio
Ownership

  1. 500
So, although I should know better I plowed out from the snowpocalypse using my synthetic winch rope and a hawse fairlead.
A) 5” of snow is not a snowpocalypse.
B) I’m a dumb ass.

As one would expect the rope broke, fortunately right as I was finishing.

689A8965-36E7-4440-A607-89E7D8BD6621.jpeg


Interestingly the rope was having an issue an issue with the center of the spool being crushed.
In the picture below you can see the V shape of the rope on the spool.

82519331-357C-4742-89C5-EB0BC9388B08.jpeg


So I looked at some of the solutions that that the winch makers have out there.
$30~$40 is not bad.
But the reviews point out all sorts of issues.

Looking at YouTube I found this.
It seams to avoid some of the pitfalls and it’s cheap.

316822 1d3ae6e3892245c648d67972fd86391e

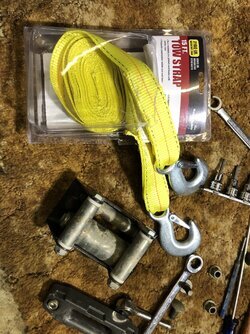
Bought a cheap tow strap from harbor freight, cheapest on they had was $12 and it will make 2 straps.

3E2A5E3F-C7C8-46B8-830A-6F7792F64227.jpeg


Used duct tape to attach the strap to the drum.
Spooled the strap on to the drum.
Also I switched out the hawse for the roller fairlead that came with the winch (the one with the big roller on bottom - looks like it has a fat lip).

E23B1530-9829-4747-8D4C-48F0F0BD03BC.jpeg


The Warn/Honda plow has a thing to keep the hook / thimble out of the fairlead.
I folded the strap in thirds and it fit in the little catch thing.

Made another pass around the property and this set up worked well.
So far so good.
 
trigger

trigger

Old Ironsides
Vendor
Lifetime Member
Supporting Member
Feb 13, 2016
21,742
161,924
113
Bay City, Michigan
www.quickshieldutv.com
Ownership

  1. 500
So, although I should know better I plowed out from the snowpocalypse using my synthetic winch rope and a hawse fairlead.
A) 5” of snow is not a snowpocalypse.
B) I’m a dumb ass.

As one would expect the rope broke, fortunately right as I was finishing.

689A8965-36E7-4440-A607-89E7D8BD6621.jpeg


Interestingly the rope was having an issue an issue with the center of the spool being crushed.
In the picture below you can see the V shape of the rope on the spool.

82519331-357C-4742-89C5-EB0BC9388B08.jpeg


So I looked at some of the solutions that that the winch makers have out there.
$30~$40 is not bad.
But the reviews point out all sorts of issues.

Looking at YouTube I found this.
It seams to avoid some of the pitfalls and it’s cheap.

View attachment 317708

Bought a cheap tow strap from harbor freight, cheapest on they had was $12 and it will make 2 straps.

3E2A5E3F-C7C8-46B8-830A-6F7792F64227.jpeg


Used duct tape to attach the strap to the drum.
Spooled the strap on to the drum.
Also I switched out the hawse for the roller fairlead that came with the winch (the one with the big roller on bottom - looks like it has a fat lip).

E23B1530-9829-4747-8D4C-48F0F0BD03BC.jpeg


The Warn/Honda plow has a thing to keep the hook / thimble out of the fairlead.
I folded the strap in thirds and it fit in the little catch thing.

Made another pass around the property and this set up worked well.
So far so good.

Yeah, I started switching over to the roller fairlead after breaking my rope plowing. I'll use the hawse on the trails though.
 
The Green Goat

The Green Goat

LGBTQ Compliance Officer -Lotta gays in this place
Lifetime Member
Supporting Member
Sep 7, 2020
1,859
13,486
113
Ohio
Ownership

  1. 520
FYI, KFI sells a plow strap for like $30, if you don't want to mess with making your own.
 
lee

lee

Village Idiot
Lifetime Member
Club Contributor
Apr 4, 2013
2,359
13,324
113
Springfield Ohio
Ownership

  1. 500
Dd3acbae e8a4 45d5 8a8b b9b71f0971f7 jpegIMG 3152

I've been threatening to do some kind of Milwaukee Packout storage thing for a bit.
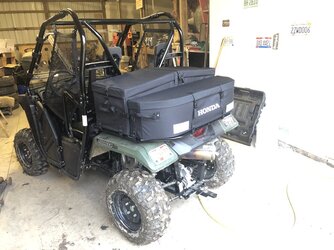
The soft bags where fun but after 4 years and ~2000 miles they are showing there age.
The internal baffles are tearing, a few of the hold down straps are looking tired and the rear bag isn't holding it's shape - it doesn't close correctly and leaks.

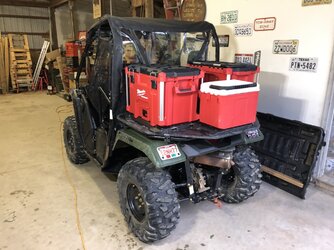
So, I made a board, 3/4" plywood, cut to shape to hold 2 large Packout bases and one half size.
There is also a rack to hold one of my 5L gas cans, the rack is an army surplus ammo box rack.
Originally the ammo box rack was set up for 2 boxes side by side.
I cut it down to hold just the one gas can.

IMG 3154


I set it up so there is some separation between the boxes.
This allows the lower box to be accessed without needing to remove the upper box.

IMG 3153


So, on the left is a XL tool box.
This is used for holding rain gear (frog togs) and excess warm clothes for my wife, a heavy coat, Carhart overalls.
(and yes, excess is the correct word)

On the right there is a tool case with inserts on the bottom and a large tool box on top.
Originally I had them stacked the other way but the smaller box was way heavier, so it seamed logical to invert them.
The tool case has both tools and recovery gear.
I usually carry a canvas tool roll with a bare minimum of tools, my tool list is developed to fit the fasteners used on the p500 with nothing extra.
But with the bigger tool case there was more room so I went crazy and that thing got way too heavy.
I will have to show more restraint next time.

The larger box has snacks, first aid kit, binoculars (I keep bringing them but I have yet to pull them out to use them).
It's the general 'stuff' box.

IMG 3155


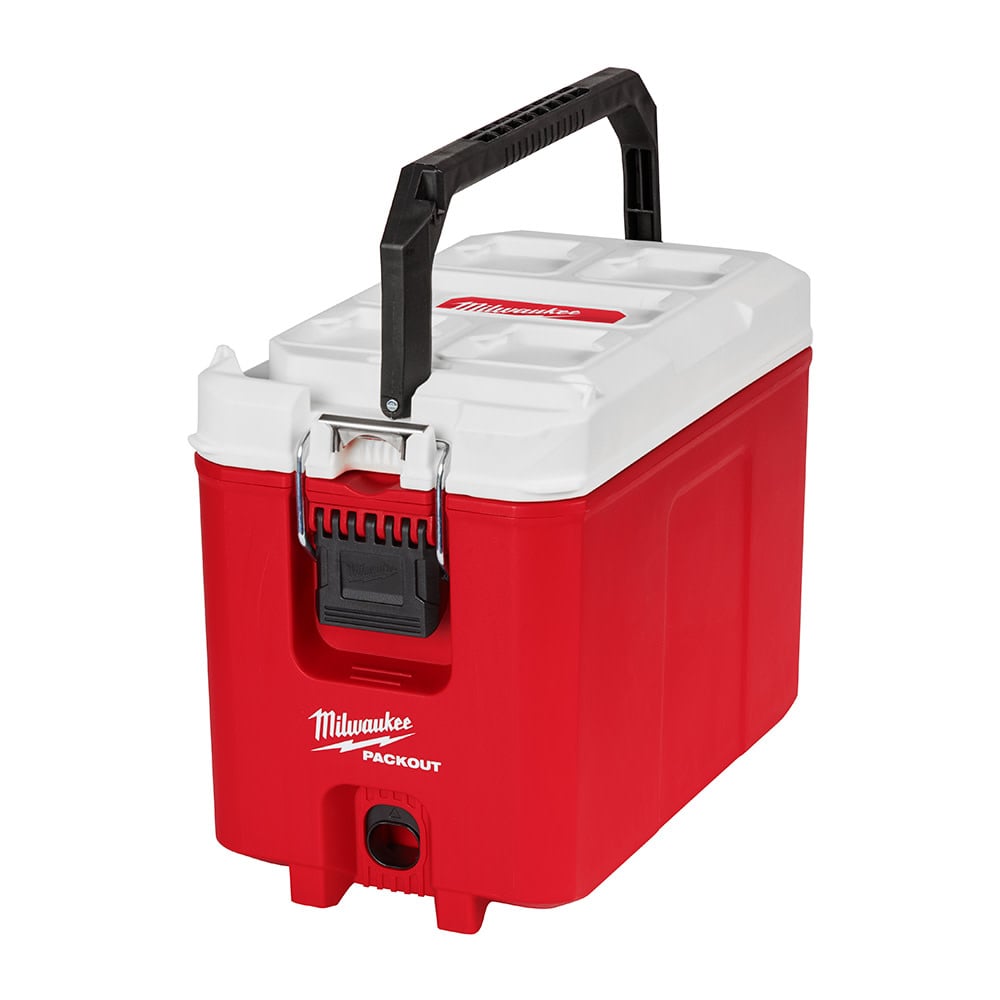
Finally I added a 16 qt cooler on the back.
We have been using a soft cooler in the soft bags.
With the hard side cooler we threw a bag of ice in on top of the drinks.
It was nice to have ice on the trail.

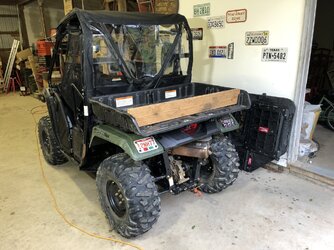
The board is held to the Mighty P500 rack with 8 of the honda 25.4 mm ROPS clamps.
This makes it relatively easy to switch between the cargo tray and the Packout plate.
At the Takeover I used the cargo tray to haul our gear up to the cabin, then switched to the Packout plate.

IMG 3152IMG 3156

Special thanks to @Neohio and @futzin I asked a lot of question before I did this.
And seeing @futzin mount some Packout on SpiderMonkey motivated me to get off my ass.

IMG 3151
 
Last edited:
Neohio

Neohio

Beast of the East
Lifetime Member
Supporting Member
Club Contributor
Dec 22, 2016
13,565
67,590
113
Painesville Ohio
Ownership

  1. 1000-5
@lee can you share the part number or pictures of the 25.4mm clamps? I am not sure I have seen them that small.
It does look good. You should enjoy it. I did see some other 500 with packout, but I wondered why they had the plates reversed. The latches were towards center. I wasn't sure why it was done that way.
 
futzin

futzin

Well-Known Member
Lifetime Member
Sep 10, 2019
3,492
25,587
113
Kentucky
Ownership

  1. 500

  2. 520
Probably mine.
I mounted the plates towards the outer edges of the Honda tray, which has side walls.
I figured the walls may interfere with setting the boxes.
 
KyGal83

KyGal83

KGB, SNS, Duchess Sheldon, Ms. Daisy, Natasha
Lifetime Member
Feb 3, 2021
8,082
80,836
113
Kentucky
Ownership

  1. 500
Add me to the “I need Packouts” list. Did someone say snack box??? Where?? I wanna see???


@lee loving your spare gas setup. Did it work well there? Any issue? Can you give me details on the tank & mount?
 
Last edited:
advertisement
lee

lee

Village Idiot
Lifetime Member
Club Contributor
Apr 4, 2013
2,359
13,324
113
Springfield Ohio
Ownership

  1. 500
@lee can you share the part number or pictures of the 25.4mm clamps? I am not sure I have seen them that small.
It does look good. You should enjoy it. I did see some other 500 with packout, but I wondered why they had the plates reversed. The latches were towards center. I wasn't sure why it was done that way.
The 1" ROPS clamp was created to mount to P500 cargo tray to the rack.
So it has a 'HL5' part number, Honda part # 08L00-Hl5 -A01.


FYI, the cargo rack on honda ATV's are a different size so this part has really limited application.

A few notes on making the board.
The board is 3/4" plywood, holes where located based on the needs of the Milwaukee Packout base plates with T-nuts installed.
And the board was covered in Herculiner roll on truck bed liner.

IMG 3158


I wasn't really paying attention when I started applying the Herculiner.
The can said something about not shaking so I stirred it.
After coating one side of the board I flipped it over and ran out of goop.
Apparently you have to stir it aggressively.
I had half a can of rubber crumbs compacted in the bottom of the can and only half a coated board.
As I had left this whole project till the last weekend, and I needed to attend a wedding on Saturday I scurried around trying to find Herculiner on the shelf.
I found it but it was touch and go for a bit.

T-nuts.
I ordered all the nuts and bolts from Amazon (china).
The quality is s***.
The black 6mm bolts are rusted already.
The black washers are zinc plated silver and painted black - so the corners of the bolts wipe the paint off and you can see a ring of silver around the bolt head.
I dropped the T-nuts in the holes and knocked them in with a hammer.
But, probably 1/3 of the T-nuts where pushed so tight against the side of the hole I could not start the bolts.
I ended up knocking them out with a punch and inserting a longer bolt to draw the T-nuts in, then replacing the bolt.

I placed washers under the Packout base plates at each bolt hole.
The base plates have a T-washer to transfer the load of the bolts to the substrate the base plate is mounted on.
As I was using a soft wood the extra washer will spread the load in to the plywood board.

The 1/2 base plate do not have this feature.
I found this amusing, why dose one have good design practice and the other dose not.
Oh-well.


I need packouts. And we need some pictures inside the snackle box.

Add me to the “I need Packouts” list. Did someone say snack box??? Where?? I wanna see???


@lee loving your spare gas setup. Did it work well there? Any issue? Can you give me details on the tank & mount?

The snackle box is a nice size and it has several handles to make carrying it easy.
But I find myself garbing the aluminum corner braces.

IMG 3159


Inside the snackle box is a nice little tray that is always easy to access.
So this tray is stocked with trail necessities and important paperwork.
However the snackle box was packed by a male (as biologically determined by a trained medical professional at birth) so there is no port-a-potty or privacy tent.
Picture shows the contents sans snacks (post trip picture).

IMG 3160


Finally, the gas can holder.
There is not much to it.
Basic aluminum angle frame with a strap.
The strap has a hook on the side you cant see and an over center toggle device.
Gas can stayed put the whole weekend.

1718065182777
 
Scoop

Scoop

Well-Known Member
Lifetime Member
Supporting Member
Sep 7, 2021
4,441
17,152
113
Michigan
Ownership

  1. Other Brand

  2. 1000-5

  3. Talon R LV
@Scoop which box are you using for your snackle box
This one: 48-22-8435


There is one that same size but half as thick that we filled with first aid supplies: 42-22-8436


Those fit nice on top of the smaller Packout cooler: 48-22-8460

 
Last edited:

About us

  • Our community has been around for many years and pride ourselves on offering unbiased, critical discussion among people of all different backgrounds. We are working every day to make sure our community is one of the best.

User Menu

Buy us a beer!

  • Lots of time and money has gone into making sure the community is running the best software, best designs, and all the other bells and whistles. Care to buy us a beer? We'd really appreciate it!

    Beer Fund!

    Club Membership!