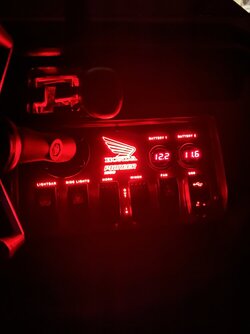
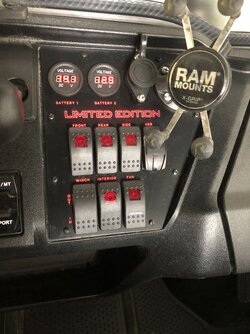
P1000 Custom switch panel

E

Ethan

Member
Sep 20, 2018
29
76
13
Tucson
Ownership

  1. Other Brand
Just wanted to share this custom panel from Concours Specialties. I told him what I wanted as far as the switches go and drew a sketch of the Honda wings and logo to be back lit and he did an amazing job. I also purchased a fuse and relay box to go with it and everything was color coded and labeled individually for each of my accessories. Made installing everything so easy I did it all in 1 day. The winch, horn, 3 led light on front bumper and the RAM mount. I still have to install the extra motor fan. Turned out Amazing!!
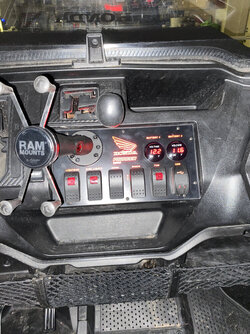
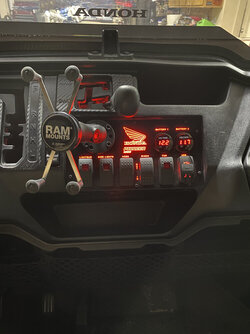
8B681806 08FF 4E5A B591 89CD414954FA 105BD6BA 5B63 4160 AFAD 130E26729EC4 D9887DB2 0ECB 48D0 929E 010B89AFB180
 
B

BobSmithing

Member
Dec 20, 2020
28
80
13
Kent, WA
Ownership

  1. 1000-5
Just finished up by switch panel install. Custom panel from New Wire Marine ~$60 before shipping. I installed it where the warning plate was on the dashboard after removing that. Install was interesting. The mounting holes were too close to the top rivet holes and I had to use a piece of flat aluminum across the back of the panel at the top that I tapped and used it as the "nut". Some pics are below. I picked up suggestions from the forums. Appreciate all the tips.

Pic 1: Putting Aluminum behind the panel to screw it in.
Pic 2 & 3: Wiring before being put in place.
Pic 4: Shape of the bar put in place to act as a mounting point.
Pic 5: Final switch.
Pic 6: Tape holding bar in place until I could put bolds in place.
2021 03 P 1404 UTV Switch Panel
2021 03 P 1405 UTV Switch Panel
2021 03 P 1406 UTV Switch Panel
2021 03 P 1410 UTV Switch Panel
2021 03 P 1412 UTV Switch Panel
2021 03 P 1413 UTV Switch Panel
 
Remington

Remington

Deputy Fife POIDH Enforcement Officer
Lifetime Member
Supporting Member
Jul 24, 2016
18,865
108,193
113
Michigan
Ownership

  1. 1000-5

  2. Talon X
Just finished up by switch panel install. Custom panel from New Wire Marine ~$60 before shipping. I installed it where the warning plate was on the dashboard after removing that. Install was interesting. The mounting holes were too close to the top rivet holes and I had to use a piece of flat aluminum across the back of the panel at the top that I tapped and used it as the "nut". Some pics are below. I picked up suggestions from the forums. Appreciate all the tips.

Pic 1: Putting Aluminum behind the panel to screw it in.
Pic 2 & 3: Wiring before being put in place.
Pic 4: Shape of the bar put in place to act as a mounting point.
Pic 5: Final switch.
Pic 6: Tape holding bar in place until I could put bolds in place.
View attachment 261870View attachment 261871View attachment 261872View attachment 261873View attachment 261874View attachment 261875
Nice work!
ugh that mouse nest give me high blood pressure, reminds me of mine lol. I do love your attention to detail and labeling your wires! I do the same thing.
 
B

BobSmithing

Member
Dec 20, 2020
28
80
13
Kent, WA
Ownership

  1. 1000-5
Thanks Remington! Yeah if I don't label them it will be hours of work when I have to go fix them and you just know that is coming! Next time I'll be able to use my nifty heat shrink labels! :D Even better, when I closed it up...everything worked!
 
advertisement
M

Michiganboy

Active Member
Aug 17, 2021
45
168
33
Grand Rapids
Ownership

  1. 700-4

  2. 1000-5
Does anyone know where to get the factory Honda rocker switches?
 
  • Like
Reactions: Lady01

About us

  • Our community has been around for many years and pride ourselves on offering unbiased, critical discussion among people of all different backgrounds. We are working every day to make sure our community is one of the best.

User Menu

Buy us a beer!

  • Lots of time and money has gone into making sure the community is running the best software, best designs, and all the other bells and whistles. Care to buy us a beer? We'd really appreciate it!

    Beer Fund!

    Club Membership!