P1000 Honey Badger

HONEY_BADGER77

HONEY_BADGER77

Member
Sep 19, 2016
31
52
18
BIG SANDY ,TX
Ownership

  1. 700-4

  2. 1000-3
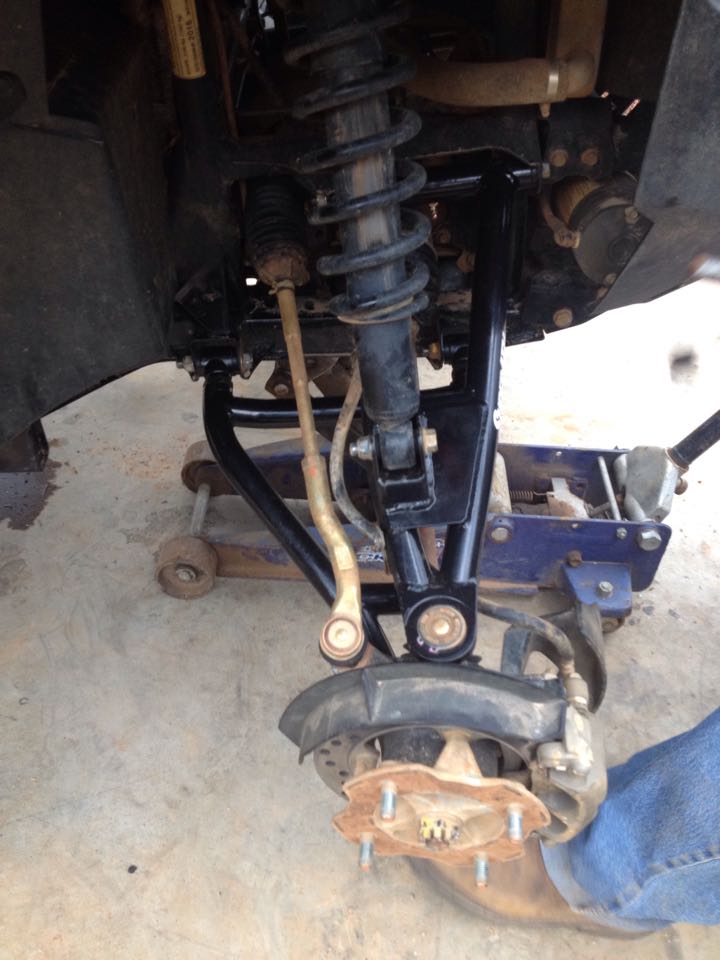
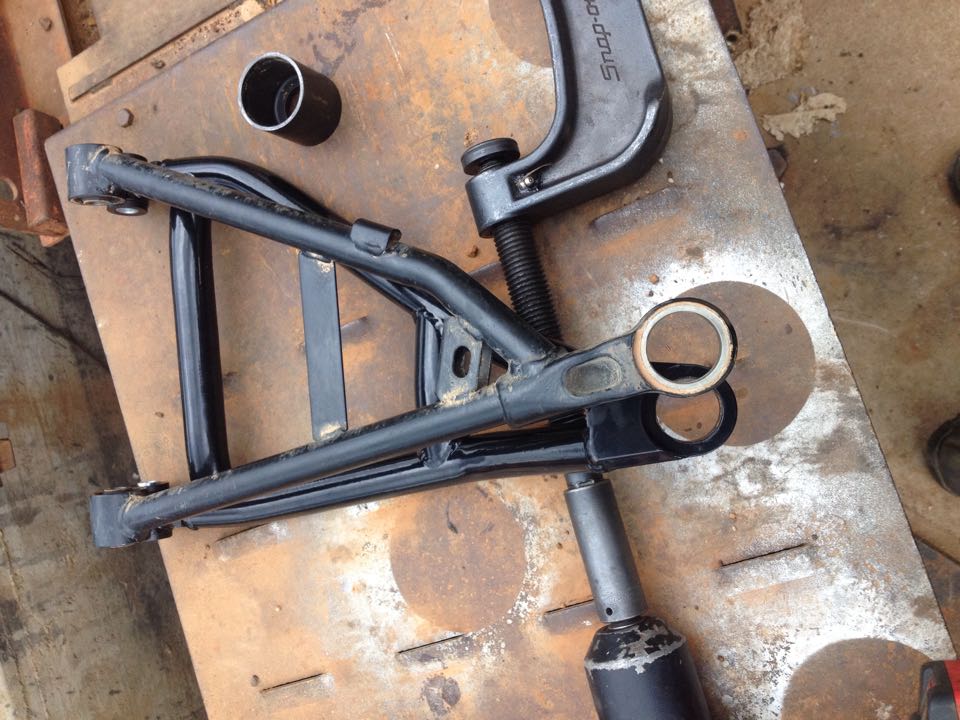
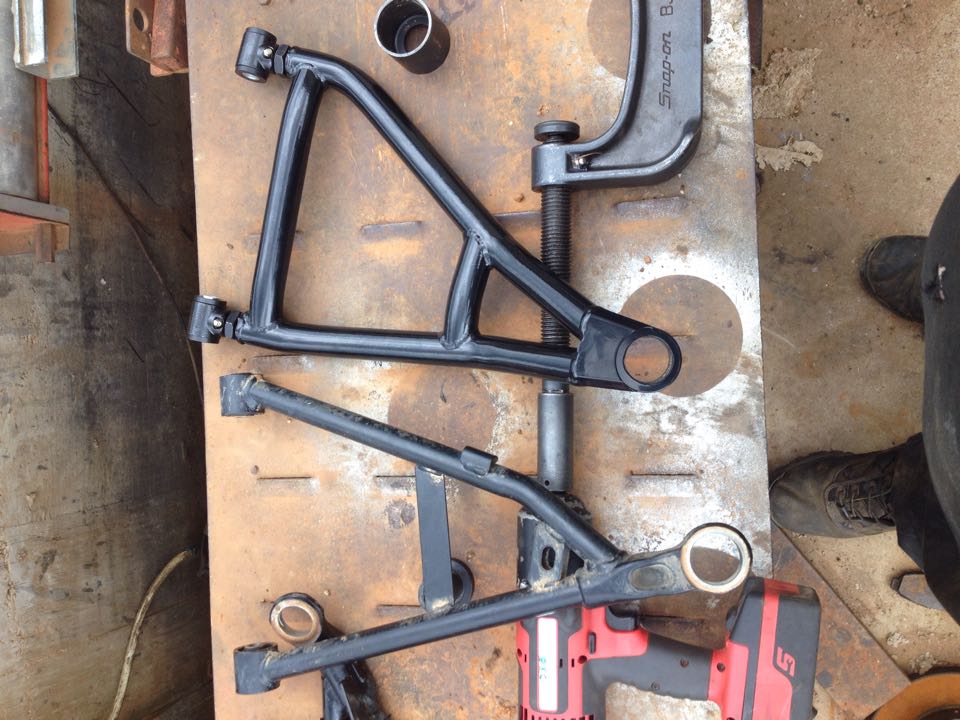
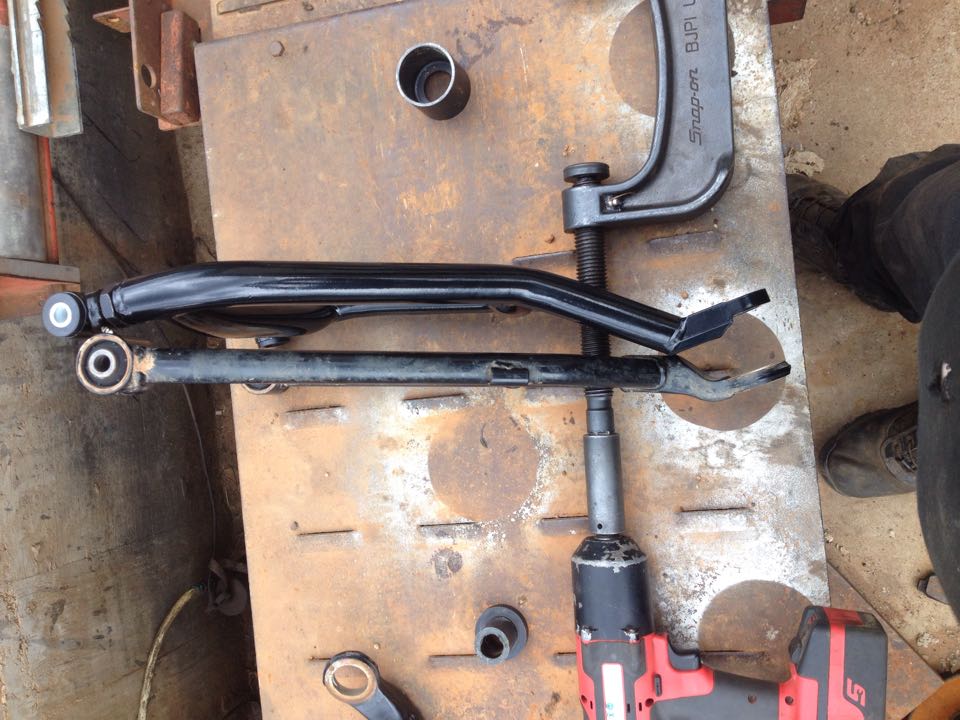
So far I have built or bought and installed : (Me-made) Led whips , Honda winch mount and Harbor Freight 5000lb winch ( pulled a buried jeep out once I anchored to a tree and pulled my self out a few times under water and works great) , am/fm /mp3 player and 6 1/2" Boss audio tube and Walmart flexible radio antenna , front over head light LED strips , High Lifter 2" lift kit , Super ATV front Forward 1.5" A-arms , STI HD7 Matte Black/Radiant Red wheels with ITP Cryptid 30x10-14 tires, Honda flip up windshield , 45" curved LED bar roof mounted , Drilled the baffle in the muffler with 4 7/8" holes and fabbed a new 2" tail pipe exit flange, second battery under hood, Honda rear view mirror.

next plans ,build a snorkel and run vent lines up ,build a rear bumper and maybe a front , led reverse lights, led side lights, led cab lights , build a nicer switch plate from the pattern, etc.

I am sorry I didnt take time to take more pictures as I installed but I will try to more from now on and I will be posting more picts of what has been done.

14542776 10206358170787890 800004442 n
 
  • Like
Reactions: sharp and pct
advertisement
HONEY_BADGER77

HONEY_BADGER77

Member
Sep 19, 2016
31
52
18
BIG SANDY ,TX
Ownership

  1. 700-4

  2. 1000-3
started on my homemade snorkel today and almost finished it but letting paint dry over night. couple of push/ pull tabs and 4 5mil allen bolts and covers off

Air box cover Air box uncovered
 
HONEY_BADGER77

HONEY_BADGER77

Member
Sep 19, 2016
31
52
18
BIG SANDY ,TX
Ownership

  1. 700-4

  2. 1000-3
this is what you see from rear of engine looking forward. the factory air duct has a rubber 90 at engine to loosen on pipe side with #2 pillips and a rubber coupler under front seat near bottom frame same style clamp, then 2 pull tabs one at front i have pulled see the holes and one at rear near engine is tricky to see but maybe thats just cause my buggy is filthy, anyhow take the front rubber coupler off both pipes and you can drop pipe down and towards drivers side and pull up and out through seat hole real easy

Looking forward from back of engine Front tab on air duct Rear tab on air duct Air duct and coupler Air pipe coming out
 
HONEY_BADGER77

HONEY_BADGER77

Member
Sep 19, 2016
31
52
18
BIG SANDY ,TX
Ownership

  1. 700-4

  2. 1000-3
next ,pipes and pipe couplings were flying all over this thing like a mad man trying to break a code on a bank vault , but through the miracle of time I found a good combo of parts and measurements , added a little exhaust bracket to help support the new crossover pipe, then I had to do some minor cutting to the engine cover plastic on drivers side , I also had to trim the front top plastic that hangs over the square metal frame on the bed for pipe to not interfere with dump operations , missed that photo op somehow. then i looked at it going to the right side behind seat but i chose to put it in the middle to keep mud away from intake. decided to wrap the pieces around the engine with some aluminum sealer wrap stuff I had laying around from some auction box lot , should keep most heat off the pipe. will look better painted so that was next. then I need to build a few more brackets to hold upper pipe to rops.

Air pipe bracket Engine cover over snorkel Snorkel to right side Snrokel up Snorkel paint Snorkel paint 2 Snorkel rap
 
Last edited:
HONEY_BADGER77

HONEY_BADGER77

Member
Sep 19, 2016
31
52
18
BIG SANDY ,TX
Ownership

  1. 700-4

  2. 1000-3
High Lifter front and rear lift already installed didnt get pictures during but really took about 15 mins on front and 20 mins on rear to do, very easy.and gained exactly 2 inch height

Front lift Rear lift
 
  • Like
Reactions: Upstatefreedom
X4Dice

X4Dice

Active Member
Jun 3, 2016
87
130
33
USA
Ownership

  1. 500

  2. 1000-3
next ,pipes and pipe couplings were flying all over this thing like a mad man trying to break a code on a bank vault , but through the miracle of time I found a good combo of parts and measurements , added a little exhaust bracket to help support the new crossover pipe, then I had to do some minor cutting to the engine cover plastic on drivers side , I also had to trim the front top plastic that hangs over the square metal frame on the bed for pipe to not interfere with dump operations , missed that photo op somehow. then i looked at it going to the right side behind seat but i chose to put it in the middle to keep mud away from intake. decided to wrap the pieces around the engine with some aluminum sealer wrap stuff I had laying around from some auction box lot , should keep most heat off the pipe. will look better painted so that was next. then I need to build a few more brackets to hold upper pipe to rops.

View attachment 23452 View attachment 23453 View attachment 23454 View attachment 23455 View attachment 23457 View attachment 23458 View attachment 23463
Can you show how you brought it up behind the seat? Thanks
 
joeymt33

joeymt33

i4WD=imitated 4WD
Moderator
Lifetime Member
Supporting Member
Club Contributor
Mar 17, 2015
11,092
39,079
113
Guntersville, AL
Ownership

  1. 1000-3

  2. 1000-5
Looking great! Y'all have a good time don't you?!


Quote by jackal: "we won't be doing any extreme trails".
 
  • Like
Reactions: CumminsPusher

About us

  • Our community has been around for many years and pride ourselves on offering unbiased, critical discussion among people of all different backgrounds. We are working every day to make sure our community is one of the best.

User Menu

Buy us a beer!

  • Lots of time and money has gone into making sure the community is running the best software, best designs, and all the other bells and whistles. Care to buy us a beer? We'd really appreciate it!

    Beer Fund!

    Club Membership!