Hondasxs
Club Founder
Staff member
Lifetime Member
Supporting Member
We have become aware that some of our lighted headlight retrofit switches may be incorrectly wired.
Here will give some details on how to inspect and check your connector.
This is the item in question - Lighted Headlight Switch Retrofit for Honda Pioneer 1000 - Plug-n-Play
Notice: There is no risk or concern regarding the issues listed here.
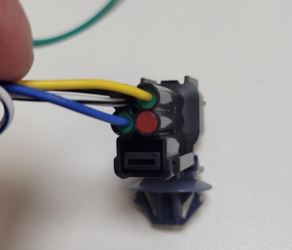
The below image IS CORRECT.
This is how the connector should be wired. Any differences will lead to the switch partley working, reversed, or not working at all.
We are mostly questioning the yellow and blue wire location. The black and white/black are correct on all switches.

Now we will discuss how to correct this.
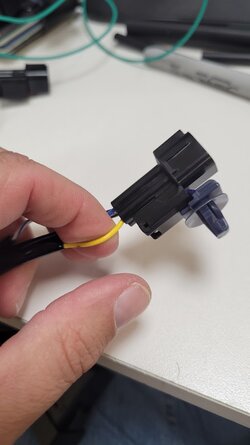
Identify the wire that needs to be removed. Here we will work with the yellow wire in the below image.
To do this, take your finger and hold it like shown.

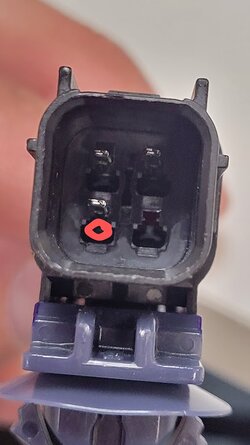
Next, we want to push the finger holding the silver clip down. This will release the connector. Then give the wire a pull.

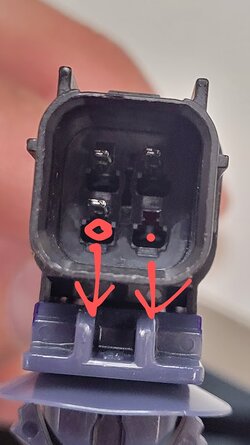
The direction the fingers need to go. 2 are marked for reference.

Finally, reinstall the wires per this layout

If you wish to do this yourself you are more than welcome.
Otherwise, contact HondaSxS to for a return shipping label. we will get it fixed and returned ASAP.
Thanks.
Here will give some details on how to inspect and check your connector.
This is the item in question - Lighted Headlight Switch Retrofit for Honda Pioneer 1000 - Plug-n-Play
Notice: There is no risk or concern regarding the issues listed here.
The below image IS CORRECT.
This is how the connector should be wired. Any differences will lead to the switch partley working, reversed, or not working at all.
We are mostly questioning the yellow and blue wire location. The black and white/black are correct on all switches.
Now we will discuss how to correct this.
Identify the wire that needs to be removed. Here we will work with the yellow wire in the below image.
To do this, take your finger and hold it like shown.

Next, we want to push the finger holding the silver clip down. This will release the connector. Then give the wire a pull.

The direction the fingers need to go. 2 are marked for reference.

Finally, reinstall the wires per this layout

If you wish to do this yourself you are more than welcome.
Otherwise, contact HondaSxS to for a return shipping label. we will get it fixed and returned ASAP.
Thanks.
Last edited:

