P500 P-500 Air Suspension Mod- JWB Mod

JWB

JWB

Well-Known Member
Lifetime Member
Oct 3, 2016
802
2,023
93
California MD
Ownership

  1. 500
Started this thread to put all the data, info, experiences, recommendations, etc., to install the Gabriel Hi-jackers(Part [HASHTAG]#49304[/HASHTAG]) or AC Delco air ride shocks (Part [HASHTAG]#504557[/HASHTAG]) to completely replace the stock P-500 shocks.

The least expensive, and simplest version of this set up, is to just replace the front shocks, have a single fill point, and a single valve to allow for isolating one side from the other, or allowing both sides to be joined, or 'see' each other. This set up also makes the most dramatic change in ride, and front suspension articulation, and is the biggest 'bang for the buck'.

**No matter what set up you end up going with, you MUST use doubled shocks at each wheel**

Adding the air shocks to the rear of the machine further improves ride, but not as dramatically as the front. This also adds cost (obviously) and complexity. If you normally carry alot of weight on the machine, the rear air-shocks may not serve you well with shock mounts in the stock location. I normally carry about 60-70 lbs on my cargo rack, and roughly 450 lbs riders and gear with no issues at all,(Note: my rear sway bar is removed) but the rear air pressure needs to be near 200psi to make changes on a slope, so an on-board 200psi compressor is really needed, as I've never seen a shop air compressor go above 140psi.

That being said, having '4 corner' air suspension opens up a whole new set of possible capabilities to the machine.
1- Allows for load compensation- side to side, and/or front to rear
2- Adjust ride quality for trail conditions or improved handling
3- Allows for better weight transfer on slopes to improve traction when ascending or descending steep terrain
4- Allows machine to be 'leaned' into a hill to reduce risk of rollovers in off camber situations.
5- Increases suspension travel by over 3" or a 50%+ improvement
6- Dramatic improvement in suspension articulation, with full control of all four wheels independently or in pairs front to rear.
7- Allows machine to be lowered to allow entry into height limited trailers, garages etc.
8- Can all be adjusted on the 'fly'
9- If bridged up or bottomed out, you can easily lift one wheel at a time, put fill under it, and the
machine can lift itself up off the obstacle.
 
Last edited:
JWB

JWB

Well-Known Member
Lifetime Member
Oct 3, 2016
802
2,023
93
California MD
Ownership

  1. 500
And now the downside...
These air shocks are not high quality-hence the price- and were never intended to be used in this type of set-up.
They will never have the high speed ride and all-out control of a purpose built shock like the Walker-Evans or other high end shocks. Period.
However, I just had my first real shock failure in almost 2 years, and over 1600 miles of abuse, due to the lack of limit straps. *EDIT* In retrospect, I think the failure I encountered wasn't "due" to not having limit straps, but was caused by having way more pressure than needed in the shocks. Limit straps might have stopped the failure, but the straps *I believe* introduce more potential issues than they solve, and am now of the opinion that they aren't worth the hassle of installing them, and the anxiety it would cause me wondering constantly if they're getting tangled in something every time the suspension compresses.

These are things I feel after near 2 years with this set-up, are required if you want the set-up to last, and be as trouble free as possible:

1- Modifications to all the control arm bushings to minimize excessive wear due to the increased suspension travel.
2- Edit- As noted above, I'm kinda backing away from the limit straps now, and may remove it from the list..:Installation of limit straps to protect the shocks from 'banging' out to full extension, and eventually pulling themselves apart. *SEE NOTE BELOW*
3- Required: Fabrication of spacers and shock bushing inserts.
4- This one is more for aggressive riders, but due to the increased traction to the front wheels, I would recommend reinforcing the control arm mounts. They aren't welded on the back side, and will eventually start tearing away from the frame. I drive like an idiot, so I also added reinforcement as well. If you're planning to add a Torq-locker too, then you gotta at least finish welding the tabs on the backside.
5- If you use an air tank, make sure to clean it thoroughly before installing- both the tanks i bought were full of debris that could have damaged valves or plugged lines etc.
6- If your air tank doesn't have an over-pressure safety valve, install one.
7-The bushings that come installed in the shocks are pretty crappy- way too soft for this application, and are pretty much destroyed after a couple hundred miles on the machine. Replacing the the bushings with the polyurethane ones that @Duckhunt listed a few posts down will eliminate the issue altogether.

If you are just starting this mod, you have a great advantage here, in that you can avoid all the mistakes, and most of the wear issues I, and the others who've done this mod have dealt with.

**NOTE- I haven't come up with a viable solution for limit straps. If you avoid running air pressure above what is needed to ride comfortably, the issue of limit straps may never be an issue at all.

This thread is gonna take me a while to really get it right, but most of the info that ends up here is in the 'p5 suspension' thread already. The JWB mod saga starts here: P500 - p5 suspension
and as we get further into this, I'll keep updating this list with new improvements, and add links to the appropriate info. Eventually we'll have a complete parts list, with sources, and a 'damn near' install manual!
 
Last edited:
JWB

JWB

Well-Known Member
Lifetime Member
Oct 3, 2016
802
2,023
93
California MD
Ownership

  1. 500
FRONT SHOCKS ONLY PARTS LIST AND INSTALLATION - BASIC SET UP

2 sets of the gabriel hi jackers part # 49304, or AC Delco 504557
Fabricate spacers to fit in the original shock location to support the tabs for mounting the dual shocks on the outsides of the mount.
Longer bolts to mount the shocks- the actual length and diameter will be dependent on your choice of bushings and how 'stock' you want to keep the machine for switching back to the stock, or even after-market 'coilover' shocks in the future. The bolts should grade 6-8 for resistance to bending.
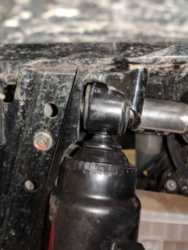
Fabricate steel inserts for the lower shock bushings, as the shocks only come with inserts in the top mounts.
I initially put this part in the 'recommended' category, but after thinking about this, I'm thinking more along the lines of 'mandatory': Remove the 'teeth' in the ends of the control arm bushings and replacing the stock control arm bushing bolts with longer bolts that keep the threaded section out of the mount tabs. This allows for full articulation without damaging the mount tabs and bolts. The control arms should move freely when completed- see the great vid that @Duckhunt posted, that clearly shows the difference after the mod:

If you don't do this, the teeth in the control arm bushing will damage the mount tabs, and will saw through the bolts!
I would recommend:
Replace the bushings in the shocks- thanks @Duckhunt again- with the polyurethane ones that @Duckhunt has in the next post.

Here's links to pictures of the clearancing on the front vertical support needed to install the front shocks.
https://hondasxs.com/attachments/dscn1044-jpg.29510/
https://hondasxs.com/attachments/dscn1048-jpg.29512/
Here's some pics that @pFive took of his front only set up: 85780 788a17a3704a579674cb59b84f9fe632 85781 819a174260461f58d691015c9ba00276 85782 6675aeb1918e761d3304fdb09cbe1bd6

More to come later..........:)
 
Last edited:
D

Duckhunt

Guest
I am currently in the middle of the @JWB P500 air shock mod. I would first like to thank @JWB for all his testing an input. Saving me A LOT of time and calculations. I agree with him these shocks are not designed to do what we are doing, but I am very intrigued by their performance not to mention they are cheap! Plus my type of riding is 90% designated ATV trails. The other 10% is ice fishing and hunting. So I am not racing, hill climbing, crawling, etc. @JWB rides a lot more difficult terrain and over obstacles so I am hoping 1600+ miles for him = 2000+ for me!

Right now I am doing 2 shocks at each corner, manually adjusting air pressure from a separate compressor or air tank. Plan is to add compressor and more valves to adjust on the fly later this year or next spring. The first thing I did and highly recommend is I removed the standard shock bushings and replaced with polyurethane bushings. I used Energy Suspension (PART #9.8116G) G=Black, R=Red bushing. They are an exact fit. HOWEVER, I recommend getting the (PART #9.8147G) or R split bushings. These are the exact same dimensions as the 9.8116 but they are split so you install a half from each side. I ended up splitting mine with a utility knife because they were too difficult for me to install. But I don't have any press or anything in my garage.

To remove the factory "foam" bushings the bottoms very easily pry out with a screw driver. The tops with the steel insert bushing, I drilled several holes around steel insert through the bushing with a 3/16 drill bit and "hogged" out each hole after the bit went all the way through. I just worked the drill in a circle. You'll notice how bad these bushings are because after you get a couple holes drilled the bushing starts coming apart in chunks. Then you can pound the steel insert out, i used an old deep impact socket slightly larger than the steel insert as a base. Then the stock bushing, what's left of it, comes out very easily with screwdriver.

Here is a link for the Energy Suspension 9.8116 bushings
Energy Suspension 9.8116 - Shock Eye Bushings - 98116. Energy Suspension ENE-9.8116G
Here is a link for the split ENERGY Suspension 9.8147 bushings
Energy Suspension 9.8147 - Shock Eye Bushings - 98147. Energy Suspension ENE-9.8147G
 
Last edited by a moderator:
Iceout

Iceout

New Member
Jun 2, 2018
6
7
3
New Hampshire
Ownership

  1. 500
Thanks for your efforts in sorting out this air shock option. I ordered up a set of AC Delcos and bushings this week.

On the limiter strap issue, wouldn't these work, and what size is best? UTV Limit Straps - Yamaha | Polaris | Can-Am | Arctic Cat | Kawasak

Lastly, it seems that leaving the A-arm bolt loose after grinding the bushing sleeve teeth would allow wearing at the A-arm frame mount in the long run. Have any of you explored pressing out the rubber bushing altogether and a poly bushing and steel sleeve replacement?
 
  • Like
Reactions: Lady01
Montecresto

Montecresto

Montecresto el segundo
Lifetime Member
Supporting Member
Club Contributor
Jan 17, 2016
22,584
34,172
113
Eastern oklahoma
Ownership

  1. Other Brand

  2. 500

  3. 1000-3

  4. 1000-5

  5. Talon X4
Thanks @Duckhunt for the bushing info- excellent ! Here's the video about how I have the air valves set up on my machine, and why I have them that way.
I think it’s fantastic that you’ve consolidated all this and worked through the bugs. I started on this two years ago with 1 air shock on each side which of course failed and never did get back to redoing it with doubles....but I still do intend to, and now you’ve made it even easier. Thank you!!!
And, for what it’s worth, I nominate you to be flagged as a club contributor* (@Hondasxs ??)
 
D

Duckhunt

Guest
Lastly, it seems that leaving the A-arm bolt loose after grinding the bushing sleeve teeth would allow wearing at the A-arm frame mount in the long run. Have any of you explored pressing out the rubber bushing altogether and a poly bushing and steel sleeve replacement?

Welcome @Iceout from Minnesota!

I am going to strongly look into that exact idea next spring. Been occasionally looking at used arms on EBay to play with this winter - see how the stock rubber comes out, look at the bore finish on the arm, etc. On the A-arm bolts, I keep them snugged enough so they do not rotate or move with A-arm travel. There's light friction on the now-smooth insert against the SS washer (greased up) that makes up the removed teeth material thickness. That should be the new wear point. I do keep an eye on the bolt tension often, which is why I'm exploring a permanent solution.

I too am also in the middle of the air shock mod. Just fall time crept up on me like it always does so put it aside, it will get done for sure this winter. I have been watching @JWB new posts like a hawk and am also convinced I will move the upper rear shock mounts to the outside of the frame for a more vertical shock. I have all the shock & plumbing parts and pretty much have everything designed just need to get parts cut out. But that way when this all goes to sh*t I still have 100% of the factory mounts/bolts to throw WE shocks in LOL. But obviously I believe in this mod enough to go forward with it.
 
  • Like
Reactions: Lady01
JWB

JWB

Well-Known Member
Lifetime Member
Oct 3, 2016
802
2,023
93
California MD
Ownership

  1. 500
I think it’s fantastic that you’ve consolidated all this and worked through the bugs. I started on this two years ago with 1 air shock on each side which of course failed and never did get back to redoing it with doubles....but I still do intend to, and now you’ve made it even easier. Thank you!!!
And, for what it’s worth, I nominate you to be flagged as a club contributor* (@Hondasxs ??)
It's been a lot of fun! And I gotta say how much I appreciate the incredible support I've gotten from everyone on this forum- y'all rock! Having other members kicking in their thoughts, ideas, and, well, discoveries, makes this on-going project that much more fun and satisfying! So, Thank you!
 
JWB

JWB

Well-Known Member
Lifetime Member
Oct 3, 2016
802
2,023
93
California MD
Ownership

  1. 500
Thanks for your efforts in sorting out this air shock option. I ordered up a set of AC Delcos and bushings this week.

On the limiter strap issue, wouldn't these work, and what size is best? UTV Limit Straps - Yamaha | Polaris | Can-Am | Arctic Cat | Kawasak

Lastly, it seems that leaving the A-arm bolt loose after grinding the bushing sleeve teeth would allow wearing at the A-arm frame mount in the long run. Have any of you explored pressing out the rubber bushing altogether and a poly bushing and steel sleeve replacement?
Welcome to the club! This forum/club has made sharing this project worth every bit of effort I've put into it!
So far, the mount tabs on the frame have not worn at all since I removed the teeth, and leave the bolts just tight enough to keep them from turning with the control arm movement. Even with no grease at all on the bolts, there doesn't seem to be any appreciable wear on the longer bolts that don't have the threads contacting the mount tabs. 99% of the wear in my mount tabs was caused by the teeth before I removed them.
As far as the limit straps, the one's you linked us to (thank-you) will work, but here's the issue with any kind of limit strap: With the air shocks, not only do you gain about 3" plus, of travel, you will likely be using all of it often, full extension, to full compression. That's near 10" of movement, so at full compression, you end up with 10" of strap flopping around just begging to get tangled up in something.... It makes me cringe to think of the possibilities.... I'm very hopeful, that moving the rear shocks into a more vertical position (like the fronts) and using a bit of common sense, will really reduce, if not eliminate the need for limiters due to lowering the rear pressure requirements.
I've been so tied up with work (and life...:rolleyes:) lately, that I still don't know when I'll get to it. I've also been looking for valves that are a little more compact, and easier to manage while traversing tough terrain- got a couple ideas in the works on that as well.
So with the latest additions- move the rear shocks, and the change to the poly bushings in the shock eyes, we're really starting to get this set-up fine tuned! What I have has worked really well, functionally, but it's kinda 'clunky' and basic, and has exposed some real weak spots in the P500 when it comes to pushing it way past it's original design parameters, and for the most part, I think we've been able to address those trouble spots without a lot of fuss!
 
advertisement
Iceout

Iceout

New Member
Jun 2, 2018
6
7
3
New Hampshire
Ownership

  1. 500
Thanks for the info guys. I ordered up four AC Delcos, and lined them up for the left front first. My first shot at this will be air shocks in the front and relocation of front shocks to the rear. I'm not sure if my 2015 is different in this way, but this involves quite a bit of grinding for the front shock to clear the frame. I still have not ground off enough to have clearance for the stop nut. I am a bit concerned that I am reducing the frame strength by doing this grinding, but I suppose I can always shore it up with a gusset when all is done. JWB, how did you get this front air shock mounted without grinding?
TbC88IW
 
  • Like
Reactions: Lady01 and JWB
pFive

pFive

Well-Known Member
May 3, 2016
668
1,256
93
Greenwood IN
Ownership

  1. 500
I had to remove metal there, on what would normally be called a "Core support" on a car to gain access to the nut that threads on. It is not much of a structural component.
 
JWB

JWB

Well-Known Member
Lifetime Member
Oct 3, 2016
802
2,023
93
California MD
Ownership

  1. 500
I had to remove metal there, on what would normally be called a "Core support" on a car to gain access to the nut that threads on. It is not much of a structural component.
Same here, but I narrowed the bushings a bit to minimize the over-all width of the shock eye too. In your picture, you can see how much rubber protrudes from the shock eye. I made that about flush with the belt sander. I'll do the same to the poly bushings when I install those.
 
  • Like
Reactions: Lady01
D

Duckhunt

Guest
Shock Bushings:
If you struggle to find a local lathe to make bushings as I did, and want a quality bushing for your shocks I talked to a company on EBay to make the bushings/spacers that go between the shock bushing and your bolt. You will still need to use a spacer in place of the old shock but that can be a chunk of pipe, just to fill the gap and keep the mounts from caving in. Here it is:
Steel Bushings /Spacer/Sleeve 5/8" OD 2 sizes 16 Pcs | eBay

I also ordered GR8 (10.9) 10mm and 12mm bolts from Fastenal a while ago, I need to find my invoice for what part numbers, but I believe they were 125mm and 130mm lengths respectively. Again personally I want to keep everything factory so sticking with the 10mm front bolts (for now!)
 
JWB

JWB

Well-Known Member
Lifetime Member
Oct 3, 2016
802
2,023
93
California MD
Ownership

  1. 500
Thanks for the info guys. I ordered up four AC Delcos, and lined them up for the left front first. My first shot at this will be air shocks in the front and relocation of front shocks to the rear. I'm not sure if my 2015 is different in this way, but this involves quite a bit of grinding for the front shock to clear the frame. I still have not ground off enough to have clearance for the stop nut. I am a bit concerned that I am reducing the frame strength by doing this grinding, but I suppose I can always shore it up with a gusset when all is done. JWB, how did you get this front air shock mounted without grinding?
View attachment 92979
Yup, grinding required. Don't be scared:)! I trimmed just enough to fit a locking nut in there, and trimmed the bolt so it just made it through the locking part of the nut. I have truly beat the hell outta this set up for over 2000 miles, including using my snow plow as a driveway grader with no structural issues with that support at all. If you're an aggressive rider, you should consider adding some support to the control arm mounts
 
  • Like
Reactions: Lady01
B

BenBusenitz

New Member
Mar 20, 2019
13
23
3
Whitewater,KS
Ownership

  1. Do not currently own
Just spent a while online looking for m10 bolts long enough to work with a dual shock setup. Only option I found was from fastenal for over $4 a bolt and they weren't flange bolts. Got to thinking that Honda prob makes a 10mm bolt long enough....
95801-10130-08
And under $2 too!
 
JWB

JWB

Well-Known Member
Lifetime Member
Oct 3, 2016
802
2,023
93
California MD
Ownership

  1. 500
Just spent a while online looking for m10 bolts long enough to work with a dual shock setup. Only option I found was from fastenal for over $4 a bolt and they weren't flange bolts. Got to thinking that Honda prob makes a 10mm bolt long enough....
95801-10130-08
And under $2 too!
Very cool! Thanks for the input!
 
D

Duckhunt

Guest
Just spent a while online looking for m10 bolts long enough to work with a dual shock setup. Only option I found was from fastenal for over $4 a bolt and they weren't flange bolts. Got to thinking that Honda prob makes a 10mm bolt long enough....
95801-10130-08
And under $2 too!
Nice! I got the Fastenal 10mm x 130MM 10.9 but through work they were under $2. They work good thus far, if you want to shave the bushing like @JWB did you could possibly get away with 120mm.
 
  • Like
Reactions: Lady01 and JWB
JWB

JWB

Well-Known Member
Lifetime Member
Oct 3, 2016
802
2,023
93
California MD
Ownership

  1. 500
I am currently in the middle of the @JWB P500 air shock mod. I would first like to thank @JWB for all his testing an input. Saving me A LOT of time and calculations. I agree with him these shocks are not designed to do what we are doing, but I am very intrigued by their performance not to mention they are cheap! Plus my type of riding is 90% designated ATV trails. The other 10% is ice fishing and hunting. So I am not racing, hill climbing, crawling, etc. @JWB rides a lot more difficult terrain and over obstacles so I am hoping 1600+ miles for him = 2000+ for me!

Right now I am doing 2 shocks at each corner, manually adjusting air pressure from a separate compressor or air tank. Plan is to add compressor and more valves to adjust on the fly later this year or next spring. The first thing I did and highly recommend is I removed the standard shock bushings and replaced with polyurethane bushings. I used Energy Suspension (PART #9.8116G) G=Black, R=Red bushing. They are an exact fit. HOWEVER, I recommend getting the (PART #9.8147G) or R split bushings. These are the exact same dimensions as the 9.8116 but they are split so you install a half from each side. I ended up splitting mine with a utility knife because they were too difficult for me to install. But I don't have any press or anything in my garage.

To remove the factory "foam" bushings the bottoms very easily pry out with a screw driver. The tops with the steel insert bushing, I drilled several holes around steel insert through the bushing with a 3/16 drill bit and "hogged" out each hole after the bit went all the way through. I just worked the drill in a circle. You'll notice how bad these bushings are because after you get a couple holes drilled the bushing starts coming apart in chunks. Then you can pound the steel insert out, i used an old deep impact socket slightly larger than the steel insert as a base. Then the stock bushing, what's left of it, comes out very easily with screwdriver.

Here is a link for the Energy Suspension 9.8116 bushings
Energy Suspension 9.8116 - Shock Eye Bushings - 98116. Energy Suspension ENE-9.8116G
Here is a link for the split ENERGY Suspension 9.8147 bushings
Energy Suspension 9.8147 - Shock Eye Bushings - 98147. Energy Suspension ENE-9.8147G
I have installed a set of these bushings- the solid ones- and have put about 200 miles on them. They haven't distorted at all, and seem to have made a slight improvement in ride. I installed them by using my vise as a press and it worked pretty well. I lubricated the bushings with a bit of dielectric grease first and then pushed them in by squeezing the shock eye and bushing together in the vise. It took a few tries on a couple, but it was pretty straight forward. I think it took less than 1/2 hr to install the bushings in 8 shocks. I did narrow them down on the belt sander like I did with the stock bushings. Highly recommend this mod! I used a press to push out the old bushings- that was a p.i.t.a. with our cheap wobbly press.... but the effort was worth it. Thanks again @Duckhunt !
 

About us

  • Our community has been around for many years and pride ourselves on offering unbiased, critical discussion among people of all different backgrounds. We are working every day to make sure our community is one of the best.

User Menu

Buy us a beer!

  • Lots of time and money has gone into making sure the community is running the best software, best designs, and all the other bells and whistles. Care to buy us a beer? We'd really appreciate it!

    Beer Fund!

    Club Membership!