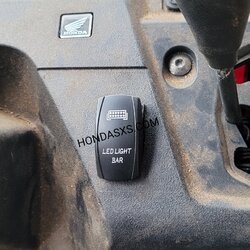
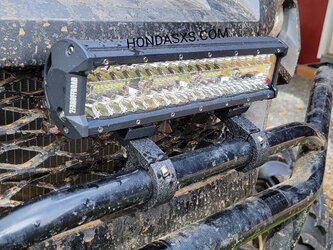
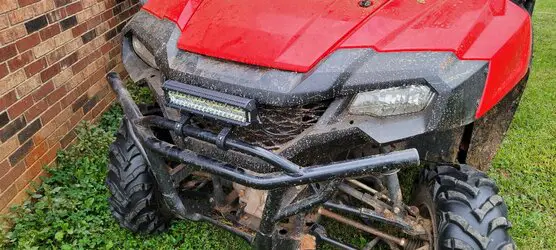
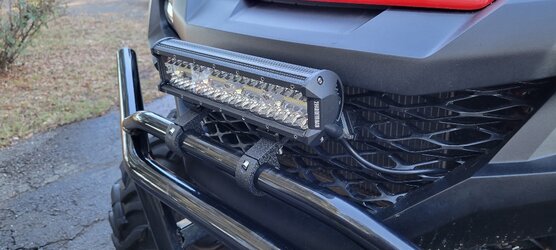
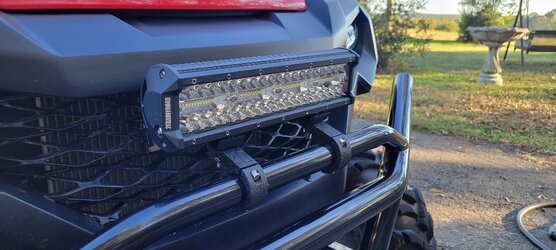
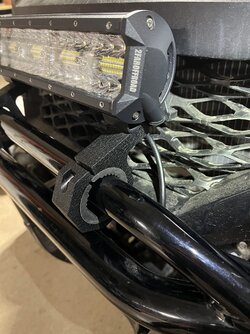
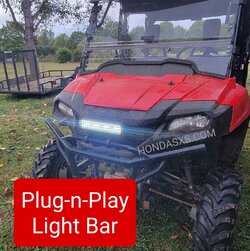
Pioneer 700 Plug-n-Play LED light bar.

Hondasxs

Hondasxs

Club Founder
Staff member
Lifetime Member
Supporting Member
Feb 13, 2013
18,452
66,871
113
Charlotte, NC
HondaSxS.com
Ownership

  1. 1000-5

  2. Talon R
Installing the LED light bar is fairly simple. We have designed it for the basic user with a semi factory machine. Our goal was to make it so it could be installed without having to worry about splicing or running wires to the battery. Our design is relay-free and relies on the factory ACC system to provide the power.
67aa6e7809a732e23b6d8e7306c6cf69

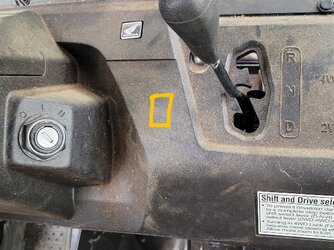
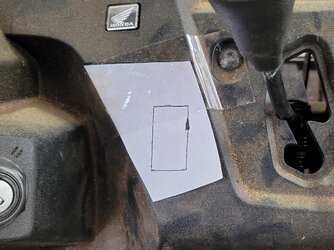
For those without a switch panel, we have included a template for the light bar switch.
See PDF attached ---> https://hondasxs.com/attachments/700-led-switch-pdf.300874/

Cut out the template and align it as shown.
Using a sharp box cutter you can cut a hole to the side of the rocker switch.
C255efa37185f51b600dff662fcd5b9dA0ff283f457562e32c58ed926c6b4f54


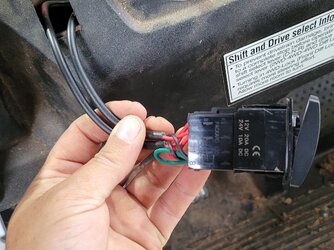
Next, feed the switch wire harness through this hole.
62acfc4c2d47f61c606825cff549d3cbD502fb9bf1beb26f23847f36b3343032

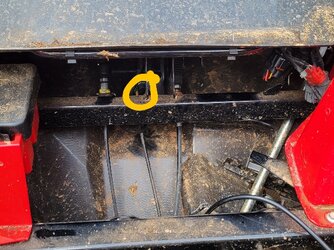
Under the hood locate the connector shown and disconnect it.
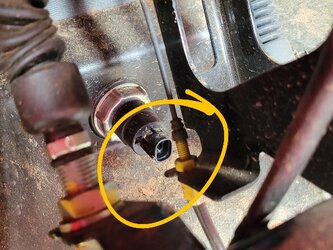
1f0e1795e372fd854e06c79ef343ba0640cfae3302a0e72baff9263c88066c76


Now connect the wire harness from the switch to this location.
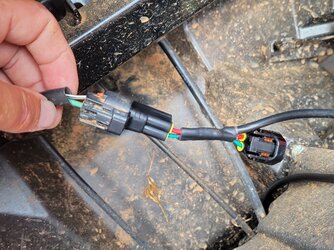
85c22054cc14e078c5d13e2ffe093a11


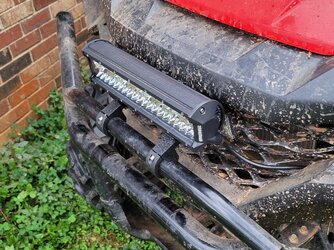
Now we will install the light bar. Using the alen wrench included, unscrew the 1/2's of the clamps and install them on the top bumper bar.


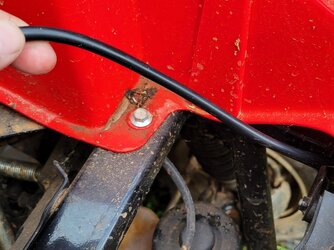
Now, run the wires through the front cowl and up into the hood area.
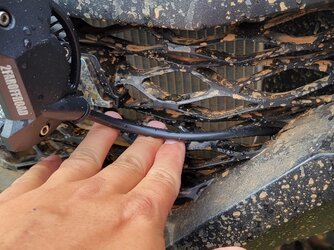
90f6925bad279fd0b807a867483df734F98c53f2f59e3b2c5f57d16043acd3b1


Connect the light bar to the switch wire harness.
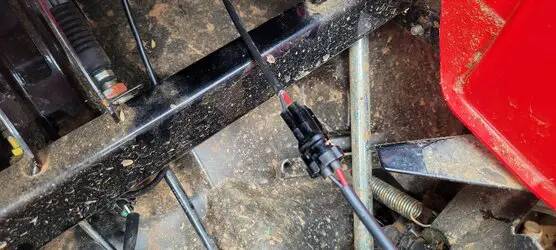
7a919cea77375de495c3f0a91918a892


The light should work as designed.
It is tied to the factory ACC circuit and pulls 3 amps of power.
It only works with key-on.

Any questions feel free to contact us.
D914c1ab81d1c3eb42c8b5793392593070a8f28f9e67922df73e4bdd66cbc59d14c0a72cfe8c7d02e3d92faa57563099
6900400e231036099e7e1efa46acb646 Aa25d969686a56cef011637e3b657c12
 

Attachments

  • 700-LED-Switch.PDF
    6.9 MB · Views: 738
Last edited:
D

Dadio

Member
Feb 6, 2022
8
60
13
Missouri
Ownership

  1. 700-4
This kit worked perfectly. My previous experience installing electrical accessories is limited to hack job stereo installs in high school so something like this was what I was looking for. I’m such a novice that it took me five minutes or so to figure out how to disconnect the stock electrical connection. It’s idiot proof-the connectors go one way only so if they don’t click try the other one. Go slow with cutting the dash; I put a new blade in a utility knife and made many light pressure cuts. Take your time with that. The template for that made the install very clean, just cut out the shape (rhomboid? It’s been a long time since geometry class) and tape it to the dash.

Momio is very impressed. Asked me if I should put one on the tractor. (Hmmmmm, why yes, Honey, that’s a great idea!)

I’m sure you could source the individual components a little cheaper. The extra bucks are to avoid aggravation. You are paying to tap into the knowledge of some guy who has worked all this out for you, and that makes this well worth the price.
3358937B F986 4B95 9827 AF532DDAE7A9
 
C

Cov10-06

New Member
May 7, 2022
2
4
3
Pa
Ownership

  1. 700-4
This kit worked perfectly. My previous experience installing electrical accessories is limited to hack job stereo installs in high school so something like this was what I was looking for. I’m such a novice that it took me five minutes or so to figure out how to disconnect the stock electrical connection. It’s idiot proof-the connectors go one way only so if they don’t click try the other one. Go slow with cutting the dash; I put a new blade in a utility knife and made many light pressure cuts. Take your time with that. The template for that made the install very clean, just cut out the shape (rhomboid? It’s been a long time since geometry class) and tape it to the dash.

Momio is very impressed. Asked me if I should put one on the tractor. (Hmmmmm, why yes, Honey, that’s a great idea!)

I’m sure you could source the individual components a little cheaper. The extra bucks are to avoid aggravation. You are paying to tap into the knowledge of some guy who has worked all this out for you, and that makes this well worth the price.
View attachment 325207
I’ve been looking at these and was wondering if you could help me out on a question I have. Do you like the light bar on the bottom and could I flip the mounting brackets so it would be on the top side of the bar instead of the bottom? They are sold out of the top mount or I would probably go that route. Thanks for your input
 
Hondasxs

Hondasxs

Club Founder
Staff member
Lifetime Member
Supporting Member
Feb 13, 2013
18,452
66,871
113
Charlotte, NC
HondaSxS.com
Ownership

  1. 1000-5

  2. Talon R
I’ve been looking at these and was wondering if you could help me out on a question I have. Do you like the light bar on the bottom and could I flip the mounting brackets so it would be on the top side of the bar instead of the bottom? They are sold out of the top mount or I would probably go that route. Thanks for your input
If you can wait 2 weeks. I will add some June 14th for purchase.

Sent from my SM-G996U using Tapatalk
 
  • Like
Reactions: Smitty335
B

bwnr

New Member
Jan 14, 2023
2
3
3
Burton, OH
Ownership

  1. 700-2
i have a 2023 pioneer 700 forest and the light kit. However, the electrical connections are not the same as descibed above. Can anyone direct me where the plugs from the kit go please?
 
Buggyman

Buggyman

Well-Known Member
Lifetime Member
Supporting Member
Jan 3, 2020
44,576
360,242
113
ne. ohio
Ownership

  1. 700-2
i have a 2023 pioneer 700 forest and the light kit. However, the electrical connections are not the same as descibed above. Can anyone direct me where the plugs from the kit go please?
Welcome from another Ohio member @Hondasxs or someone familiar with the newer buggy will be along to help. I think you unplug factory plug from back of acc. outlet (Cigarette lighter) then plug light onto that and then plug factory plug into light plug but I am not positive.
 
Last edited:
  • Like
Reactions: Smitty335
Hondasxs

Hondasxs

Club Founder
Staff member
Lifetime Member
Supporting Member
Feb 13, 2013
18,452
66,871
113
Charlotte, NC
HondaSxS.com
Ownership

  1. 1000-5

  2. Talon R
i have a 2023 pioneer 700 forest and the light kit. However, the electrical connections are not the same as descibed above. Can anyone direct me where the plugs from the kit go please?
Unfourchently I have no feedback from a 2023 as of yet.
But my quick research says the CIG connector is the same.
Now the location may have changed but all is easily accessible under the hood of a 700.
Look for the silver hold ring, disconnect the connector and reconnect it with the splitter in between.
Would appreciate any pictures you can provide.
Thanks.
 
B

bwnr

New Member
Jan 14, 2023
2
3
3
Burton, OH
Ownership

  1. 700-2
Thank you both for your replies. Yes, the CIG connector looks the same as the picture of the older models and is in a different location but all came unclipped as described and the harness for the lights plugged in exactly as described. Confirming, anyone with a purchase of this light kit will have no issues installing on 2023 P700-2. All plug n play.
 
  • Like
Reactions: Smitty335
advertisement
JoMa

JoMa

New Member
Mar 15, 2021
6
20
3
Texas
Ownership

  1. 700-2
Hey there folks. Purchased this light kit last year and just getting it installed, lol. Everything worked great except I can't mount to my upper bar which is where I want it. Any help is appreciated, is there an adapter? Pic below.

IMG 0082
 
JoMa

JoMa

New Member
Mar 15, 2021
6
20
3
Texas
Ownership

  1. 700-2
Just looked at my order and my dumbass ordered the wrong size. Can I purchase the correct bracket?
 
Hondasxs

Hondasxs

Club Founder
Staff member
Lifetime Member
Supporting Member
Feb 13, 2013
18,452
66,871
113
Charlotte, NC
HondaSxS.com
Ownership

  1. 1000-5

  2. Talon R
Just looked at my order and my dumbass ordered the wrong size. Can I purchase the correct bracket?
Ya. I'll message you.
We have some other spacers for that 2" but they don't quite sit right.
 

About us

  • Our community has been around for many years and pride ourselves on offering unbiased, critical discussion among people of all different backgrounds. We are working every day to make sure our community is one of the best.

User Menu

Buy us a beer!

  • Lots of time and money has gone into making sure the community is running the best software, best designs, and all the other bells and whistles. Care to buy us a beer? We'd really appreciate it!

    Beer Fund!

    Club Membership!