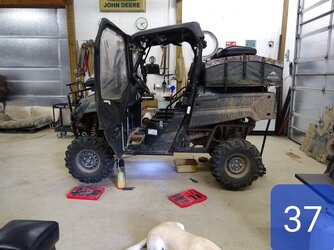
Needed a snorkel kit but wanted maximum airflow so I built my own using 2 ½” inside pvc pipe. Most everything was schedule 40 except for a few schedule 80 on the 45 degree elbows. I also used the color grey to help it blend in more with my Honda. Wanted black but it was almost impossible to find 2 ½ pvc and what I did find was extremely pricey. I’ve listed below the pieces that I cut and have included pictures of the different steps that I took and all the parts that I used.
I started with 3 ½” of pipe. 2 ½” will go into the air box boot.
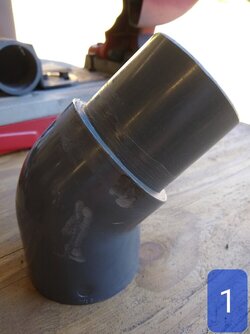
Then took a 45 schedule 80 elbow - cut one end off & left 1” penetration depth for pipe on airbox side. #1
Cut 15 ½” long pipe to go into the 45 elbow on the airbox side then into another 45 elbow which is up under the seat at the top of the seat frame rail.
Cut 10 ¼” long pipe that comes out of the 45 degree elbow at the top of the seat frame rail into a 90 elbow also up under the seat at the top seat frame rail.
Cut 10 ⅝” long pipe that will come out of the upper 90 elbow headed down the seat frame rail into another 90 elbow that will now take your pipe under the floorboard frame rail tubing.
Cut 19 ¼” piece of pipe that will come out of the 90 elbow at the bottom of the seat frame rail and will head straight forward into a 45 elbow at your front drivers wheel well.
Cut 5 ¼” pipe that will come out of the 45 elbow by the drivers wheel well and go out to a 90 elbow headed towards the upper body.
On the upside of the 90 elbow, cut off and left 1” of penetration for pipe. After cutting off 90 elbow, I heavily beveled the outside to give optimal clearance for body and tie rod.
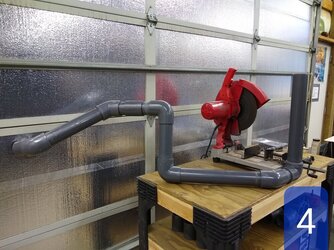
Cut 18 ⅛”pipe that will go into the beveled 90 elbow and up towards the upper body of the machine. See picture #4
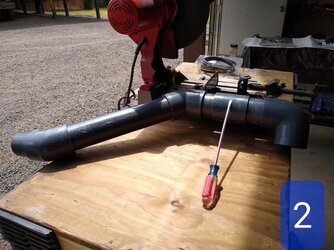
Now you have a complete pipe system from airbox to wheel well. I suggest you have a minimum of 4 couplers on hand just in case you glue one of your fittings at the wrong angle. See picture #2 where screwdriver is pointing and had to use a coupler to fix my mistake. You might end up with some extra couplers but you’ll be way happier than if you have to wait for them to show up.
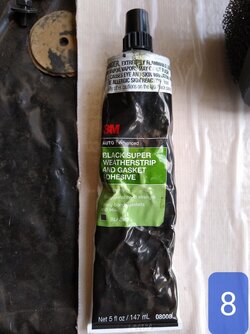
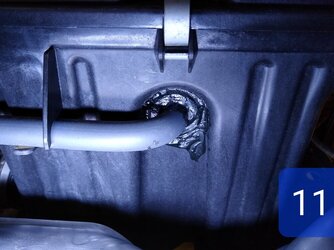
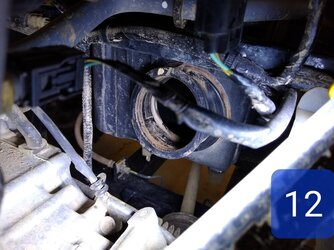
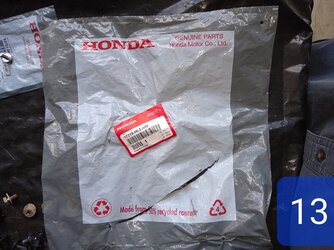
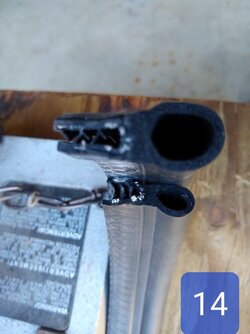
Now back to the airbox side. Take 3M Black Super Weatherstrip Gasket Adhesive (see picture #8) go around pcv tube inlet on airbox (see picture #11). Seal around it to stop dust and water from entering airbox. Go around pipe air intake boot on airbox (see picture #6). At the time of this writing I believe I’ve missed a picture of the O2 sensor going into the airbox. Seal around that also. Now take and order you another honda lid seal (see picture #13), add it into lid seal slot, not removing the original but adding it on top of the original seal. It will all fit. I believe the original seal was inadequate to start with or has just collapsed but the 2 together seal the airbox pretty tight.
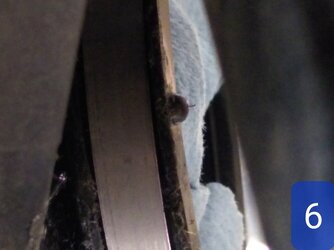
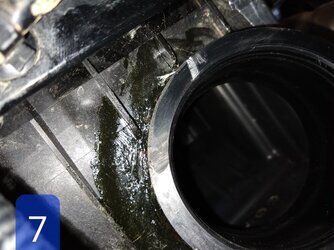
Now take and put a shop towel or paper towel in airbox intake boot plugging it off from debris getting in. Now take your dremel and grind off small tit on air intake boot. (see picture 6 & 7).
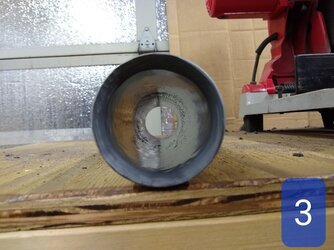
Before you assemble and glue your pipe, take a dremel and severely angle the inside lip of the pipe on all the air inflow side from snorkel back (see picture #3). This helps to increase airflow. Remember to run a rag thru to clean debris out of pipe before assembly.
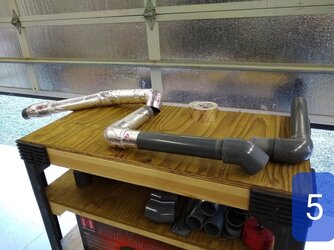
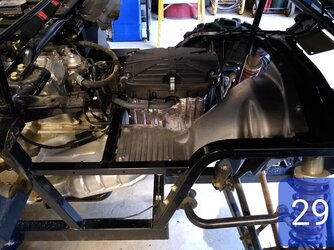
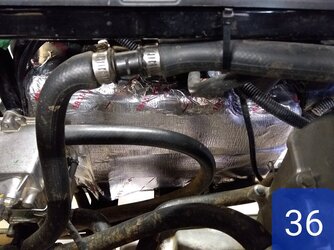
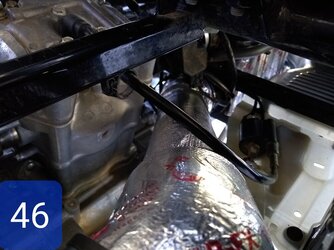
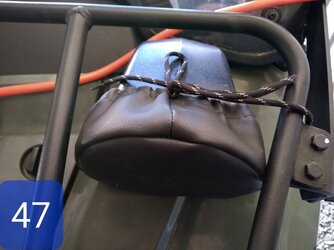
Do a mockup up in your machine, assemble and glue your pipe in multiple sections. Mine I assembled in 3 sections. Took it back out and now start to take your adhesive backed heat barrier, cut & wrap your pipe, sealing your edges all around with your heat tape. Remember to leave room where your pipe sections will meet in your machine. (see picture 5) Make sure when you reassemble in your machine, you seat pipe and glue correctly so they’ll seal so there are no air leaks for dirt to get in. Then after installation is complete and glue is cured, run some heat tape where your 2 pieces went together. This is only necessary to run heat barrier from airbox to bottom of seat frame. Now when assembling this system pay close attention to the amount of room you have from the frame up under the seat to the airbox and get your pipe centered exactly thru there so you have the right amount of clearance between the coolant sensor to the other stuff all around. (see picture 46). It looks closer in that photo than it really is. Everything clears just fine right down the middle. If you rough handle it when you assemble you will break that jug coolant sensor and it is quite expensive for no more than it is. Ask me how I know.
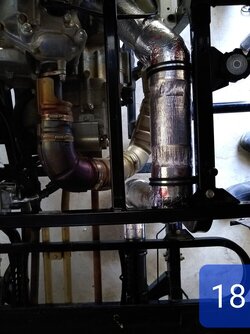
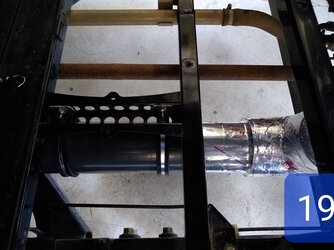
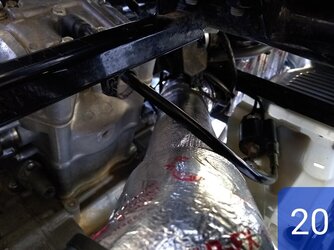
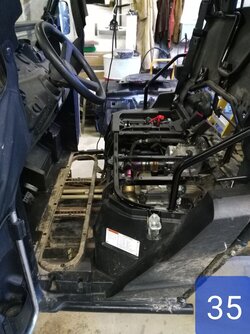
 After wrapping, reassemble in the machine gluing your 3 sections together. Make sure you get your angles right and everything clears. Line up your pipe going under your floorboard to go in line with the edge of your floorboard bracket with all the holes in it so the majority of the pipe is towards the drivers side. (see picture #19). Make sure when you line it all up, check the bolt up front under the front firewall floorboard that holds the steel brake line and make sure your pipe does not rub the bolt. If you line everything up properly you will have plenty of clearance between the pipe and your bolt. See pictures 18 & 19). There are 2 sizes of rubber lined Stainless Steel clamps. The larger size fits over the 45 and 90 elbows (see pic #18). Then they are attached to bottom of seat frame with self tapping bolts.
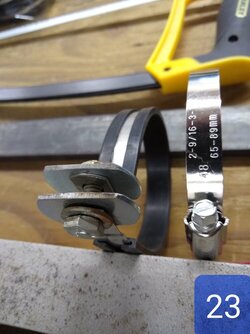
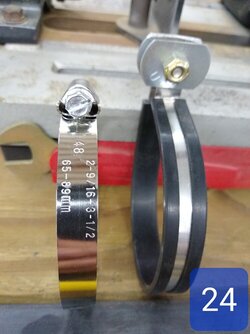
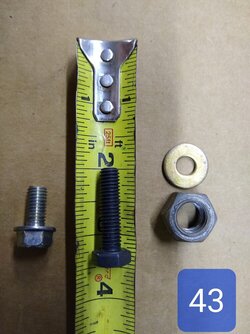
Now on your floorboard stainless steel rubber lined clamps they are the smaller pair and they are attached with locking nuts, bolts and custom ground washers connected to the holes in the floor brackets. (see picture #23 & 24). See how I ground the washers flat to fit the floorboard bracket. Used regular washer to prevent it from pulling thru the clamp. Only look at the rubber lined brackets in the picture. Bear in mind you’ll have to customize the 4 clamps in both locations by flattening the jag out of one side and redrilling your holes. You’ll have to have some fabrication skills to hold your pipe snug and tight with the clamps.
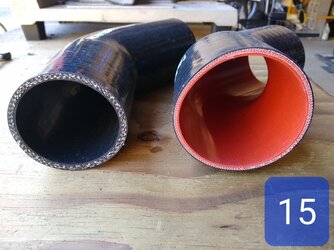
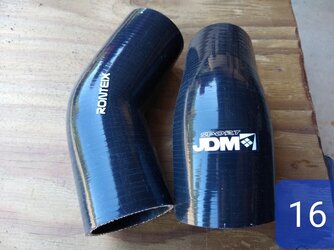
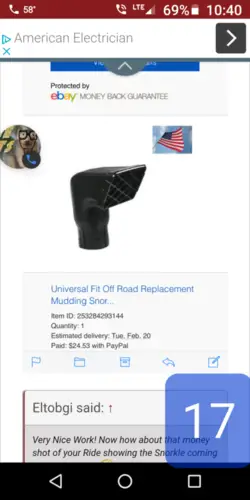
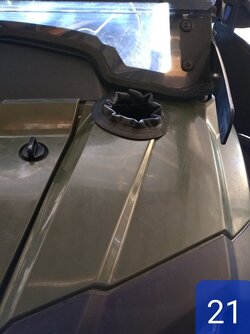
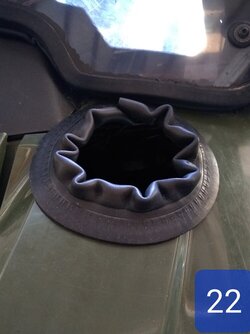
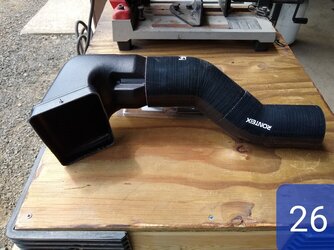
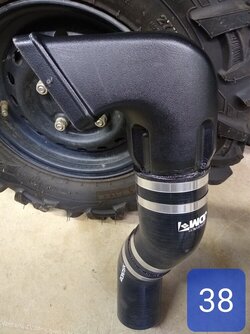
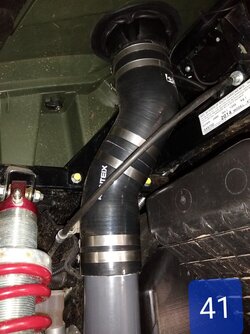
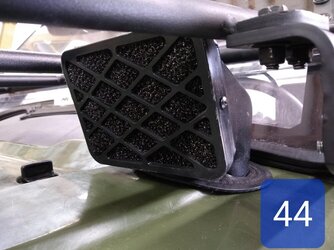
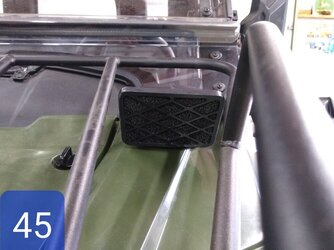
I then attached a Ronteix 4 ply 45 degree elbow coupler which was 2.75 wide and cut 2 ½ inches on the side that attaches to the JDM 45 elbow. The JDM coupler/elbow goes from 2.75 to 3.25. On the side that is 2.75”, I cut roughly 1 ½” off. This then connected to the snorkel. As you can see I attached everything with the appropriate size clamps, glue, etc...
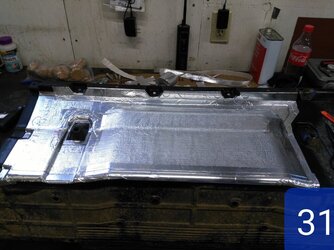
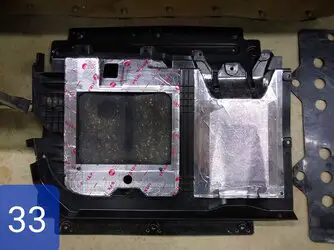
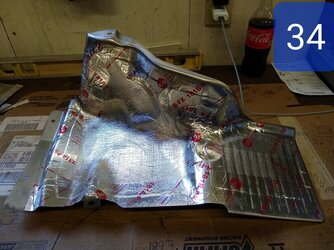
I also added heat shielding underneath my seat and wrapped the pipe where needed. This is working great and I’m impressed with the improvement in the performance of my Pioneer.
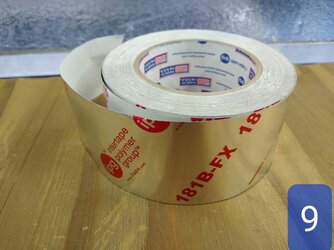
I use Thermo Tec #13590 (24x48 and withstands radiant temps of over 2000 f) Got mine from Jegs. I also used IPG 1818B-FX aluminized tape (got from local hardware store and is rated to 350f. See picture #9.)
(All right guys here’s the deal. I do the write ups and computer stuff for the 2 guys that have the Honda Pioneer 700 and I lost the rest of the instructions before I got it posted. I’m very sorry and hope that the pictures are self explanatory because once the parts are glued they can’t be measured.)
I started with 3 ½” of pipe. 2 ½” will go into the air box boot.
Then took a 45 schedule 80 elbow - cut one end off & left 1” penetration depth for pipe on airbox side. #1
Cut 15 ½” long pipe to go into the 45 elbow on the airbox side then into another 45 elbow which is up under the seat at the top of the seat frame rail.
Cut 10 ¼” long pipe that comes out of the 45 degree elbow at the top of the seat frame rail into a 90 elbow also up under the seat at the top seat frame rail.
Cut 10 ⅝” long pipe that will come out of the upper 90 elbow headed down the seat frame rail into another 90 elbow that will now take your pipe under the floorboard frame rail tubing.
Cut 19 ¼” piece of pipe that will come out of the 90 elbow at the bottom of the seat frame rail and will head straight forward into a 45 elbow at your front drivers wheel well.
Cut 5 ¼” pipe that will come out of the 45 elbow by the drivers wheel well and go out to a 90 elbow headed towards the upper body.
On the upside of the 90 elbow, cut off and left 1” of penetration for pipe. After cutting off 90 elbow, I heavily beveled the outside to give optimal clearance for body and tie rod.
Cut 18 ⅛”pipe that will go into the beveled 90 elbow and up towards the upper body of the machine. See picture #4
Now you have a complete pipe system from airbox to wheel well. I suggest you have a minimum of 4 couplers on hand just in case you glue one of your fittings at the wrong angle. See picture #2 where screwdriver is pointing and had to use a coupler to fix my mistake. You might end up with some extra couplers but you’ll be way happier than if you have to wait for them to show up.
Now back to the airbox side. Take 3M Black Super Weatherstrip Gasket Adhesive (see picture #8) go around pcv tube inlet on airbox (see picture #11). Seal around it to stop dust and water from entering airbox. Go around pipe air intake boot on airbox (see picture #6). At the time of this writing I believe I’ve missed a picture of the O2 sensor going into the airbox. Seal around that also. Now take and order you another honda lid seal (see picture #13), add it into lid seal slot, not removing the original but adding it on top of the original seal. It will all fit. I believe the original seal was inadequate to start with or has just collapsed but the 2 together seal the airbox pretty tight.
Now take and put a shop towel or paper towel in airbox intake boot plugging it off from debris getting in. Now take your dremel and grind off small tit on air intake boot. (see picture 6 & 7).
Before you assemble and glue your pipe, take a dremel and severely angle the inside lip of the pipe on all the air inflow side from snorkel back (see picture #3). This helps to increase airflow. Remember to run a rag thru to clean debris out of pipe before assembly.
Do a mockup up in your machine, assemble and glue your pipe in multiple sections. Mine I assembled in 3 sections. Took it back out and now start to take your adhesive backed heat barrier, cut & wrap your pipe, sealing your edges all around with your heat tape. Remember to leave room where your pipe sections will meet in your machine. (see picture 5) Make sure when you reassemble in your machine, you seat pipe and glue correctly so they’ll seal so there are no air leaks for dirt to get in. Then after installation is complete and glue is cured, run some heat tape where your 2 pieces went together. This is only necessary to run heat barrier from airbox to bottom of seat frame. Now when assembling this system pay close attention to the amount of room you have from the frame up under the seat to the airbox and get your pipe centered exactly thru there so you have the right amount of clearance between the coolant sensor to the other stuff all around. (see picture 46). It looks closer in that photo than it really is. Everything clears just fine right down the middle. If you rough handle it when you assemble you will break that jug coolant sensor and it is quite expensive for no more than it is. Ask me how I know.
Now on your floorboard stainless steel rubber lined clamps they are the smaller pair and they are attached with locking nuts, bolts and custom ground washers connected to the holes in the floor brackets. (see picture #23 & 24). See how I ground the washers flat to fit the floorboard bracket. Used regular washer to prevent it from pulling thru the clamp. Only look at the rubber lined brackets in the picture. Bear in mind you’ll have to customize the 4 clamps in both locations by flattening the jag out of one side and redrilling your holes. You’ll have to have some fabrication skills to hold your pipe snug and tight with the clamps.
I then attached a Ronteix 4 ply 45 degree elbow coupler which was 2.75 wide and cut 2 ½ inches on the side that attaches to the JDM 45 elbow. The JDM coupler/elbow goes from 2.75 to 3.25. On the side that is 2.75”, I cut roughly 1 ½” off. This then connected to the snorkel. As you can see I attached everything with the appropriate size clamps, glue, etc...
I also added heat shielding underneath my seat and wrapped the pipe where needed. This is working great and I’m impressed with the improvement in the performance of my Pioneer.
I use Thermo Tec #13590 (24x48 and withstands radiant temps of over 2000 f) Got mine from Jegs. I also used IPG 1818B-FX aluminized tape (got from local hardware store and is rated to 350f. See picture #9.)
(All right guys here’s the deal. I do the write ups and computer stuff for the 2 guys that have the Honda Pioneer 700 and I lost the rest of the instructions before I got it posted. I’m very sorry and hope that the pictures are self explanatory because once the parts are glued they can’t be measured.)


