I'm running tracks on my P500 and they really suck the gas down quick. The P500's little 5 gallon factory tank isn't nearly big enough to run me all day. Carrying a gas can is no big deal when you rarely need it but they're kind of a hassle when you have to use them on a regular basis.
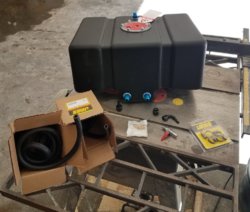
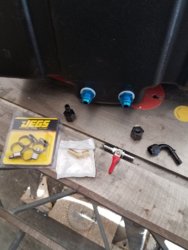
So I've installed an auxiliary 7 gallon tank with a simple valve to gravity feed fuel to the factory tank whenever I start running low. I purchased a JAZ Products 250-008-NF JAZ Drag Race Fuel Cell from Jegs. It cost me about $130. There was also a 5 gallon model that's proportionately smaller. The pictures show most of the other assorted parts I used.
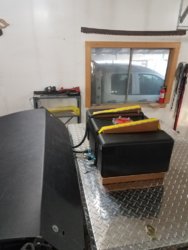
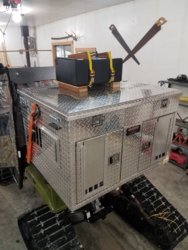
I mounted the tank on top of my dog box but it could go anywhere, as long as it's higher than the factory tank so it can gravity feed. The tank has a 2" sump so I had to build up a base for it with a 2x4 + 1/2" plywood sandwich which I carriage-bolted to the dog box. The pics don't show it but on the inside of each of the sandwiches I screwed 2 90 degree brackets with the horizontal leg flush with the bottom of the tank. The ratchet straps pick up those legs to hold the tank down.
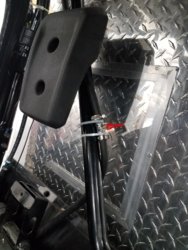
There were two outlets so I just screwed a cover over one. I ran 3/8" fuel line into the cab, through a lever valve, and on down to the tank. The trickiest part of the whole operation was connecting the line to the tank and I don't know if what I did was a good idea or not! I drilled a 1/2" hole through the filler neck from above. I shoved a tight-fitting rag with a string attached for extraction down the filler neck to keep plastic drillings from falling into the tank. After drilling I pulled the rag out and the pieces came with it. There's really only one spot where this is accessible and it is very tight and I couldn't get a picture of it. When you take the seat off it's just a little spot located between the tank and the filler.
I screwed a 1/2 NPT pipe thread with 3/8" barbed fitting on the other end (in the picture it shows this fitting with a 45 bend but I ended up needing a straight one) into the hole I drilled. It was a very tight fit, which is what I wanted. After running it in once, I took it out, gobbed on JB Weld and screwed it in again so that a big base of JB Weld was formed to help support and hold it in place. It seemed solid as a rock after it set up but only time will tell if it will hold up.
I ran a 5/16" fuel line (which was probably massive overkill) from the vent on top down to the bottom of the frame. The 90 degree fitting for the vent sticks up off the top of the tank and looks like it would be vulnerable to low-hanging branches/brush so I cut a couple wedge-shaped pieces of 2x4 that go under the ratchet straps and will hopefully deflect that sort of thing.
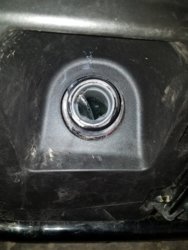
I've used it a few days now and it has worked well. When my fuel gauge starts flashing at me I just reach over and open the valve. With that big vent it flows quickly so as I'm going I keep an eye on the fuel gauge and when it shows full (in just a few minutes) I shut off the valve. If I end up dipping into the auxiliary tank then at the end of the day I remove the fuel cap, partially open the valve (if I make it wide open it splashes out the cap hole), and let it run into the tank until the tank is full. That way I only have to refill one tank at the gas station and I'm keeping the fuel in the auxiliary fresh. I think if I left the valve on to the point that the tank was overfull (with the gas cap on) then gas would begin to run out of the factory tank vent line, that's why I have to keep an eye on either the gauge or remove the cap to watch when I top off the factory tank. It's a little difficult to tell but the last picture is a view of the fuel flowing into the filler neck with the cap removed.
Like most of my projects it looks a little like a kindergartner was in charge (no offense intended to kindergartners) but so far at least it seems to be working!


Last edited:

