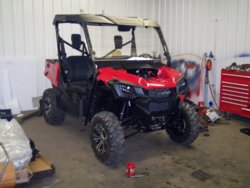
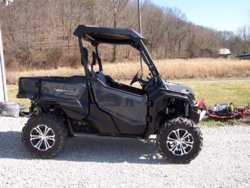
P1000 Color change started

pct

pct

Lost in the hills
Lifetime Member
Supporting Member
Jan 10, 2016
790
1,023
93
Letart WV
Ownership

  1. 1000-5
Well guys here we go no to good with a camera but first off is the front doors and bumper need to come off then pull the push pins out and remove the wheel flairs then you look under the front wheel ther are 4 phillips screws that hold the head light to the plastic then a 10mm bolt that holds the light in place 02 22 16 002
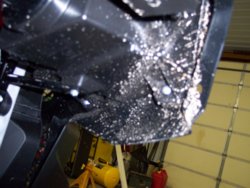
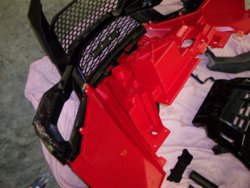
sorry for the bad pics but you can get the idea02 22 16 016
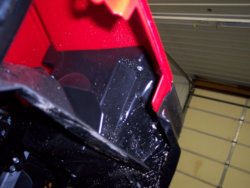
a better pic
02 22 16 015

Now under the hood remove the battery and all the wiring take your time with the clips ( with 20+years doing auto body repair it helped on the removal of the plastics) it is not hard just take your time the only thing that needs uplugged is the headlights remove all the bolts and the clamp on the hose that goes to the air cleaner when removing the grill comes off with the fender assy and the headlights will stay on the bike02 22 16 005
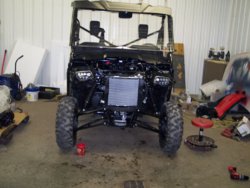
02 22 16 006

handle it with care so you don't break it there are 4 phillips screws that hold it to the fenders
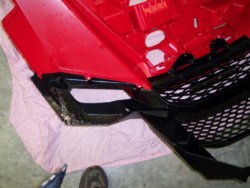
02 22 16 007
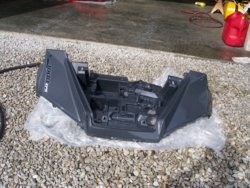
after removing the grill look on the bottom of the frender assy there are 2 t nuts that must be removed and the clips that hold the relays
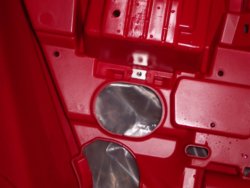
02 22 16 010 02 22 16 011
reinstall them in your new plastic and do everything in reverse it is not a bad job it would help if you had a buddy there to lend a hand if you have ant questions just ask
hope this helps
Paul
 
pct

pct

Lost in the hills
Lifetime Member
Supporting Member
Jan 10, 2016
790
1,023
93
Letart WV
Ownership

  1. 1000-5
Well guys here we go no to good with a camera but first off is the front doors and bumper need to come off then pull the push pins out and remove the wheel flairs then you look under the front wheel ther are 4 phillips screws that hold the head light to the plastic then a 10mm bolt that holds the light in placeView attachment 10800
sorry for the bad pics but you can get the ideaView attachment 10801
a better pic
View attachment 10802

Now under the hood remove the battery and all the wiring take your time with the clips ( with 20+years doing auto body repair it helped on the removal of the plastics) it is not hard just take your time the only thing that needs uplugged is the headlights remove all the bolts and the clamp on the hose that goes to the air cleaner when removing the grill comes off with the fender assy and the headlights will stay on the bikeView attachment 10804
View attachment 10805

handle it with care so you don't break it there are 4 phillips screws that hold it to the fenders
View attachment 10806
after removing the grill look on the bottom of the frender assy there are 2 t nuts that must be removed and the clips that hold the relays
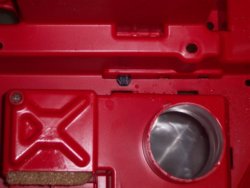
View attachment 10807 View attachment 10808
reinstall them in your new plastic and do everything in reverse it is not a bad job it would help if you had a buddy there to lend a hand if you have ant questions just ask
hope this helps
Paul
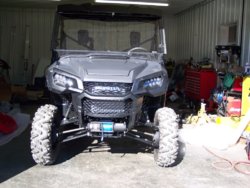
I havent started putting it back together yet because I'm going to mount the winch hopefully tomorow and it will be easier to take pics of install
need to get it back together i hate to look at over 16.000 dollarrs with 50 miles on it tore all to hell in the shop HaHa
 
  • Like
Reactions: Lady01
pct

pct

Lost in the hills
Lifetime Member
Supporting Member
Jan 10, 2016
790
1,023
93
Letart WV
Ownership

  1. 1000-5
Well guys here we go no to good with a camera but first off is the front doors and bumper need to come off then pull the push pins out and remove the wheel flairs then you look under the front wheel ther are 4 phillips screws that hold the head light to the plastic then a 10mm bolt that holds the light in placeView attachment 10800
sorry for the bad pics but you can get the ideaView attachment 10801
a better pic
View attachment 10802

Now under the hood remove the battery and all the wiring take your time with the clips ( with 20+years doing auto body repair it helped on the removal of the plastics) it is not hard just take your time the only thing that needs uplugged is the headlights remove all the bolts and the clamp on the hose that goes to the air cleaner when removing the grill comes off with the fender assy and the headlights will stay on the bikeView attachment 10804
View attachment 10805

handle it with care so you don't break it there are 4 phillips screws that hold it to the fenders
View attachment 10806
after removing the grill look on the bottom of the frender assy there are 2 t nuts that must be removed and the clips that hold the relays
View attachment 10807 View attachment 10808
reinstall them in your new plastic and do everything in reverse it is not a bad job it would help if you had a buddy there to lend a hand if you have ant questions just ask
hope this helps
Paul
Revision 1 HaHa well guys it just got easier when getting it ready to put back together guess what when you go to remove the front clip you leave the headlights in the grill just remove the 2 10mm bolts on the bracket one on each side unplug the lights then remove the bolts and push pins and remove the front as one piece then remove all the parts and put them on the new plastic piece of cake HaHa
Paul
 
advertisement
JACKAL

JACKAL

Ancient Honda fanboi
Moderator
Lifetime Member
Supporting Member
Club Contributor
Jun 11, 2015
39,982
273,587
113
Pioneer, TN
Ownership

  1. 1000-5

  2. Talon X4
Where did you find that gray colored panels?
Here are all the part #s from my order. Was $217 for all 8 parts when I bought, expect it to be $320-$350 range now.

 
  • Like
Reactions: Lady01 and TripleB
pct

pct

Lost in the hills
Lifetime Member
Supporting Member
Jan 10, 2016
790
1,023
93
Letart WV
Ownership

  1. 1000-5
I bought mine from the dealer I'm not sure but I think they were around 300.00 but that was in 2016 and I just sold them a couple months back
 

Similar threads

SuperMidget
Replies
41
Views
4K
SuperMidget
jcasads
Replies
0
Views
1K
jcasads

About us

  • Our community has been around for many years and pride ourselves on offering unbiased, critical discussion among people of all different backgrounds. We are working every day to make sure our community is one of the best.

User Menu

Buy us a beer!

  • Lots of time and money has gone into making sure the community is running the best software, best designs, and all the other bells and whistles. Care to buy us a beer? We'd really appreciate it!

    Beer Fund!

    Club Membership!