Neohio
Beast of the East
Lifetime Member
Supporting Member
Club Contributor
Might be able to get pins from your local Honda Automotive dealer as well. Pins tend to be universal along families.
Yup, danged critters got my Gold Wing a couple winters ago!!Was indeed a code for for the MAP/TPS. Apparently Honda insulates their wire with peanut butter.
View attachment 100666
Don’t know how well it will show up on the pic but an inch and a half section of the mint green wire is gone from the plug to where it is taped like it was just cut off with side cutters. The way the plug goes in from the bottom I could not see any sign until I pulled the air box and removed the plug again. Once the plug was turned over I still had to look close to see it between the heat shield for the cat and carb.
Went to the hardware store a few years ago to get mouse traps, the owner of the store asked me if I wanted humane traps or regular, I replied what ever hurts the worst! HA!View attachment 100673 View attachment 100674
Yup, danged critters got my Gold Wing a couple winters ago!!
I have the plug apart had to run to work and get my other butane soldering pin, will try to post pics as repaired but it may be tomorrow before I get them postedSnap a pic of the connector end. You should be able to repin it wih a short pigtail and crimp. Waiting on parts will be a few days though.
Yep playing with imports is how I knew how to get the pins out of the plug, they almost all use similar type weatherpack plugs.Might be able to get pins from your local Honda Automotive dealer as well. Pins tend to be universal along families.
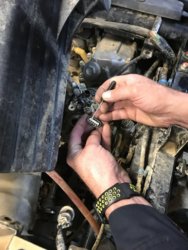
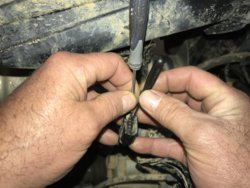
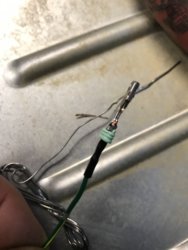
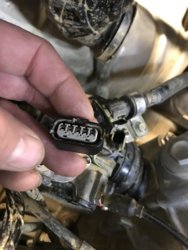
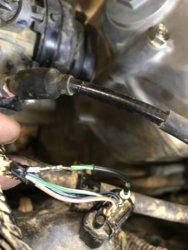
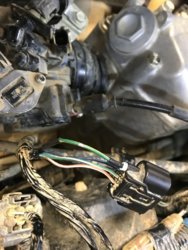
They make tools for pin removal and reassembly. And they work great!Sorry it took so long to get these up hope this helps someone.
Keep in mind that these plugs are plastic and too much force can stretch or break them. It is important to be patient and take your time. They are not hard to get apart but sometimes they come apart quick and sometimes the process can be time consuming.
View attachment 101379
Picture above is of me using a small screwdriver and gently prying the white insert out of the plug. This insert keeps the tabs that hold the pins in the plug from releasing the pins.View attachment 101380
The next step requires two small screwdrivers or one small screwdriver and a straight pick. The small black screwdriver in the pic is used to insert into the hole exposed when you removed the white insert in the first pic, it is used to pry in order to release the tabs at the bottom of the pin and release the pin. You have to feel for the tabs because you can’t see them. As you pry the tab use the other screw driver to keep pressure straight down on the pin, when the tab releases the pin will slide down and out the back side of the plug.
View attachment 101381
This is the exposed pin while it was out of the plug after soldering on the new piece of wire. Sorry I didn’t get a pic before the soldering.
View attachment 101382
This pic is just the pin locked back in place and the white insert back in the plug.
View attachment 101383
This is a pic of the second solder joint before sliding down the heat shrink to cover it. If you can see it in the pic, I could not get the rubber seal all the way back in the back of the plug due to the heat shrink put on the first solder joint making the wire so thick. To solve this I put a small amount of RTV around the wire and pushed the seal in as far as I could get it. It is important to do everything you can to seal out moisture.
View attachment 101384
This is the final picture of the repair. The only thing I did after this was used electrical tape from about an inch and a half back on the factory tape and wrapped the wires all the way to the plug.
I have tools for the round pin plugs because they can be a PITA, but I’ve never had trouble getting the square pin plugs apart. If you deal with these plugs daily I could see where the tools could be handy.They make tools for pin removal and reassembly. And they work great!

