P1000 Help with OEM Heater Install - 2022 Pioneer 1000-5 Deluxe

J

john790

Well-Known Member
Jan 13, 2020
328
1,019
93
Clinton ohio 44216
Ownership

  1. 1000-5
Well pulling wrenches for 45 years i would no part of installing that heater.Way to much work and the results might not be all that great.If the core goes bad or the motor major job to fix.Kiss for me.Plus i have always hated engineers let them fix what they built.
 
C

ckirch

Member
Mar 9, 2021
22
30
13
Wisconsin
Ownership

  1. 1000-5
I'm pretty experienced working on and repairing electronic devices, and home remodeling type work, but this level of job is definitely new to me. So far the disassembly has been timely, but not terribly difficult. I'm just getting into the meat of the heater install now though, so that could change in a hurry. I'll take photos and notes along the way and post them on there for anyone else crazy enough to try it themselves.

I'll be working on getting the heat shield off tonight and then draining the coolant. Next steps after that involve cutting into the dash...can't wait...
 
Scoop

Scoop

Well-Known Member
Lifetime Member
Supporting Member
Sep 7, 2021
4,206
15,731
113
Michigan
Ownership

  1. Other Brand

  2. 1000-5

  3. Talon R LV
The thought of installing mine was a little intimidating at first, but now that I've done it, I COULD do it again without too much fanfare. But I'd rather supervise someone else doing it ... 🤣
 
C

ckirch

Member
Mar 9, 2021
22
30
13
Wisconsin
Ownership

  1. 1000-5
Haha I bet, but I'm still glad to have some guys on who've done this before! As predicted earlier I'll swear a lot while getting the heat shield out, which was correct.
Did you have to disconnect the shift cable to get it out? I'm referring to the cable that is in the middle of the slit in the image below? I think the shield would slide right out the front if that wasn't in the way, but the instructions don't say anything about disconnecting the cable, and I'd rather not if possible. Do you remember which way you were able to slide it out?
Any tips are appreciated, thanks!

The cable doesn't have anywhere near enough slack to slide out the slit on the right.
Heatshieldcable1


The cable in question is just to the right of the ignition on this pic. I think the heat shield needs to be removed towards the front, but not sure with that cable locking it in place.
Heatshieldcable3
 
Scoop

Scoop

Well-Known Member
Lifetime Member
Supporting Member
Sep 7, 2021
4,206
15,731
113
Michigan
Ownership

  1. Other Brand

  2. 1000-5

  3. Talon R LV
I installed an Ice Crusher heater, not the OEM Honda unit. Also, mine is a 2021, not a 2022. I didn't have to remove any heat shield or disconnect much of anything (beyond what it took to remove the front end).
 
P

PDogRex

Well-Known Member
Supporting Member
Apr 19, 2022
70
349
53
Central MT.
Ownership

  1. 1000-5
You shouldn’t have to disconnect any cables, work the heat shield out carefully. It is a tight fit to get out, but it will come out. Just a suggestion, take a picture “as found” then you have a reference when reinstalling.
As I mentioned in my post when installing accessories “ a lot of beer was consumed, and a lot of cuss words were expelled” but it all came together in the end.
 
C

ckirch

Member
Mar 9, 2021
22
30
13
Wisconsin
Ownership

  1. 1000-5
Good to know, thanks for the reply, and yes I've taken many pics and videos along the way to be sure it goes back correctly in the end.
I found out if I pushed the shift lever to the right it provided me another ~inch of slack, which was enough to get the cable around the slot, barely. Now it's the black hard plastic snorkel/intake duct on the bottom of the pic that's blocking it from coming out...this is a frustrating one for sure, worst step yet in my opinion. I don't suppose you had to remove or loosen that duct? I took one plastic rivet out that I could access easily but it didn't do much.

The large wire harness on the left isn't making it any easier either, and blocks the plate from moving left.

On a side note, after looking through the Service Manual I realized why I had a hard time finding the 'heat shield' they reference in the Heater Install instructions (my original reason for posting this thread). That's because it's really called the 'Air Guide Plate' in the Honda Service Manual. Even though I found the correct section in the manual it's not helping to get it removed, they act as if it should just slide right out after disconnected, I wish.
 
C

ckirch

Member
Mar 9, 2021
22
30
13
Wisconsin
Ownership

  1. 1000-5
I did this heater install on my 2022 P1K5 Trail when it was just 4 days new to me. The Honda Service manual (got mine off eBay) is great for reference and you can following the directions for the heater installation then look up the component in the manual, which will tell you how to remove it, how many and what type fasteners.
Take your time and read and understand the instruction, if it is unclear, reread them again. Route the hoses, wiring just as it is described. Make sure you bleed all the air out of the coolant system.
It will take about 12-15 hours to do this. This was the most complex accessory that I have installed on all kinds of equipment. Any of the other Honda accessories are a piece of cake after this. On the plus side you learn where all the components are located.
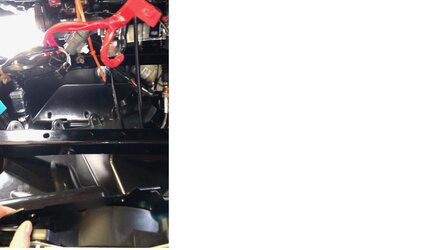
Pictures are what mine looked like with panels removed for installation.

View attachment 374043 View attachment 374044
I was looking at your photo again to see if I missed anything, and I noticed the heat shield/air guide plate is still installed in this pic.

Do you know if it was the next part to come out after the photo was taken? I've been working on this for a few hours over a couple of nights now. I'm about to try loosening up the snorkel duct from the back to see if I can get some movement on it up front.
Thanks!
 
C

ckirch

Member
Mar 9, 2021
22
30
13
Wisconsin
Ownership

  1. 1000-5
Well I finally got it out. Not much changed except I got a little bit of extra play on the duct by removing a pin and loosening up some hose clamps (located under the passenger seat roughly). What I had to do was put a lot more force into it and really bend the hell out of that heat shield. Luckily it's tough flexible plastic or it would have never come out. Here's a couple of pics. One of it completely removed, one of it finally coming out and it's orientation, and one of what's behind it when removed.

This is the prick, worst part to remove by far.
Shieldremoved1


This is the angle it eventually came out.
Shieldremoved2


This is what's behind it after it's removed. That window in the center leads to the middle lower part of the dash.
Shieldremoved3


Next steps are to finish draining the coolant, then install the templates for the dash cutouts.

I'll be back... Shieldremoved2
 
NEfarm_ranch

NEfarm_ranch

Well-Known Member
Oct 3, 2021
87
362
53
Nebraska
Ownership

  1. Do not currently own

  2. 1000-3
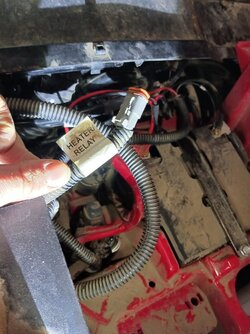
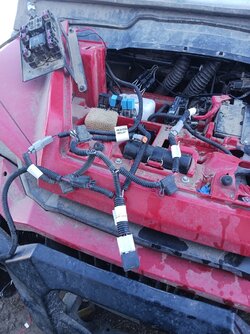
I recieved my 2022 pioneer 1000 in July of last year. I had the dealer install the OEM heater and assumed it was done right. It wasn't. Found my demist ducts were never hooked up. It was very challenging getting them in place with all the plastic in place. Yesterday I was doing some wiring and found the connector in the picture below laying beside the OEM fuse box. Let me know where/if it should be hooked up if you see it during this project. Hopefully it's not needed or I can get it without to much disassembly. The zone control function makes no changes when the dial is changed. Maybe it has something to do with that.

20230215 164758
 
C

ckirch

Member
Mar 9, 2021
22
30
13
Wisconsin
Ownership

  1. 1000-5
I recieved my 2022 pioneer 1000 in July of last year. I had the dealer install the OEM heater and assumed it was done right. It wasn't. Found my demist ducts were never hooked up. It was very challenging getting them in place with all the plastic in place. Yesterday I was doing some wiring and found the connector in the picture below laying beside the OEM fuse box. Let me know where/if it should be hooked up if you see it during this project. Hopefully it's not needed or I can get it without to much disassembly. The zone control function makes no changes when the dial is changed. Maybe it has something to do with that.

View attachment 374444
Sorry to hear that. I called up my dealer today to see if they had any tips on getting the shield off and they said they hadn't installed any 2022 heaters yet, so they would have been experimenting on mine if I'd had them do it also I'm sure.

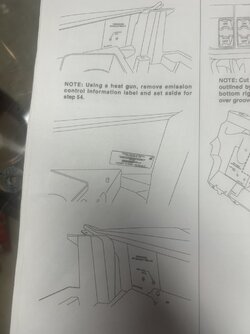
At least they installed the fuse box for you. It should just plug right into there, any open accessory/switch (not aux I suppose) 10A slot. I haven't gotten that far yet, but here is the step from the install guide I believe. And steps to put it back together if you had to take anything off.

Good luck, hope it works better after this. If so please report back on it's performance, let me know if all this work is going to be worth it or not :)

1676611508015
 
  • Wow
Reactions: Smitty335
NEfarm_ranch

NEfarm_ranch

Well-Known Member
Oct 3, 2021
87
362
53
Nebraska
Ownership

  1. Do not currently own

  2. 1000-3
I tore into it a little bit. Figured out that label goes with my dfk hardcabs windshield wiper/washer setup.

20230217 151334
 
  • Like
Reactions: Smitty335
K

Ksims

New Member
Feb 19, 2023
3
0
1
Juneau
Ownership

  1. 1000-5
We are
Hi All,
I've been reading on HondaSXS for awhile now, but first time post here.

Around 2 weeks ago I purchased a new 2022 1000-5 Pioneer, and I'm starting to install some accessories, starting with the new Honda Heater. The instructions start by having you remove a fairly large list of parts from the Pioneer, which I've completed except for the last item on the list, which is the Heat Shield.

I've removed what I thought was the heat shield, but it does not match the photo of the Heat Shield in the installation instructions for the Heater. This Heat Shield requires drilling/cutting templates be attached to it, but for the life of me can't find a part that matches the pic. Is anyone familiar with this part, or can tell me exactly where it is located? Here are some pics of the machine and work in progress. I posted a pic of what I think is the Heat Shield, and what its supposed to look like according to the install instructions. The shield I removed has a plastic insert connected to it, and that is labeled "Heat Shield Cover", so I can't be too far off I wouldn't think...

Machine nearly disassembled and ready for heater install
View attachment 374026

This is where I removed what I thought was the correct Heat Shield (originally covered the exhaust ports)
View attachment 374027
This is the heat shield I removed that doesn't match the install instruction picture.
View attachment 374028

This is what the instructions say to remove and modify, but this does not look like my heat shield.
View attachment 374029

The machine is a 2022 and the instructions/Heater kit are the 2022 version.

Thanks anyone who can help!
Currently installing the Honda heater. Pain in the butt… We are having a difficult time finding where the passenger side return duct template go as well as driver side. Any tips for this installation?

FFD916D4 789A 402F 8330 7F1EB3210FF0
 
C

ckirch

Member
Mar 9, 2021
22
30
13
Wisconsin
Ownership

  1. 1000-5
We are

Currently installing the Honda heater. Pain in the butt… We are having a difficult time finding where the passenger side return duct template go as well as driver side. Any tips for this installation?

View attachment 374957

Pain in the butt indeed. Those steps took me a minute to locate also, but they go on the main fender (largest hood section that the battery rests in). You'll see the emissions sticker on there which should help locate the spots.

I got to the point of installing the heater unit itself today. I took it out of the brand new sealed box and notice the blower/fan unit inside was very loose and moving around. After turning the heater around a bit I could hear plastic shaking around inside, and one decent sized piece fell out. So now I'm at a standstill, and of course the dealer is closed until Tuesday.

Let me know how your heater fits inside of the lower bracket once you get to that step. The snorkel duct/hard intake tube is really in the way and doesn't seem to let it sit squarely on the bracket. The instructions don't call for it but I ended up removing the entire radiator assy just to get more access, I'd recommend it (only a couple more hose clamps and one electrical plug more).

My heater is busted but I'm still running through the next few steps to help make it go smoother when I have the working unit...
 
Last edited:
H

HondaTech

Guest
Pain in the butt indeed. Those steps took me a minute to locate also, but they go on the main fender (largest hood section that the battery rests in). You'll see the emissions sticker on there which should help locate the spots.

I got to the point of installing the heater unit itself today. I took it out of the brand new sealed box and notice the blower/fan unit inside was very loose and moving around. After turning the heater around a bit I could hear plastic shaking around inside, and one decent sized piece fell out. So now I'm at a standstill, and of course the dealer is closed until Tuesday.

Let me know how your heater fits inside of the lower bracket once you get to that step. The snorkel duct/hard intake tube is really in the way and doesn't seem to let it sit squarely on the bracket. The instructions don't call for it but I ended up removing the entire radiator assy just to get more access, I'd recommend it (only a couple more hose clamps and one electrical plug more).

My heater is buster but I'm still running through the next few steps to help make it go smoother when I have the working unit...

The 2 we've done didn't seem to have any issues with the lower bracket?

Got any pictures?
 
K

Ksims

New Member
Feb 19, 2023
3
0
1
Juneau
Ownership

  1. 1000-5
Pain in the butt indeed. Those steps took me a minute to locate also, but they go on the main fender (largest hood section that the battery rests in). You'll see the emissions sticker on there which should help locate the spots.

I got to the point of installing the heater unit itself today. I took it out of the brand new sealed box and notice the blower/fan unit inside was very loose and moving around. After turning the heater around a bit I could hear plastic shaking around inside, and one decent sized piece fell out. So now I'm at a standstill, and of course the dealer is closed until Tuesday.

Let me know how your heater fits inside of the lower bracket once you get to that step. The snorkel duct/hard intake tube is really in the way and doesn't seem to let it sit squarely on the bracket. The instructions don't call for it but I ended up removing the entire radiator assy just to get more access, I'd recommend it (only a couple more hose clamps and one electrical plug more).

My heater is buster but I'm still running through the next few steps to help make it go smoother when I have the working unit...
Thank you. I loosened the radiator to get the heater in, it seems to fit perfectly, having a problem with the dash vent rubbing on the 4 wheel drive shifter now…
 
C

ckirch

Member
Mar 9, 2021
22
30
13
Wisconsin
Ownership

  1. 1000-5
The 2 we've done didn't seem to have any issues with the lower bracket?

Got any pictures?
The issue was more with what they call ‘snorkel duct B’ In the instructions. The top of it about 1/4” too far to the right and prevents the heater from sitting in squarely (Pushes on the left side of the heater). There is a lot of extra plastic around that bolt hole in the front on the duct, so I made the hole a little bigger and now I can just make it fit. Thanks though, I’ll probably need something else before it’s all done.
 
Last edited:
C

ckirch

Member
Mar 9, 2021
22
30
13
Wisconsin
Ownership

  1. 1000-5
Looks like Honda revised the Heater install instructions this month and added a video link for the heat shield/templates:

1677019317181
 
  • Like
Reactions: NorthernJoe

About us

  • Our community has been around for many years and pride ourselves on offering unbiased, critical discussion among people of all different backgrounds. We are working every day to make sure our community is one of the best.

User Menu

Buy us a beer!

  • Lots of time and money has gone into making sure the community is running the best software, best designs, and all the other bells and whistles. Care to buy us a beer? We'd really appreciate it!

    Beer Fund!

    Club Membership!