V
Greetings to all. This will be my first post on this forum. I have been on this site since I bought my 2018 P500 about two months ago. It was pretty basic as the previous owner stripped off all except the bigger tires and the stick stompers prior to selling it.
The P500 will be mainly used for checking cattle in the pastures as well as "normal"pasture care.........much easier on my old bones than my 2019 grizzly 450/EPS The width was a good selling point for me. It fits nicely on my trailer, and also is narrow enough to cross the "bridges" over the narrow mucky streams that need to be crossed to gain access to all areas of the pastures. I got tired of winching thru the muck so build the "bridge".
I built the bumper in the picture, which is kind of a copy of the Strong front bumper.
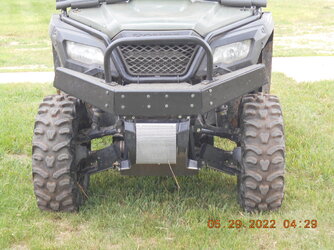
The metal for the bumper came from metal from a long retired silage chopper so the cost was negligible .The silver screen was made from and old hammer mill screen. It can easily be removed if I decide to add a winch (not likely to happen).
Both bumpers were made from the piece of metal off of silage chopper and other scrap metal I had.
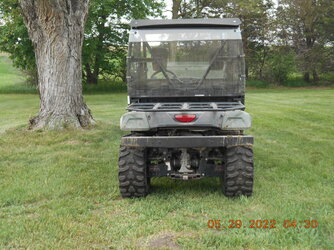
The rear window and top were from Amazon and both fit nicely. I have also added Moose mirrors (cost $65.00) that I purchased with $100.00 gift card from the dealership, 1 gallon of oil and a filter took care of the remainder of the gift certificate. I am pleased with the mirror. I also have a 48 inch wide aluminum storage box for the rear rack which is waiting to get attached to the rear rack.
The windshield I bought on a consignment sale for $5.oo. I think it came off of a Polaris. I used a pool noodle to fill in the space between the hood and windshild.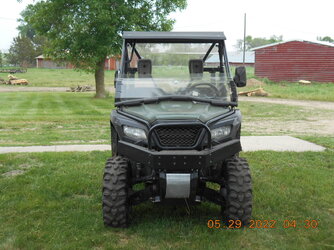 I cut it down and made it work for me. Not pretty but functional. Total out of pocket cost for both bumpers mirrors and windshield was less than $10.00 I work really cheap and enjoy building useful things so I did not figure any labor in the cost
Stan from NE Nebraska
The P500 will be mainly used for checking cattle in the pastures as well as "normal"pasture care.........much easier on my old bones than my 2019 grizzly 450/EPS The width was a good selling point for me. It fits nicely on my trailer, and also is narrow enough to cross the "bridges" over the narrow mucky streams that need to be crossed to gain access to all areas of the pastures. I got tired of winching thru the muck so build the "bridge".
I built the bumper in the picture, which is kind of a copy of the Strong front bumper.

The metal for the bumper came from metal from a long retired silage chopper so the cost was negligible .The silver screen was made from and old hammer mill screen. It can easily be removed if I decide to add a winch (not likely to happen).
Both bumpers were made from the piece of metal off of silage chopper and other scrap metal I had.

The rear window and top were from Amazon and both fit nicely. I have also added Moose mirrors (cost $65.00) that I purchased with $100.00 gift card from the dealership, 1 gallon of oil and a filter took care of the remainder of the gift certificate. I am pleased with the mirror. I also have a 48 inch wide aluminum storage box for the rear rack which is waiting to get attached to the rear rack.
The windshield I bought on a consignment sale for $5.oo. I think it came off of a Polaris. I used a pool noodle to fill in the space between the hood and windshild.
 I cut it down and made it work for me. Not pretty but functional. Total out of pocket cost for both bumpers mirrors and windshield was less than $10.00 I work really cheap and enjoy building useful things so I did not figure any labor in the cost
Stan from NE Nebraska
Last edited:


