Greetings - I posted this in my build thread but thought I would share as a simple, budget friendly auxiliary fan mounting solution. Like 99.5% of you, I've been battling the heat issue. I researched fan solutions on here and decided to go with a 7" radiator / auxiliary fan instead of bilge fans, simply because it could move more air. Below is a parts list and installation instructions with photo's. Hopefully this provides some help to those looking for a solution, and of course, feel free to toss out ideas to improve it.
Parts:
When I ordered the fan, I wasn't sure how I was going to mount it. After searching my shop and playing around with what I had, below is what I came up with. It's inexpensive, easy, and works (so far).
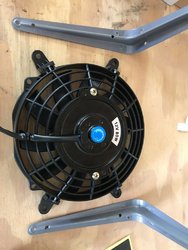
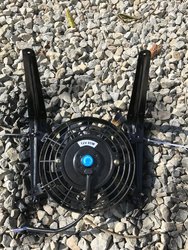
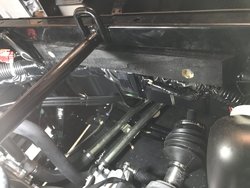
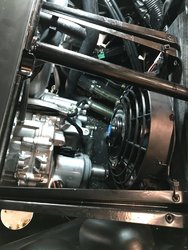
Parts:
- Ultra Hardware 96125 Shelf Brackets,Grey, 8 x 10, Pack Of 20
- Upgr8 Universal High Performance 12V Slim Electric Cooling Radiator Fan With Fan Mounting Kit (7 Inch, Black)
- DROK Motor Speed Control Driver Board for Brush Motor 7V-60V 20A 420W PWM Controller DC 12V 24V 36V 48V Regulator Cooling Fans Dimmer Governor Pulse Width Modulator LED Indicator Switch Function
- 12-15" piece of 1x2 wood (I used a scrap piece of popular)
- Self tapping screws (x2)
- Wood screws (x4)
- Zip ties (x8)
- Black spray paint
- Wire / connectors / etc.
When I ordered the fan, I wasn't sure how I was going to mount it. After searching my shop and playing around with what I had, below is what I came up with. It's inexpensive, easy, and works (so far).
- Lay out the brackets and fan, orienting them how you want them. I mounted the fan so the mounting tabs you insert (note I put small screws in to hold the tabs in place, but watch to make sure they don't interfere with the blade) put the fan in a more horizontal orientation (they're offset). The brackets should have the 8" side with the fan and the 10" side running at the top (see pictures)
- Mark holes to drill in brackets for the mounted fan tabs. Drill holes. Attach (loosely!) the fan to the brackets with zip ties. I painted mine at this point to make it look less... hillbilly, but you can paint whenever.
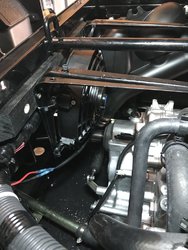
- Take the seat off your machine, remove rubber / heat shield to access the engine area. Along the front of the seat, right where the back of your knee would be, is where the wood and fan will mount, oriented towards the rear. Take the piece of wood and hold it up above the wiring harness, below the bar, against the flat metal piece that runs across supporting the front top of the seat. Measure and cut - this is what the shelf brackets and fan will mount to. I cut the ends at a 45 deg angle (because 1 was already that way, haha) for a cleaner look. Paint the wood (if you choose).
- Test fit assembly before screwing and zip tying tight - make sure you get the orientation to your liking. The top of the shelf brackets should sit above a rubber hose and under the bar on the back seat support.
- Once you've test fit, install the wood piece with self tapping screws. I had to drill counter sink holes because the only self tapping screws I had laying around were short. You can also drill pilot holes in the metal, but be careful because I noticed metal shavings dropping on the drive shaft and boot that sits below - blow those out so they don't work their way into any bearings or seals!
- With the wood mounted, screw the shelf brackets (with fan loosely attached) to the wood. I used a temporary zip tie around the round set bar in the middle to hold the fan in place while mounting the brackets. Again, you may want need to drill pilot holes (but it's a tight spot, so you may not). Once the brackets are secure, zip tie the fan tighter. There's also an additional set of holes on the fan shield - I zip tied these as well to make sure it wasn't going anywhere.
- Check and make sure everything's right and tight.
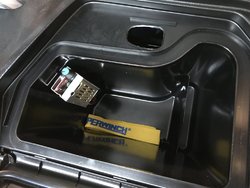
- Mount the fan speed control. I chose to do so in the glove box for easy, dry access. I used velcro so I could take it on/off easier.
- Wire the fan to the speed control.
- Wire the speed control to (your choice for powering accessories).\
- Test.
- Drink a cool beverage of your choice.


Last edited:

