Hondasxs
Club Founder
Staff member
Lifetime Member
Supporting Member
When it comes to the mud the more ground clearance the better. And we all know Honda is not known for extravagant specs when it comes to ground clearance. The Honda Pioneer is no different offering a standard 10.5 inches of clearance. Loaded down with 4 people and gear you quickly learn where these limits are sitting in a 10 inch rut.
Enter Savant Manufacturing. Makers of the STRONG MADE 2.5 inch lift kit for the Honda Pioneer.
[img1=http://StrongMade.com]//hondasxs.com/gallery/image.php?album_id=96&image_id=1149[/img1]
Simple to install and easy on your wallet, this lift kit will give your Pioneer the clearance it needs to tackle the deep stuff. Combined with a set of 27" tires you can expect a potential gain of 5+ inches on the rear vs factory specs.

Overall the kit is simple, STRONG, and well MADE. Using minimal parts to reduce movement this kit stays put. The Strong Made kit allows maximum lift while maintaining the axles at an acceptable angle to reduce cup/axle rub. All kits are made out of steel laser cut to fit. To protect the kit from the elements, each kit is power-coated for long lasting finish. All the bolts and spacers you need are included to insure quick and easy fit.
Installation of the lift kit was simple.
Installing the fronts only took about 10 mins each side and was completed with ease.
[album]1132[/album][album]1133[/album][album]1134[/album][album]1135[/album]
Switching to the rear took a bit longer as we found it necessary to disconnect the sway bar and loosen the bushings. This step is recommended with ALL lift kits.
[sway bar pic] [knuckle bushing pic]
Releasing the sway bar was done by disconnecting one point on either arm. Next we needed to releive the bushings as they tend to hold the factory lift and stop the knuckle from fully dropping. This can be simply done by loosening the 2 bolts on each knuckle at the arm mount point. Once both were loose you can push the knuckle down, the bushings will release allowing true downward free float for the install.
[album]1139[/album][album]1140[/album]
Once those steps were completed, we were able to install the rear kit easily.
[album]1136[/album][album]1138[/album][album]1142[/album]
Finally, reconnect the sway bar and recheck the lift kit bolts. Once we lowered the Pioneer we then tighten the rear a-arm/knuckle bolts in there new position.


FINAL RESULTS:
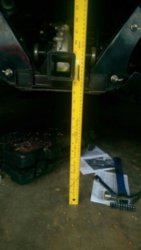
We were most impressed with the STRONG MADE Lift Kit. Our "on the ground" measurements showed the front increasing by 2 inches and the rear by 3 inches. Overall what a great value STRONG MADE provides and for the money, you want find a lift kit anywhere that keeps the joints in check while being easy on your wallet.
With 27 inch tires our Pioneer was sitting close to 13.5 inches of clearance in the front and 15 inches of clearance in the rear with the shocks preload set to 2.
LINK's to STRONGMADE.com
STRONG MADE LIFT KIT - $125
Other Strong Made accessories for the Honda Pioneer
Enter Savant Manufacturing. Makers of the STRONG MADE 2.5 inch lift kit for the Honda Pioneer.
[img1=http://StrongMade.com]//hondasxs.com/gallery/image.php?album_id=96&image_id=1149[/img1]
Simple to install and easy on your wallet, this lift kit will give your Pioneer the clearance it needs to tackle the deep stuff. Combined with a set of 27" tires you can expect a potential gain of 5+ inches on the rear vs factory specs.
Overall the kit is simple, STRONG, and well MADE. Using minimal parts to reduce movement this kit stays put. The Strong Made kit allows maximum lift while maintaining the axles at an acceptable angle to reduce cup/axle rub. All kits are made out of steel laser cut to fit. To protect the kit from the elements, each kit is power-coated for long lasting finish. All the bolts and spacers you need are included to insure quick and easy fit.
Installation of the lift kit was simple.
Installing the fronts only took about 10 mins each side and was completed with ease.
[album]1132[/album][album]1133[/album][album]1134[/album][album]1135[/album]
Switching to the rear took a bit longer as we found it necessary to disconnect the sway bar and loosen the bushings. This step is recommended with ALL lift kits.
[sway bar pic] [knuckle bushing pic]
Releasing the sway bar was done by disconnecting one point on either arm. Next we needed to releive the bushings as they tend to hold the factory lift and stop the knuckle from fully dropping. This can be simply done by loosening the 2 bolts on each knuckle at the arm mount point. Once both were loose you can push the knuckle down, the bushings will release allowing true downward free float for the install.
[album]1139[/album][album]1140[/album]
Once those steps were completed, we were able to install the rear kit easily.
[album]1136[/album][album]1138[/album][album]1142[/album]
Finally, reconnect the sway bar and recheck the lift kit bolts. Once we lowered the Pioneer we then tighten the rear a-arm/knuckle bolts in there new position.
FINAL RESULTS:
We were most impressed with the STRONG MADE Lift Kit. Our "on the ground" measurements showed the front increasing by 2 inches and the rear by 3 inches. Overall what a great value STRONG MADE provides and for the money, you want find a lift kit anywhere that keeps the joints in check while being easy on your wallet.
With 27 inch tires our Pioneer was sitting close to 13.5 inches of clearance in the front and 15 inches of clearance in the rear with the shocks preload set to 2.
LINK's to STRONGMADE.com
STRONG MADE LIFT KIT - $125
Other Strong Made accessories for the Honda Pioneer


