L2R
Understanding women Vol. 1
Lifetime Member
I could not find much on a skid plate install so hoping this helps someone else later on.-
First, The Trail Armor skid plate is top notch quality. Very well packaged. Fit and finish is great. I hate that it is on the bottom and I can't really show it off.
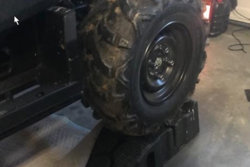
I did this lifting up the SXS about 6 inches and it worked fine with jack stands on the front- all with OEM tires and wheels.
Some of this will not apply but here is what I would suggest for anyone who installs it this ramps only.
Degree of difficulty: 4 beers
If you have a snow plow bracket, you need something to cut out some the skid plate to fit or at least I did and add 2 beers to takt time.
Tools -
1. safety glasses or face shield, dirt is coming down on you if you are removing the old skid plate while on your back.
2. 1 impact cordless drill with 10mm socket to remove the old screws ONLY
3. 1 adjustable drill with a 10mm to re-install screws
4. 1 ratchet wrench
5. Work light (this one from Amazon is great and has a cable port to recharge it)
6. jack stand or ramp for each corner of the SXS
7. Optional- I really like the harbor freight tool creeper caddy
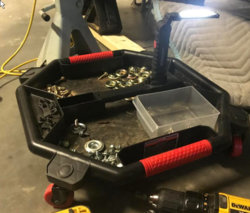
Maybe not necessary to say so but the engraving and counterbores go face down if you want to lay it all out before starting.
Optional instructions if you have a Denali or snow plow bracket attached-
1. remove plow bracket
2. use bracket to outline cut out on the skid ( I used a silver sharpie)
I vertically cut the front skid tangent to the two large holes shown below.
I horizontally cut at the center point of the same holes.
(I also had to cut about 1/2" off the end of the skid plate and chamfer it at least 3/8" chamfer.
This stock photo shows 5 screws and bushings but this leaves you with 3, 1 on top and the 2 below.
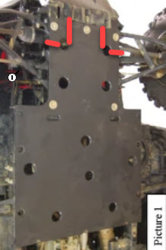
This left me with the bracket covering a bit of the center screw bushing and about 1 1/2 inches overlap
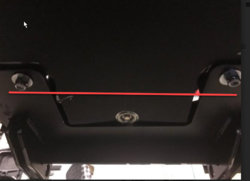
This is the overlap that well covers the front of the skid plate.
(the red line is the end of the skid plate)
If you had to modify the skid plate, the hardest part is over and you can resume installing the front skid plate. (note: I saw complaints about stripping out threads when installing screws so I took my time and used multiple tools to install the screws. I used a 20v drill but backed off the torque to 13. Then used a 3/8ths ratchet by hand and finished without any problems)
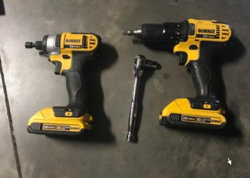
I was a bit concerned about drilling/tapping on the radius of the tubing for the 12 outboard screws to complete the job.
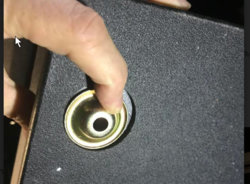
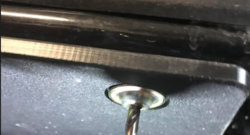
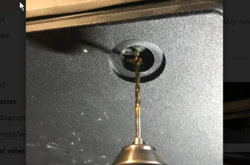
I used a 5/16 drill and inverted a bushing to spot drill on center. I then used a 1/8 drill bit to finish the hole. Then used the self tapping screws to finish with a cordless drill. By drilling a pilot hole, I used less pressure when installing the screw to keep from stripping the threads. Maybe could have done it faster but I didn't have to fix anything either.
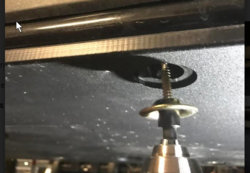
First, The Trail Armor skid plate is top notch quality. Very well packaged. Fit and finish is great. I hate that it is on the bottom and I can't really show it off.
I did this lifting up the SXS about 6 inches and it worked fine with jack stands on the front- all with OEM tires and wheels.
Some of this will not apply but here is what I would suggest for anyone who installs it this ramps only.

Degree of difficulty: 4 beers
If you have a snow plow bracket, you need something to cut out some the skid plate to fit or at least I did and add 2 beers to takt time.
Tools -
1. safety glasses or face shield, dirt is coming down on you if you are removing the old skid plate while on your back.
2. 1 impact cordless drill with 10mm socket to remove the old screws ONLY
3. 1 adjustable drill with a 10mm to re-install screws
4. 1 ratchet wrench
5. Work light (this one from Amazon is great and has a cable port to recharge it)
6. jack stand or ramp for each corner of the SXS
7. Optional- I really like the harbor freight tool creeper caddy

Maybe not necessary to say so but the engraving and counterbores go face down if you want to lay it all out before starting.
Optional instructions if you have a Denali or snow plow bracket attached-
1. remove plow bracket
2. use bracket to outline cut out on the skid ( I used a silver sharpie)
I vertically cut the front skid tangent to the two large holes shown below.
I horizontally cut at the center point of the same holes.
(I also had to cut about 1/2" off the end of the skid plate and chamfer it at least 3/8" chamfer.
This stock photo shows 5 screws and bushings but this leaves you with 3, 1 on top and the 2 below.

This left me with the bracket covering a bit of the center screw bushing and about 1 1/2 inches overlap
This is the overlap that well covers the front of the skid plate.
(the red line is the end of the skid plate)

If you had to modify the skid plate, the hardest part is over and you can resume installing the front skid plate. (note: I saw complaints about stripping out threads when installing screws so I took my time and used multiple tools to install the screws. I used a 20v drill but backed off the torque to 13. Then used a 3/8ths ratchet by hand and finished without any problems)

I was a bit concerned about drilling/tapping on the radius of the tubing for the 12 outboard screws to complete the job.
I used a 5/16 drill and inverted a bushing to spot drill on center. I then used a 1/8 drill bit to finish the hole. Then used the self tapping screws to finish with a cordless drill. By drilling a pilot hole, I used less pressure when installing the screw to keep from stripping the threads. Maybe could have done it faster but I didn't have to fix anything either.


Last edited:

