CumminsPusher
Just a Honda doing Honda things.
Lifetime Member
Supporting Member
Club Contributor
I've recently received some interest in this install and wanted to explain how it was done. I went through it a little on my thread CumminsPushers ride in the garage however I understand there was a lot of information there on basically the whole build so it had all the information on the two weeks of the build. 300watt will be no problem 400watt you will be a little limited on other accessories 500watt is runable but shouldn't do without upgrading the stator 700watt is slightly too much even with stator. First of all I'd like to explain why it was important for me to install here. First and most importantly it effects none of your accessories...window still comes out you can put half glass in whatever and not lose any thing. Second it's solid will not move doesn't effect roll cage in the slightest if anything makes it stronger. Third it's about the best placement for light,when you're light is overhead it's less effective for actually using it because you have to look through it and in rain fog or snow it becomes totally useless also with the curve the light is drastically better on the sides,looks cool and actually fits up way tighter to the machine and makes this mount possible. Lastly it gets hit with virtually nothing it doesn't snag or grab low limbs like a top mount and the wires are much easier to install they will not need to be ran up the roof. Sometimes the cooling fins on these can whistle and be irritating, curved tends to not do that and this placement is very quiet and does not hamper vision even without the windshield installed. I tried many measured tested and tried many options here and moved on this one. The 50" looked to fit the best but 52" is the way to go as the install of that one will be easier and better.
Parts...you will need 3"plate 3/16 inch thick foot long or so,1 inch wide 3/16 by a foot(for center brace if so inclined I did but I tend do overkill, I don't tolerate wiggle or squeaks) 4 replacement bolts for the lower ROPS connection (take in for sizing as I don't remember off hand, they need to be about 1 1/2" longer if 50" lightbar and 1 1/8 if 52" bar) 4 nuts to fit that bolt if 50" 2 if 52" pick up 20-25 washers and 4 lock washers for the same. One 10mm about1.5inches lock nut,two washers and the largest washer possible around 1.5" across for this and a 1.5 inch self tapper (this is all for the center brace)there will be a couple other things explained later.
Install...place the lightbar up in between the ROPS and place cardboard and tape to secure fairly well to give you an idea of the project at hand. Start with the plate cut two 6" pieces and place long way out next to the ROPS. For the 50" they will have to be spaced by a nut on the replacement bolts protruding from the inside. Drill the two holes on each one making sure there will be room on the forward of the bar where the bar is to be mounted (you may have to angle the plates up a bit to clear hood and the holes will have to be up high at the least) 52" bar will almost be ready after forward hole in plate is made 50" get to in a second. You'll probably want to space the light bar an inch off windshield, I wanted it closer which is great but you'll have to bend in lower corners of the of the metal surrounding the windshield. After the plate is ready end plate just after roll bar to the same angle as the curved edge on the light bar place lock washer next to the bar and on 8mm replacement bolt through the plate into light bar. 52" is now mounted unless you want center mount(recommend) 50" drastically tougher (mine oops) goes like this. You have to cut and shave factory mount for the bar as a spacer. This sucks. Since the bar is curved you have to match it but not possible by bending your plate. So you cut the mounting hole section out of the bracket (I can go into better detail if you contact me, the 50" is tougher!) and buy a 3/8" thick spacer for the opposite side. Grind that at an angle to match the bolt that goes through it into the lightbar (retaining replacement 8mm bolt into the bar) and add washers to take up any gaps.
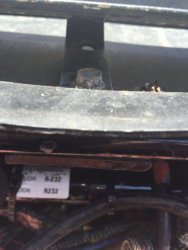
Center brace... Bend your 1" bar in a u pattern to go from cowl to the inside upper fins of the lightbar. Place inside deep drill starter hole for the self tapper into the steel through as many fins as possible and place the screw in set onto machine there is a brace under the cowl drill back side (don't go into brace as its small and you don't want to weaken it) place bolt through the new brace for the bar into plastic cowl and where it protrudes under place large washer over the Honda brace and tighten a not on. Done...
It sounds worse then it is and I wish I had taken pics throughout the build but if someone needs I will take any that help don't be shy I love this crap just get ahold of me!

Last edited:

