View attachment 2829
Tools needed:
- Flat Head Screw Driver or Fender Clip Removal Tool to remove the clips
- Phillips Screw Driver for the Screws
- 17mm Ratchet for Oil Drain Plug
- 8mm Ratchet for Oil Filter Cover
- Torque wrench
- Small end funnel
Supplies needed:
- Filter Part Number - 15412-HM5-A10 - Buy Here
- Oil Reqired - 4 Liters (3.2 required) - Pro Honda GN4 4-Stroke Motor Oil Buy Here
- A Few Rags
- Oil Catch Pan
Optional Parts
- Large Cover O-RING (54X2.4), Part#91302-KF0-003
- Small Cover O-RING (11X1.9), Part#91303-HA0-004
- SPRING, Part#15414-KF0-000
- BOLT, FLANGE (6X18), Part#96001-06018-00
- DRAIN PLUG BOLT (12MM), Part# 92800-12000
- DRAIN PLUG WASHER (12MM), Part# 94109-12000
- Fender Clips, Part# 90653-HC4-900
Prepare the work area and the SxS:
Locate a safe and level spot to park the SxS.
Operate the SxS long enough to engage the 4x4.
Drive to selected spot.
Engage the park brake. Because it is in 4x4 the front wheels will break.
Seat Removal:
Bottom Seat: Pull the rear bottom of the seat upward then slide slightly backward and set to the side.
Back Cushion: Pull the bottom of the cushion outward the push up and set to the side
View attachment 2811
Seats removed. There are hooks on the outside part of the seats and grommets on the inside.
View attachment 2813
Cab without Seats.
View attachment 2814
Remove Under Seat Panels:
Remove the Rear Center Panel
View attachment 2818
Remove the Right Seat Bottom Cover from the passenger side of the cab..
View attachment 2815
The clips and screws must be removed. There should be 13 clips and 3 screws that need to be removed.
View attachment 2812
Not a bad idea to buy a fender clip removal tool to remove those stubborn clips. This tool can be bought at most auto part stores. You may also want to purchase some additional clips. They can be purchased at your local dealer or online here: Honda Fender Clips
Once the clips and screws are removed you can flip up the tray under the passenger seat to access the filter cover and filter. Be very careful with the ECU, it should flip up with the tray.
View attachment 2816
Draining the OIL:
Jack the rear of the SXS500M2 to gain easy access to the oil drain plug.
Open the oil fill dip stick to help with the drain.
Place your oil drain pan under the plug and remove the plug with a 17mm ratchet. Allow oil to drain. Replace the washer drain plug and sealing washer. Torque the plug to 25N.m (2.5 kgf, 18 lbf.ft)
View attachment 2819
Replacing the Filter:
Under the passenger seat place an old rag under the cover, oil will leak. Remove the three bolts on the oil filter cover.
View attachment 2820
Remove the filter and dispose of properly. Replace with new filter in the correct order. Wet the O-rings with a light coating of oil.
View attachment 2817
Re-install filter cover and torque the Oil Filter Cover Bolts to acceptable specs.
WARING: Book states a torque of 9 lbf.ft (12N.m , 1.2 kgf.m), yet users have reported this may be incorrect and too much for the bolt causing it to break. Recommended using personal judgement and checking back often.
Replacing the OIL:
Replacing the Oil with the recommended oil
View attachment 2831
After Draining/Filter Change = 3.2 Liters
Remove the jack so the SXS500M2 is level.
Place a funnel in the oil fill/dipstick hole under the drivers seat and refill with 3.2 Liters of the recommended oil as shown above.
View attachment 2830
Checking the Oil
Park SxS on level surface, Start and run the engine at idle for 3-5 minuets. Stop the engine and allow to sit for 2-3 minuets.
Check the oil level is filled properly using the dip stick.
View attachment 2832
Remove the dip stick and wipe clean. Insert the dip stick into the hole without screwing it in. Remove after 1/2 second.
Check level by looking for oil between the UPPER and LOWER mark as shown below.
View attachment 2827
If low, re-do the check. If still low, add oil until reading is between the UPPER and LOWER marks. DO NOT OVER FILL!
Install dip stick.
Be sure to check back to insure there is no leaks.
The last step Maintenance Minder Indicator
The Maintenance Minder Indicator will appear in the main display when you have reached a maintenance period suggested by the Honda maintenance schedule.
The wrench will appear in the display at the following periods:
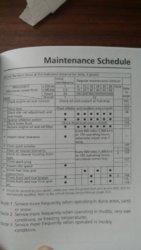
View the full Maintenance Schedule HERE
- Initial Maintenance – 100 miles
- Regular Maintenance Interval 1 – 600 miles
- Regular Maintenance Interval 2 – 600 miles after interval 1 is displayed
View attachment 2828
Resetting it
To shut the Maintenance Minder Indicator Off
Place the ignition switch in the off position. Hold the mode button on the display down and move the ignition switch to the on position. Remain holding the mode button until the wrench starts to flash (2 seconds) and the Maintenance Minder will disappear.
Now you are all set and ready to hit the trail.
Good luck and be safe.
*If you see a error please let me know.
Props to Pauly for helping put this together.
THANK YOU @pauly
Thanks.
You are using an out of date browser. It may not display this or other websites correctly.
You should upgrade or use an alternative browser.
You should upgrade or use an alternative browser.
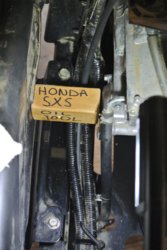
The oil change guide was well written and easy to follow. Last week I did my first oil change and had no problems. When it came to putting the filter cover back on I fashioned a "holder" to use to hold the cover in place so it freed up both hands. I will show a picture of the tool if I can figure out how.

Montecresto
Montecresto el segundo
Lifetime Member
Supporting Member
Club Contributor
What ingenuity. Nice hands free operation! Mind if I borrow it for my next oil change?The oil change guide was well written and easy to follow. Last week I did my first oil change and had no problems. When it came to putting the filter cover back on I fashioned a "holder" to use to hold the cover in place so it freed up both hands. I will show a picture of the tool if I can figure out how.View attachment 10080
Last edited:
you are certainly welcome to use itWhat ingenuity. Nice hands free operation! Mind if I borrow it for my next oil change?
Montecresto
Montecresto el segundo
Lifetime Member
Supporting Member
Club Contributor
I tried medium Phil's head, large Phil's head, PB Blaster, impact, couldn't get the vise grips to stay on.......frustrated only thing left to do is use the grinder to get the head of the bolt out of the way. Boy I hate to do that, but......I used an impact driver on the Philips screws it worked great then when I put them back in I used a little anti-seize on threads.
Montecresto
Montecresto el segundo
Lifetime Member
Supporting Member
Club Contributor
There's a certain way you hold your mouth when turning a tight Phillips head screw.I tried medium Phil's head, large Phil's head, PB Blaster, impact, couldn't get the vise grips to stay on.......frustrated only thing left to do is use the grinder to get the head of the bolt out of the way. Boy I hate to do that, but......
I did figure out another solution to my problem that others might find useful. I used a hacksaw and cut a notch in the head of the bolt, enlarged it with a 3/8 chisel large enough so I could use a very large 12 inch screwdriver. The screw finally came loose with the torque I could apply then. Honda either needs to put hex head bolts in there or apply a small amount of antiseize to each bolt. I must admit that I did fail to contort my face as suggested....that may have also workedThere's a certain way you hold your mouth when turning a tight Phillips head screw.
Montecresto
Montecresto el segundo
Lifetime Member
Supporting Member
Club Contributor
Lol!!! I agree. Do to all the warnings I saw here I sprayed mine with a solvent and then used vise grips on the shaft of a very long Phillips screwdriver and laid my chest right on it with all the weight I could and then was able to loosen them. When I put them back, I just snugged them so I should have no trouble next time.I did figure out another solution to my problem that others might find useful. I used a hacksaw and cut a notch in the head of the bolt, enlarged it with a 3/8 chisel large enough so I could use a very large 12 inch screwdriver. The screw finally came loose with the torque I could apply then. Honda either needs to put hex head bolts in there or apply a small amount of antiseize to each bolt. I must admit that I did fail to contort my face as suggested....that may have also worked
This thread has me thinking. I'm at 131mi and was thinking of waiting when I return from RB to change it. If I change it now I won't have a chance to test drive it until the trip. Not a good time or place to find out something is wrong
advertisement
This thread has me thinking. I'm at 131mi and was thinking of waiting when I return from RB to change it. If I change it now I won't have a chance to test drive it until the trip. Not a good time or place to find out something is wrong
I figured I would tackle it. Glad I did. What a mess under there. 1.5 inches of sand from the last time. All screws came out with out issues.
I myself would change the factory break-in oil before I took another trip. When you change the oil properly and carefully you need not concern yourself with it being done correctly. The break-in oil could have metal particles and contaminants in it. Obviously your decision, but I'm just sayin'......This thread has me thinking. I'm at 131mi and was thinking of waiting when I return from RB to change it. If I change it now I won't have a chance to test drive it until the trip. Not a good time or place to find out something is wrong
ehart814
Traded my Pioneer like a LOSER
Lifetime Member
Club Contributor
I didn't have a hard time removing the screws under the seat.
I bought a large assortment of screwdriver bits at Home Depot a couple years ago - many, many different sizes of philips head bits to pick from. I found one that fit the screws perfectly. Used that bit in my Ridgid impact driver and they all came out without damage. A couple of them did seem excessively tight. If you don't have a cordless impact, you could buy one of the Tusk impact drivers from Rocky Mountain - I think they are only like $10. For working on ATV's/UTV's, a good cordless impact tool is pretty much a must-have item...
You HAVE to use a philips bit that fits the screw heads snugly, or you will ruin them. Hopefully if anyone else is going to change their oil for the first time they will read this first... I am sure that if I had used a regular screw driver, I would have ruined 2 of the screws.
Thank you for the great step by step write up made my first oil change go very smooth. I was lucky I had the 3 hex head bolts on the filter cover.
O
Hondasxs
Club Founder
Staff member
Lifetime Member
Supporting Member
M
advertisement
Similar threads
J
- Replies
- 7
- Views
- 2K
- Replies
- 0
- Views
- 337


