ProudDadOf5
It all started with “Hold My Beer”
Lifetime Member
Supporting Member
I Installed the Viper UTV Winch - Elite Widespool 4500 on my 2019 P1K5 with the recommended mounting kit for it. There are many ways to address the installation & it really just depends on the users preferences how to set up your machine. Hope this helps some folks out there wanting to install this winch setup.
Where to start, I ordered the Viper UTV Winch - Elite Widespool for from the Honda SXS store with the mounting kit. I already had a winch flush mount rocker switch kit to replace the one that comes with the winch witch Is green & does not match your everyday rockers most folks use and all my rockers are blue. @Hondasxs was a huge help in choosing everything I needed!! It was easy once you figure out where you want to run your wires to the solenoid & wireless remote receiver. The links below are for the winch, everyday rocker switch & key-on adapter.
Viper UTV Winch - Elite Widespool
Winch in/out flush mount switch for Honda Pioneer.
KEY ON POWER Harness for Honda Pioneer 1000, 700, 500, and Talon 1000.
1. You have to remove the bumper from the plastic using a Allen wrench then from the subframe with 2 bolts located at the bottom and 4 bolts located in the middle.
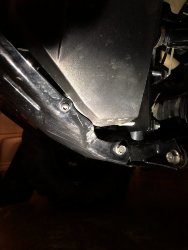
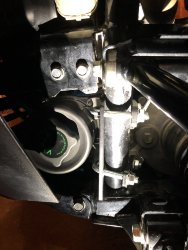
2. Then you attach the winch to the mounting plate. The directions tell you to mount it upside down but I mounted mine right side up where you can engage the free spool gear on the driver side. I did not have to cut a single thing. It fit behind the stock bumper with plenty of room. I also attached the aluminum hawse fairlead to the front of the stock bumper at this time.
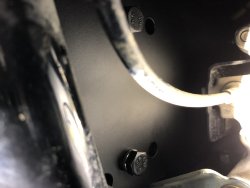
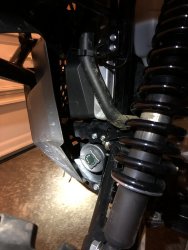
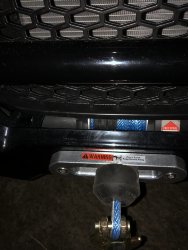
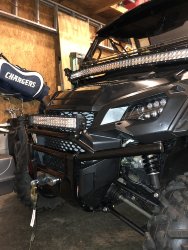
3. You mount the winch with the plate attached to the tube subframe. After I mounted this I went ahead and loosely hooked my wires up to the winch & figured out how I was going to run my wires to the solenoid. Then you run the winch cable through the fairlead (that's on the bumper) & rubber line stopper. I attached the removable hook after I did this. I reattached the front bumper while pulling the winch cable slack through so nothing got tangled.
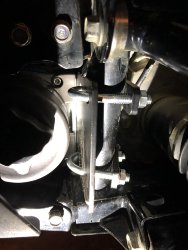
4. Once you have a located where you would like to put the wireless relay box and the solenoid, you’re ready to wire up. I located my wireless remote receiver on top of the cubby box (strong 3M double sided sticky tape) and the solenoid to the left of the air cleaner. I still have all the room to run dual batteries with the kits sold from the club store if I go that route.
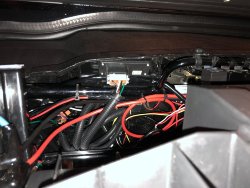
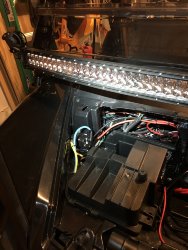
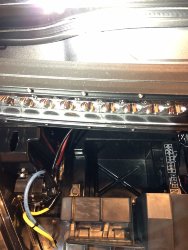
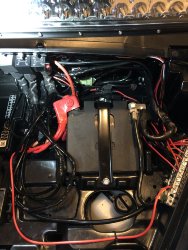
5. Once installed make sure everything works. Following the directions for wireless remote setup (very easy) as well as making sure your rocker switch works. With the way I went (winch right side up and wires green on black and green on black), I unspooled and respooled to pull from the top (recommended) instead of the bottom. I push the IN button & the cable goes IN and when I push the OUT button the cable goes OUT.
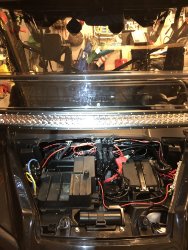
Here is a pic of my busbar situation for all accessories on driver side.
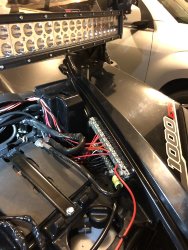
Last but not least here’s a picture of the end result. Tried to keep it as clean as possible!!
Just waiting on my blank covers to come in.
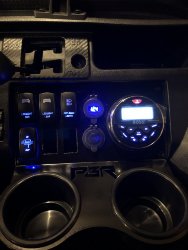
The flush mount winch rocker works the same direction as the factory would have. IN on top and OUT on bottom.
Where to start, I ordered the Viper UTV Winch - Elite Widespool for from the Honda SXS store with the mounting kit. I already had a winch flush mount rocker switch kit to replace the one that comes with the winch witch Is green & does not match your everyday rockers most folks use and all my rockers are blue. @Hondasxs was a huge help in choosing everything I needed!! It was easy once you figure out where you want to run your wires to the solenoid & wireless remote receiver. The links below are for the winch, everyday rocker switch & key-on adapter.
Viper UTV Winch - Elite Widespool
Winch in/out flush mount switch for Honda Pioneer.
KEY ON POWER Harness for Honda Pioneer 1000, 700, 500, and Talon 1000.
1. You have to remove the bumper from the plastic using a Allen wrench then from the subframe with 2 bolts located at the bottom and 4 bolts located in the middle.


2. Then you attach the winch to the mounting plate. The directions tell you to mount it upside down but I mounted mine right side up where you can engage the free spool gear on the driver side. I did not have to cut a single thing. It fit behind the stock bumper with plenty of room. I also attached the aluminum hawse fairlead to the front of the stock bumper at this time.


3. You mount the winch with the plate attached to the tube subframe. After I mounted this I went ahead and loosely hooked my wires up to the winch & figured out how I was going to run my wires to the solenoid. Then you run the winch cable through the fairlead (that's on the bumper) & rubber line stopper. I attached the removable hook after I did this. I reattached the front bumper while pulling the winch cable slack through so nothing got tangled.

4. Once you have a located where you would like to put the wireless relay box and the solenoid, you’re ready to wire up. I located my wireless remote receiver on top of the cubby box (strong 3M double sided sticky tape) and the solenoid to the left of the air cleaner. I still have all the room to run dual batteries with the kits sold from the club store if I go that route.


5. Once installed make sure everything works. Following the directions for wireless remote setup (very easy) as well as making sure your rocker switch works. With the way I went (winch right side up and wires green on black and green on black), I unspooled and respooled to pull from the top (recommended) instead of the bottom. I push the IN button & the cable goes IN and when I push the OUT button the cable goes OUT.
Here is a pic of my busbar situation for all accessories on driver side.

Last but not least here’s a picture of the end result. Tried to keep it as clean as possible!!

Just waiting on my blank covers to come in.

The flush mount winch rocker works the same direction as the factory would have. IN on top and OUT on bottom.
Last edited:

