P700 My Hunting Build

ChrisM

ChrisM

Active Member
Feb 19, 2020
63
161
33
West Central Alabama
Ownership

  1. 700-2
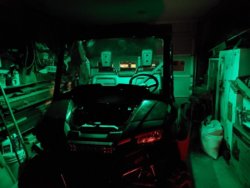
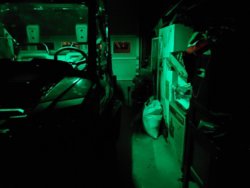
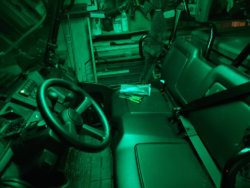
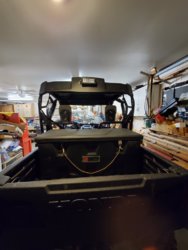
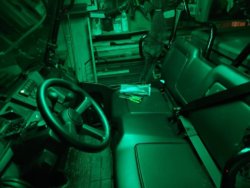
Well I've been at it again today. Got my interior lights in and I went with what I already had on hand, the green.

Looks pretty good if I say so myself.

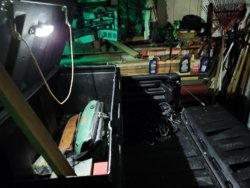
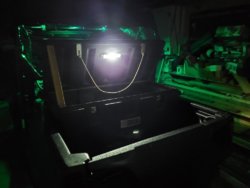
Also took a battery operated led and mounted it to the top of mt storage box. Now I can see in it at night and it gives off pretty good light to the rear of the buggy. 797bcc7d125b872688e3f97d8a0654692e910a6f6c56ce14e8333c7c03606582F83bc0da7fdee90d2afd2b29027a582b77208a68d9be7366f674d7b0faaa2434872030ea1d9ea0d9e5ef70f890d0e4b60e9dc8c0fdb77c5413a1bb3621f94760F6664a221bc075bf97dcbcb6468c7e8e

Sent from my SM-N976V using Tapatalk
 
ChrisM

ChrisM

Active Member
Feb 19, 2020
63
161
33
West Central Alabama
Ownership

  1. 700-2
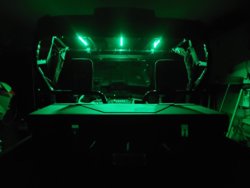
Well these are the last 2 things I've added until my reverse light harness gets here. Got the interior lights in, I went with the green as I had them on hand and they match my rocker lights.:) I've tried them out in a real dark field and to be honest they don't seem to bother my being able to see when I turn them off and sit in the dark.

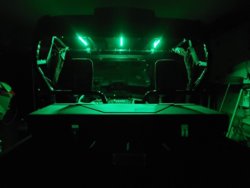
Also installed the 7.5" rear led light bar to my roof. Hated to drill holes in the roof but I have also ordered the Honda canvas rear cab panel which won't be here for a few days and I think the panel would make the light shine through it.

So for now this is the end of my build until the last 2 parts arrive and I get some more free time to work on it.

Want to thank all who committed and had suggestions. Hope to return the favor down the road.

20200222 192109 20200222 192211 20200223 183125
 
P

planenutz

Member
Mar 29, 2019
8
28
13
New Zealand
Ownership

  1. 700-2
It's interesting to note that although we are several thousand miles apart, our basic requirements are really not too different.

I've been meaning to post a few photos for ages but have never got around to it, so here goes...

This is my 700-2P, purchased mainly for hunting. We do a few trips a year where we spotlight for pests at night so this machine is rigged for that kind of mission. I fitted an aftermarket winch and beefed up the front bash-plate, installed the LED light-bar on the front and added small LED units either side for peripheral vision. The "C-Frame" on the back is so you can stand on the back and brace yourself in there when on uneven ground and the gun-rack on top securely holds two rifles. We don't run a lid on the cab because I find it better to have direct visual contact with the guys on the back and it eases verbal communication as well. Similarly we don't run with a window either - if you're cold either take a concrete pill and harden up, or stay at home!

I also added a reversing light and made up my own switch panel with a USB outlet and a Voltmeter. This week I put heavy duty springs on the front shocks and last month I manufactured a front carrier as well as a box for the back... that's a long story in itself. When this photo was taken I'd just damaged a wheel rim so it has a factory rim on the rear. On the look-out for a second-hand replacement.

When we're out and about we normally run three up or sometimes four up. If we're three up we have the driver dedicated to that job with a shooter and a guy spotlighting standing in the back. If we're four up we have the driver and a second spot-light operator in the front. It works well. Not shown in this photo is the standard canvas gear bag I put up behind the driver so the guys on the back have an ammo pouch and places to stash some food.

All the added equipment is designed to be easily fitted or removed without tooling using the standard ROPS clamps.

If anyone is interested in additional photos let me know.
2019 01 27 162751


20200125 144009

The Front Carrier is mainly designed to carry bum-bags and daypacks and saves them from getting under peoples feet in the rear tray. It's been test loaded to 100kg (220 Ibs) and I have no doubt it could handle a deer if necessary. Slots are for ropes/tie-downs etc.

20200219 172203

This rear-mounted container is a temporary setup for a specific hunting competition we have coming up in a couple of weeks. It is attached using non-dedicated mounting brackets that, like everything, is Quick Disconnect. Two pins and this box is removed in about 5 seconds.
 
Last edited:
J

jason99ws6

New Member
Dec 1, 2019
3
5
3
Loganville, GA
Ownership

  1. 700-2
Sorry for boring everyone with my thread but I was hoping to show some of the guys that are hunters like me some of my ideas and maybe they can share some of their ideas and mods.

Please feel free to post your ideas here as I have several more things I want to add but right now I'm tapped out of funds from buying and moding right off the bat.

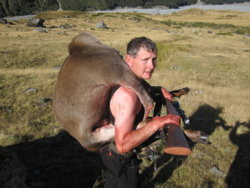
Hopefully my next mods will be a 2nd battery set up and small winch added to the rear roll bar for loading hogs and deer by myself with the bed tilted up. I'm 63 now and can't do like I used to by myself anymore.

If I find a photo if the winch install I'll upload it so folks can see what I'm getting at.

Like this.

View attachment 185921
We just run the rope for the winch over the top to pull them up into the bed.
 
Diverguy

Diverguy

Well-Known Member
Oct 8, 2018
120
321
63
PA, USA
Ownership

  1. 700-4
I just finished mounting a 2500# winch on my upper roll bar. It just fit on the top side, between my roof and roll bar. No extra battery, I'll keep machine running when winching that big ole' buck into my bed. I loaded 4 deer last season with a bad back and bad shoulders...no more of that nonsense. lol I tried the same Kolpin gun grips, but the locking pin wasn't holding well.
 
advertisement
ChrisM

ChrisM

Active Member
Feb 19, 2020
63
161
33
West Central Alabama
Ownership

  1. 700-2
I just finished mounting a 2500# winch on my upper roll bar. It just fit on the top side, between my roof and roll bar. No extra battery, I'll keep machine running when winching that big ole' buck into my bed. I loaded 4 deer last season with a bad back and bad shoulders...no more of that nonsense. lol I tried the same Kolpin gun grips, but the locking pin wasn't holding well.
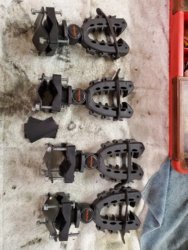
Mine have 4 bolts and a locking bolt for angle adjustment.

They don't move once tightened in position.
7fca6e75c0fe4e4393a8ee856e2f97ec

Sent from my SM-N976V using Tapatalk
 
  • Like
Reactions: Backwoods
ChrisM

ChrisM

Active Member
Feb 19, 2020
63
161
33
West Central Alabama
Ownership

  1. 700-2
I just finished mounting a 2500# winch on my upper roll bar. It just fit on the top side, between my roof and roll bar. No extra battery, I'll keep machine running when winching that big ole' buck into my bed. I loaded 4 deer last season

Got some photos of how you mounted it, bracket used?

You said on top if roll bar, did you cut a hole in your roof for cable and fairhead?

Sent from my SM-N976V using Tapatalk
 
  • Like
Reactions: Glock21user
Gator

Gator

The Most Unknown Member
Lifetime Member
Sep 16, 2015
2,488
10,464
113
Louisiana
Ownership

  1. 700-2
I'd like to see more pictures of the "C-Frame"
That gives me some ideas
 
  • Like
Reactions: Glock21user
Diverguy

Diverguy

Well-Known Member
Oct 8, 2018
120
321
63
PA, USA
Ownership

  1. 700-4
Got some photos of how you mounted it, bracket used?

You said on top if roll bar, did you cut a hole in your roof for cable and fairhead?

Sent from my SM-N976V using Tapatalk
I have a 700-4, so my roof extends back. I used the HF $4.99 mounting plate, and used a single "U" bolt to secure it. I want to add another U bolt, but need to weld an extension on the mounting plate for it. My Pioneer is at my cabin, so I can't get pictures. It tucked right up in there with fairlead exposed. I have seen them mounted upside-down under the bar, but my fishing rod rack sits there
 
ChrisM

ChrisM

Active Member
Feb 19, 2020
63
161
33
West Central Alabama
Ownership

  1. 700-2
It's interesting to note that although we are several thousand miles apart, our basic requirements are really not too different.

I've been meaning to post a few photos for ages but have never got around to it, so here goes...

This is my 700-2P, purchased mainly for hunting. We do a few trips a year where we spotlight for pests at night so this machine is rigged for that kind of mission. I fitted an aftermarket winch and beefed up the front bash-plate, installed the LED light-bar on the front and added small LED units either side for peripheral vision. The "C-Frame" on the back is so you can stand on the back and brace yourself in there when on uneven ground and the gun-rack on top securely holds two rifles. We don't run a lid on the cab because I find it better to have direct visual contact with the guys on the back and it eases verbal communication as well. Similarly we don't run with a window either - if you're cold either take a concrete pill and harden up, or stay at home!

I also added a reversing light and made up my own switch panel with a USB outlet and a Voltmeter. This week I put heavy duty springs on the front shocks and last month I manufactured a front carrier as well as a box for the back... that's a long story in itself. When this photo was taken I'd just damaged a wheel rim so it has a factory rim on the rear. On the look-out for a second-hand replacement.

When we're out and about we normally run three up or sometimes four up. If we're three up we have the driver dedicated to that job with a shooter and a guy spotlighting standing in the back. If we're four up we have the driver and a second spot-light operator in the front. It works well. Not shown in this photo is the standard canvas gear bag I put up behind the driver so the guys on the back have an ammo pouch and places to stash some food.

All the added equipment is designed to be easily fitted or removed without tooling using the standard ROPS clamps.

If anyone is interested in additional photos let me know.
View attachment 186517

View attachment 186529
The Front Carrier is mainly designed to carry bum-bags and daypacks and saves them from getting under peoples feet in the rear tray. It's been test loaded to 100kg (220 Ibs) and I have no doubt it could handle a deer if necessary. Slots are for ropes/tie-downs etc.

View attachment 186531
This rear-mounted container is a temporary setup for a specific hunting competition we have coming up in a couple of weeks. It is attached using non-dedicated mounting brackets that, like everything, is Quick Disconnect. Two pins and this box is removed in about 5 seconds.

Did you build or buy the front rack? That could come in very handy. Also is that padded shooting bar mounted in between the front bars? I'm planning to do something for that for mine if it is. Please post a photo of it.
 
Last edited:
  • Like
Reactions: Glock21user
P

planenutz

Member
Mar 29, 2019
8
28
13
New Zealand
Ownership

  1. 700-2
I didn't want to steal Chris' thread but as it's all about hunting mods it's probably the best place to post the info... hope that's OK @ChrisM

The "C-Frame" is exactly that... a "c" shaped frame manufactured from the same tube as the ROPS. I have seen a lot of "cages" put on the back of SxS's and trucks for shooting but I never liked the way you had to duck under the top bar to get in and out. When carrying a rifle that just begs for it to be pointed in the wrong direction. This C-Frame allows you to easily move in an out without having to duck under anything:

20200227 134815 resized


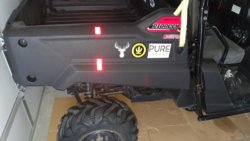
In this top view you can see it has the opening in the centre. You climb on board, slide through the (generous) gap and lean back on the padded tube. If you're carrying a rifle it can remain pointed in a safe direction at all times. When you're on the back and want to get off it is really hard to see the rear wheels so I've put some red reflective tape on the side of the tray to mark the apex of the tires so you don't have to feel your way down.

20200227 144113 resized

The C-Frame is clamped to the ROPS frame using QD clamps at the top and a plate at the bottom which has a couple of holes so you can adjust the height of the frame up and down - depending on how low your ass is to the ground. It's very simple but very effective.

The Front Rack is something I made myself, Chris. I found I always needed somewhere to put gear but when you have people on the back you don't want your stuff getting under their feet. The downside to the Front Rack is of course forward visibility, so you don't go putting big stuff on there... but its very useful for small bumbags and day-packs etc.

The Rifle Rack is also attached using ROPS Clamps. Literally takes a few seconds to remove or install. My mate wanted a "rest" to be able to shoot from so I made this setup so it had three points of contact (sturdy), the rifles were low and out of the way when not in use and the cross-members are padded so you can use them as a rest when shooting.

Yes, that is a padded shooting rest at the front...

20200227 134710 resized


Again this is attached using QD ROPS clamps. It is simply some 1" tube with some foam on it. A couple of short pieces of flat bar was welded onto the ends of the pipe so I could attach the clamps. Real simple. Again, pops on and off in seconds. The "U" in the middle is so that when you have a shooter up front who needs to disembark - for example to open a farm gate or to pick up a dead rabbit - he can place the gun down with the butt on the seat and the fore-end on the padded bar and it won't move around and make a nuisance of itself while the driver is moving the vehicle. Again it works well and makes the operation safer.

I've included a photo of the Switch panel just for laughs...

20200227 134740 resized


The "Rear View Camera" is for the rearward facing light. I wanted to be able to manually turn this on and off, not use the gear selector. Sometimes you just need a rearward facing light (!). I have a 12Vdc accessory plug for spotlight power on the back and this is operated by the "Spy Mode" switch. "Bunny Burners" are on the front bull bar. the "Darkside Lights" are the side LED's while the "Burn ya' Bastard" is of course the LED Light bar up top. The other two are self-explanatory. The switch at lower centre is the Master Switch for the accessory items and controls power to the separate Fuse Board I installed for all the other items, including the UHF radio.

I'm the laziest person I know so with all these items easy to install and remove it makes the Pioneer really practical and makes my life simple. If we're going up the river for an afternoon swim we can reconfigure for that mission in just a couple of minutes while the engine warms up or if we're going for deer we can leave the C-Frame behind and add the front carrier. Whatever suits the needs at the time.
 
ChrisM

ChrisM

Active Member
Feb 19, 2020
63
161
33
West Central Alabama
Ownership

  1. 700-2
Plans? PLANS????? Bwahahaha! Hell no! It was all done with the MK 1 eyeball, an angle grinder and some bird-s*** welding. Haha.

:)

I could maybe look at sketching something out if you were really keen?


Would be nice if you could, be nice to have a guideline to go by.
 
  • Like
Reactions: Mudwing
advertisement

About us

  • Our community has been around for many years and pride ourselves on offering unbiased, critical discussion among people of all different backgrounds. We are working every day to make sure our community is one of the best.

User Menu

Buy us a beer!

  • Lots of time and money has gone into making sure the community is running the best software, best designs, and all the other bells and whistles. Care to buy us a beer? We'd really appreciate it!

    Beer Fund!

    Club Membership!