P1000m5 Oh “Karen”

Adam490

Adam490

HFA Grand High Wizard
Lifetime Member
Supporting Member
Apr 7, 2019
8,140
61,478
113
Covington, LA
Ownership

  1. 1000-5

  2. Talon R LV
Bed Storage addition

-First I popped off the Deluxe Bed panels
-Used a palm router to open up the holes in the panel to fit the push pin button
-Screwed the ball end of the push pins into the existing locations (it doesn’t seem like the screw right in, but they do. There’s just a cap on the back side you have to get thru. I used my drill and wound them home)
-Used an oscillating tool to cut the opening in the bed
-Measured out where I wanted the hinge that I got from the hardware store and cut in half (I went 3/8” from the bottom of the panel)
-Transferred the holes from the hinge to the panel (Tip..if there’s dried mud on your machine it makes it easier to see the marks for drilling)
-Attached the panel to the SxS to line drill the holes
-Drilled a 3/16” hole for the rivet
-Used a razor blade to trim the lip off the panel
-Attached the Hinge to the SxS first
-Then attached the hinge to the panel

I only used 4 push pins per side, the others are for looks. I have the actual locking pins on the 4 corners.

A few of the things I’m going to have in the pockets

-Hand tools
-Ryobi 1/2” impact
-knives
-Imazing 2500A 20,000mAH Jump pack https://www.amazon.com/dp/B07L5HPVJZ/?tag=sxsweb24-20
-First aid kit (HSA eligible FYI)
-Tire Repair kit Amazon.com: ORCISH 98Pcs Tire Repair Plug Kit Heavy Duty Flat Tire Repair Kit Universal Tire Repair Tools & Tire Repair Set for Car Motorcycle Truck RV Jeep ATV Tractor Trailer Tire Patch Kits Puncture Repair Kit: Automotive
-VIAIR 87P Air Compressor

Next is going to be the cooling fans and heat shields, just waiting on the mail person!

View attachment 211348 View attachment 211349 View attachment 211350 View attachment 211351 View attachment 211353 View attachment 211354 View attachment 211355 View attachment 211356 View attachment 211357 View attachment 211358 View attachment 211359 View attachment 211360 View attachment 211361
Go ahead and drill some extra drain holes in the bottom of the door. When you wash it or it rains, water will run down in there and the factory drain hole will clog from dust/dirt/mud. If you get into water or mud up to the bottom of the doors (which isn't much more than floorboard deep) you'll be happy you've got the extra drain holes. I'd advise picking up a stacking toolbox system (Rigid, Milwaukee, DeWalt, Craftsman) for the impact and other tools you'll want to keep out of the elements. Pick up some quality dry bags to stuff other things in when you put them in the doors. The storage is fantastic but everything in there will get dust/mud/water.
 
Plante11

Plante11

Active Member
Jun 14, 2020
45
110
33
Maine
Ownership

  1. 1000-5
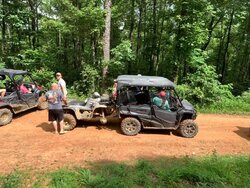
This is why I need a rig full of supplies 😉
*taken from Facebook

Side note, my brother has a CFMoto, and we ride together more often than not.

01AF225C 17A6 4E07 8051 E978960BB75F
 
Plante11

Plante11

Active Member
Jun 14, 2020
45
110
33
Maine
Ownership

  1. 1000-5
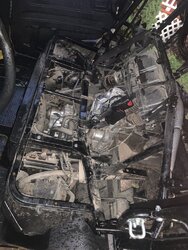
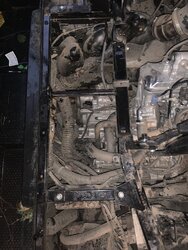
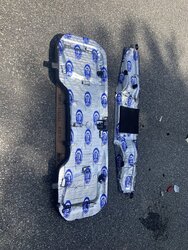
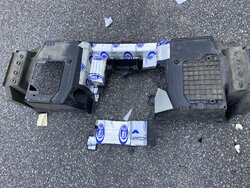
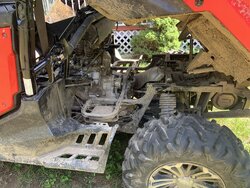
This past weekend I tore her apart, added the Thermo-Tec sound/heat barrier.

-Pulled off the seat, and removed the seat back
-Removed all of the plastics surrounding the cabin and bed
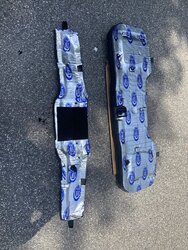
-Rolled out the entire roll of Thermo-Tec 14620 60" X 36" Heat and Sound Suppressor
-Washed the pieced I was applying the suppressor to (Seat bottom, plastic guard between front seats and Valve cover, rear passenger floor board). I used Dawn dish soap and warm water and let it dry in the sun.
-Removed the foam that was on the front passenger plastic, I saved the foam and glued it back on after the suppressor was applied.
-Applied the Thermo-Tec
-Put her back together

If I had to do it again, I would cut the mat into smaller more manageable pieces. I tried to apply it in one large piece and fought with it the entire time. I used almost the entire roll of Thermo-Tec, if I did it in smaller pieces I may have used less as well as limited the amount of grey hair I added.

Thanks to @michdave for the information and advice.

Currently waiting for the dealer to replace the clutch cover and 1-3-5 clutch pack.

Next up;
- 3 Spal fans
-Tusk Digital thermostat
- A set of @RB3offroad door bushings to kill that god awful door rattle

410694AD 931A 4AE4 A860 9DAF2928899A FB35CA33 A492 46A0 8CA4 A2567C3FD7E5 55E88124 C197 48C2 A1B3 5563C4628B47 46B1840D 80BD 466F B9E0 FF89ECFA7E3C 9C14DC15 6800 4D26 B104 9113E34B0CB4 0468699A 9665 4B2C AB3B 76F03348A08D
 
Plante11

Plante11

Active Member
Jun 14, 2020
45
110
33
Maine
Ownership

  1. 1000-5
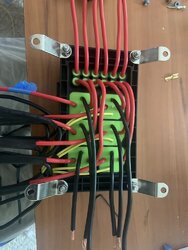
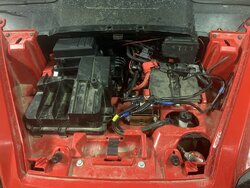
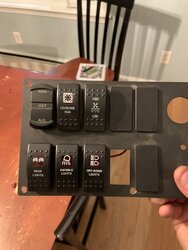
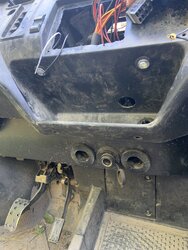
-Finished wiring up my switch panel, minus one switch waiting on the mail. Switch plate came from Justin Beatty on Facebook.

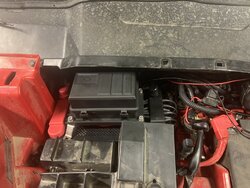
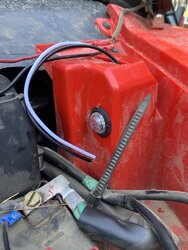
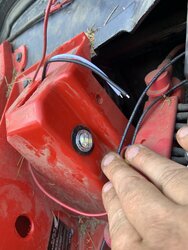
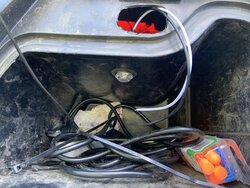
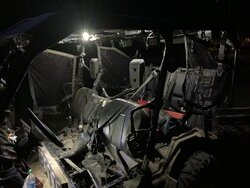
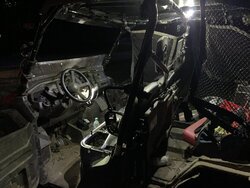
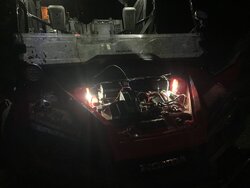
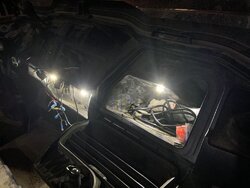
-Added some interior lighting for the cab, glove box, and under the hood.

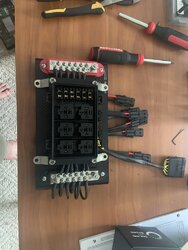
-Wired up the cube lights, flood lights, and cooling fans to the new plate and dual battery setup

Now I’m just waiting on my 3D printer in

DD9CEA1C 5B41 441B 80F5 98D7597A7905 DE12FD00 5D60 48B9 BAF5 AF40B42566E0 22BABAE5 D58E 49DF B870 ADE009CF2697 ACF83FA1 318B 4B72 9FE4 93E529358116 CB695933 D936 4E89 A850 623E0E07DEC0 5E4AC980 5C8C 4AB9 A93A 7506B3AFC754 5BF08B15 6DA5 4D36 A617 832A9C098FD6 D89797DA 93F7 42BC A413 2C114A2FE964 008DE033 29E3 4F5B B36F AADE16161CF4 58332237 2C39 4A0E 9E01 5ADC01A545BC A64FD875 0238 4A49 BBD6 4ABDFD62E4CE 3BAEC1DC 0D89 4FB1 82E3 2E062B3F5720 FDB58E9C 6A73 4552 8A77 A462427FE430
 
Plante11

Plante11

Active Member
Jun 14, 2020
45
110
33
Maine
Ownership

  1. 1000-5
For the fuse/relay box I bought a waterproof box off amazon, as well as 2 buss bars. I used various connections from allelectronics.com. I also followed a pretty awesome write up from someone on a Tacoma forum.

12V Auto Waterproof Fuse Relay... https://www.amazon.com/dp/B07MR64XK1?tag=sxsweb24-20

(Pair - Red & Black) 12 Terminal... https://www.amazon.com/dp/B07C4W7YKG?tag=sxsweb24-20


For the switch plate, I would recommend hitting up Justin Beatty on Facebook. Amazing product! I also recommend when your buying switches to buy them from the same company. Not 5 different ones for 10 switches. I use eBay switches, but always the same seller.

MICTUNING LED Digital Panel... https://www.amazon.com/dp/B077XDHQNR?tag=sxsweb24-20

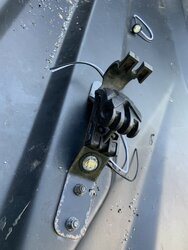
For the interior lights I used a unibit to drill 3/4” holes. Mounted them on the center roof brackets on both sides. I added one to the glovebox and 2 under the hood.

KATUR 3/4Inch Round LED Front... https://www.amazon.com/dp/B075L9S1JG?tag=sxsweb24-20

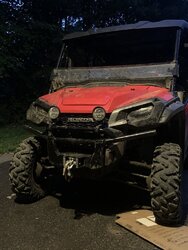
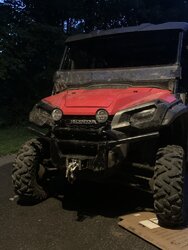
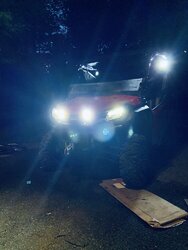
The spot lights are Hikari Rounds, I got them for $15 so I didn’t expect much, but I really like them. I tried them on the hood and didn’t like the glare I got, so I moved them to the front bumper Making sure I didn’t block the radiator or headlights. I also found bar mounts that can be adjusted to mount horizontal or vertical, as well as 30 and 60 degrees.

Hikari 2020 New, Round... https://www.amazon.com/dp/B083K86FBN?tag=sxsweb24-20

Off-Road ATV UTV Light Bar Mounts... https://www.amazon.com/dp/B082XKHYXL?tag=sxsweb24-20

The LED cubes are a NiLight 4 pack for $25. I plan to use the other two for reverse lights. As for mounting them on the B pillar, I just drilled a hole where I thought it could fit and mounted them up. I need to adjust them a little, but they do great in the woods

LED Light Bar Nilight 4PCS 18W... https://www.amazon.com/dp/B01HTXANFC?tag=sxsweb24-20

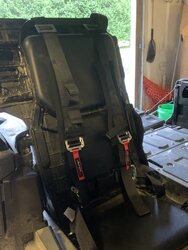
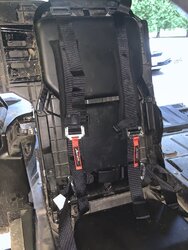
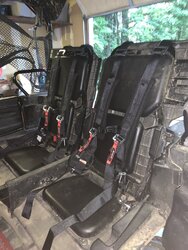
I also added 2 harnesses to the back. I had to order 90 degree seat belt brackets to keep the mounts from digging into the passengers hips. I attached them to the old seat belt mounting locations with hardware that I matched up to the original.


4 Point Harness with 2 Inch... https://www.amazon.com/dp/B07MJC82YF?tag=sxsweb24-20

E87C1EBD 65BE 45F0 AC59 E4CC209C9050 6A412792 6864 4CAF 9760 71D8D5D95760 707F87EC 7B4B 425A BE8C D3071CF64B23 EC5FC381 2067 4CCB A9CE 08CA97502E44 678EBF85 FF05 47F4 BCEA C72216CEE885
 
advertisement
Plante11

Plante11

Active Member
Jun 14, 2020
45
110
33
Maine
Ownership

  1. 1000-5
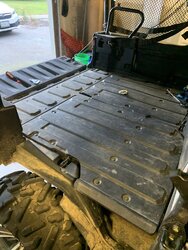
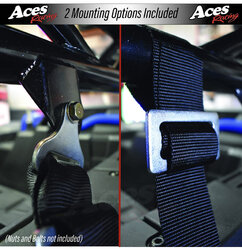
Yes the seats still close flat. It took a little fine tuning, but I got them flat. To attach them on the back, I removed the two screws on the back of the seat all the way on top. Then I looped the harness around using the mounting buckle pictured on the right

D62DDD8A 7910 4B79 8CC5 459A3F6337E5
 
Chevy_cowboy

Chevy_cowboy

Member
Lifetime Member
Aug 12, 2020
23
44
13
Southern Illinois
Ownership

  1. 1000-5
Yes the seats still close flat. It took a little fine tuning, but I got them flat. To attach them on the back, I removed the two screws on the back of the seat all the way on top. Then I looped the harness around using the mounting buckle pictured on the right

View attachment 219584


Thanks, I think I'll make the switch too. The seatbelt was really bothering my daughter on our first ride, the buckles were digging into her sides and the ratchet mechanism kept tightening on bumps and squeezing her.
 

Similar threads

About us

  • Our community has been around for many years and pride ourselves on offering unbiased, critical discussion among people of all different backgrounds. We are working every day to make sure our community is one of the best.

User Menu

Buy us a beer!

  • Lots of time and money has gone into making sure the community is running the best software, best designs, and all the other bells and whistles. Care to buy us a beer? We'd really appreciate it!

    Beer Fund!

    Club Membership!