I have been looking for a set of skid plates since I purchased the Pioneer 1000-5 but had a hard time swalling the price tag for the current offerings. At this time there are few choices; (1) you can get the honda skid plates (2) you can get the Trail Armor (3) you can now get the S&S fabrication
With option 1, the Honda accessories, they don't provide all that much protection as it is the exact same design as the stock ones (size, location) except they are made of aluminum.
With option 2, the cost is much higher than the Honda option and it has great coverage of the underside. However there are a few reasons I chose to not go this route. This system hangs out into the wheel well in the front and with larger tires, and stock a-arms, trimming is required. Also, This system is the most expensive and is made of plastic. Many people use this and it seems very durable but I am more a fan of metal.
Option 3 is what I purchased and I believe S&S is selling this exact setup for $750 including shipping and the a-arm Guards.
________________ Install Write-up ___________________
First off, this is some thick strong aluminum material, i am not sure on the thickness but believe it is somewhere around 1/4" or slightly thicker? They are manufactured in KY, and he doesn't seem to have a website, just a facebook page.
The first thing I did was lay everything out on the ground to make sure I understood how it all went together and check the installation hardware.
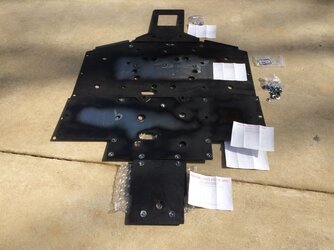
The instructions tell you the order to install and also color code the holes with green and red to indicate which holes use the "stock" locations and which ones will require drilling and placement of a self tapping screw. The green is to indicate stock hole locations and red will require drilling.
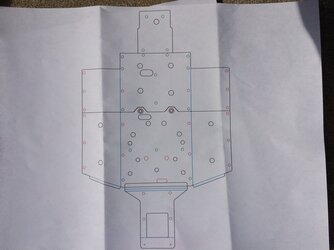
The skid system is made of 4 separate pieces and the order of installation is important. The first piece to install is the largest and is placed directly in the center of the unit (under the front bench area). The "lips" on this peace go toward the front of the unit and rise up into the wheel well very slightly.
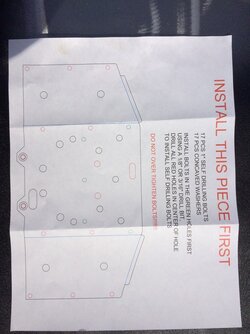
I will note that the instructions state to use the self tapping screws (1") for all holes but it would be my suggestion (and I called S&S to verify) to use the stock hardware at first, in the green locations, to get everything in place and lined up correctly. Also, I kept the stock hardware in those locations as it seems to hold it great and I could always go back to stock if that was ever desired (yeah right).
The second piece goes directly behind the first and uses the same process as the first one. The bends and whole locations were perfectly aligned and there was no issues
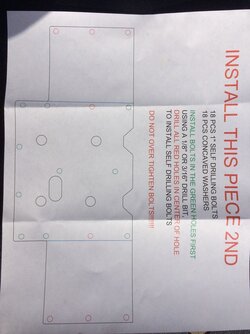
The third piece goes behind the first two and goes back under the rear diff.
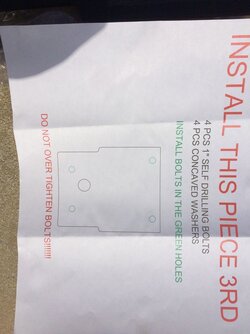
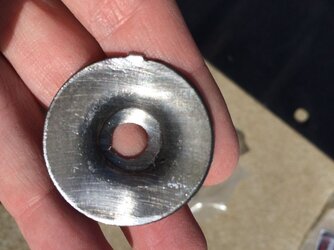
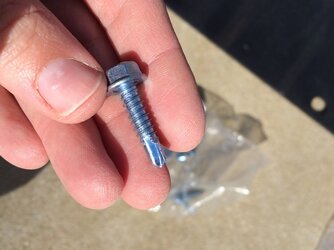
The kit comes with all the hardware in individual bags clearly marked what to use. This system uses the same "kind" of hardware as stock with nice recessed area for the head of the bolt to sit and protect it some. It looks like these were punched out of metal at his shop and not purchased hardware. This isn't bad and in fact it seems to be very thick and durable.
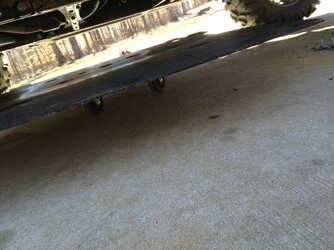
To place the skids I did not have a lift (I know what my next purchase is going to be for the barn) so I resorted to a dolly to get the skid into position and then crawled under the unit and raised it into place while getting the fist bolt in place. This is another reason using the stock hardware where you can is nice as the threads are there and no drilling or alignment concerns arise.
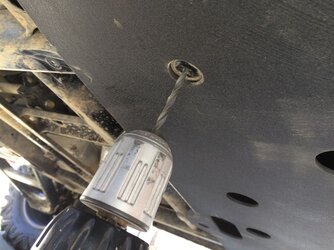
For the holes that are "new" and require the use of the new self tapping screws I pre-drilled the whole first and I will say the metal is either very hard on the frame or my drill bit and arm muscles are weak...
When installing the front skid plate you use two large 1" bolts that go into existing threads and I noticed that the skid on the front didn't conform to the Pioneer as well in this location.
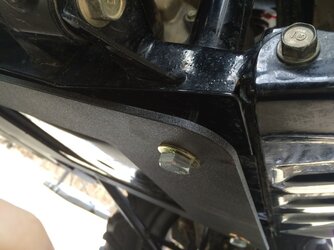
All it required though was cranking down on those bolts and it sucked the skid right up against the Pioneer easy enough.
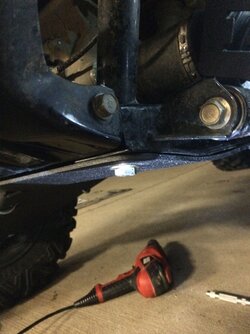
_________________ A-Arm Skids Install ____________________
For the A-arm skids its very easy to install. I started with the front skids, and there is a bolt that threads in through an existing thread down near the wheel
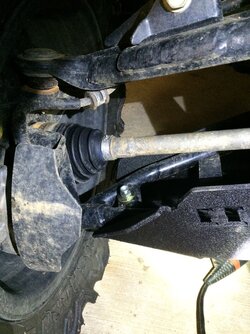
The upper two fasteners are classic u-bolts and are easy although getting hands in there can be challenging at times.
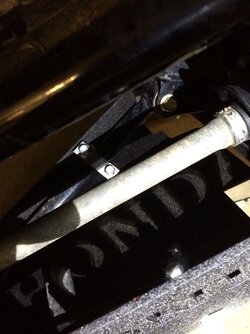
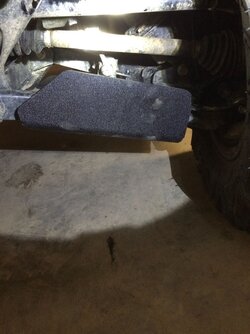
Here are the front a-arms installed...I really like how high they go to protect the boots and they have "Honda" engraved into them. He can put whatever you want in them (your name if so desired)...
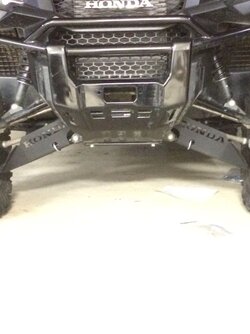
For the rear a-arms two bolts are used and go around a center post and a steal bar acts like a clamp on a u-bolt.
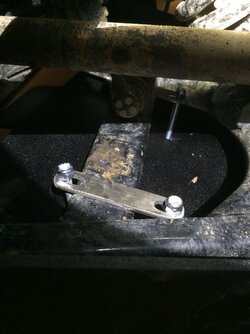
Again, everything on these a-arm guards fit great and hardware was very well laid out.
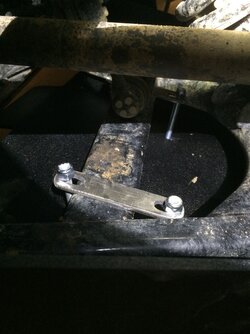
Here is a shot of it in place
With option 1, the Honda accessories, they don't provide all that much protection as it is the exact same design as the stock ones (size, location) except they are made of aluminum.
With option 2, the cost is much higher than the Honda option and it has great coverage of the underside. However there are a few reasons I chose to not go this route. This system hangs out into the wheel well in the front and with larger tires, and stock a-arms, trimming is required. Also, This system is the most expensive and is made of plastic. Many people use this and it seems very durable but I am more a fan of metal.
Option 3 is what I purchased and I believe S&S is selling this exact setup for $750 including shipping and the a-arm Guards.
________________ Install Write-up ___________________
First off, this is some thick strong aluminum material, i am not sure on the thickness but believe it is somewhere around 1/4" or slightly thicker? They are manufactured in KY, and he doesn't seem to have a website, just a facebook page.
The first thing I did was lay everything out on the ground to make sure I understood how it all went together and check the installation hardware.

The instructions tell you the order to install and also color code the holes with green and red to indicate which holes use the "stock" locations and which ones will require drilling and placement of a self tapping screw. The green is to indicate stock hole locations and red will require drilling.

The skid system is made of 4 separate pieces and the order of installation is important. The first piece to install is the largest and is placed directly in the center of the unit (under the front bench area). The "lips" on this peace go toward the front of the unit and rise up into the wheel well very slightly.

I will note that the instructions state to use the self tapping screws (1") for all holes but it would be my suggestion (and I called S&S to verify) to use the stock hardware at first, in the green locations, to get everything in place and lined up correctly. Also, I kept the stock hardware in those locations as it seems to hold it great and I could always go back to stock if that was ever desired (yeah right).
The second piece goes directly behind the first and uses the same process as the first one. The bends and whole locations were perfectly aligned and there was no issues

The third piece goes behind the first two and goes back under the rear diff.

The kit comes with all the hardware in individual bags clearly marked what to use. This system uses the same "kind" of hardware as stock with nice recessed area for the head of the bolt to sit and protect it some. It looks like these were punched out of metal at his shop and not purchased hardware. This isn't bad and in fact it seems to be very thick and durable.


To place the skids I did not have a lift (I know what my next purchase is going to be for the barn) so I resorted to a dolly to get the skid into position and then crawled under the unit and raised it into place while getting the fist bolt in place. This is another reason using the stock hardware where you can is nice as the threads are there and no drilling or alignment concerns arise.

For the holes that are "new" and require the use of the new self tapping screws I pre-drilled the whole first and I will say the metal is either very hard on the frame or my drill bit and arm muscles are weak...

When installing the front skid plate you use two large 1" bolts that go into existing threads and I noticed that the skid on the front didn't conform to the Pioneer as well in this location.

All it required though was cranking down on those bolts and it sucked the skid right up against the Pioneer easy enough.

_________________ A-Arm Skids Install ____________________
For the A-arm skids its very easy to install. I started with the front skids, and there is a bolt that threads in through an existing thread down near the wheel

The upper two fasteners are classic u-bolts and are easy although getting hands in there can be challenging at times.

Here are the front a-arms installed...I really like how high they go to protect the boots and they have "Honda" engraved into them. He can put whatever you want in them (your name if so desired)...

For the rear a-arms two bolts are used and go around a center post and a steal bar acts like a clamp on a u-bolt.

Again, everything on these a-arm guards fit great and hardware was very well laid out.

Here is a shot of it in place


