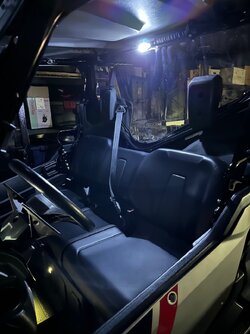
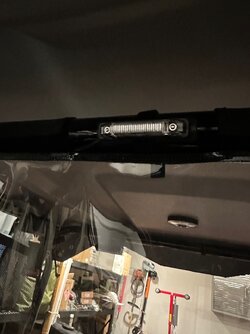
First post, been meaning to share this for a while but life gets in the way.
Short version: I want to share some information that I had a hard time finding or seeing detailed photos.
1) SuperATV flip out windshield upgrade: You can purchase an extended handle to get more airflow choices.
2) Quick Shield: Adding some photos of the product & installation process. Quick Shield
See below for photos and longer descriptions.
Background:
We finally purchased our 2023 1000-5 Pioneer Trail last April after a 6 month deposit & wait. Thank goodness the supply chain stuff is more back to normal at the time of this writing. Ordered the 2022 version but ended up with the orange 23. We love it! Much improvement over our previous 700-4. So much quieter than the 700 even comparing factory 1000 to the homemade sound insulated (construction bubblewrap) 700. The 1000 does everything better than the 700. If you're questioning an upgrade, just do it!
Currently has just over 1500 miles on it. It's amazing where thing thing can go just in Turf mode. We did learn that i-4wd will not come on from Turf mode if sitting still. We have gotten in the habit of switching to 2wd before getting to the rougher part of the trails. It engages fine if already in 2wd.
I'm a geek so check mpg. We regularly get between 18-22 mpg. The overall average has been 20.8. Doesn't seem to matter if we're on slow trails or running at speed on the back roads, it remains about the same. To be fair, the 700-4 averaged about the same as well.
Of course, photo is a requirement.

SuperATV Windshield Extended Handle upgrade:
I like the SuperATV flip out windshield but was always frustrated that it was basically either closed, barely open with air not really hitting you, or fully open with way too much air in your face at anything above 20mph. Seems like I searched all over the place with no luck for an extended handle. Was actually about to have a friend "create" one for me when I stumbled upon the Dirt Road Designs XXL handle. In all my searching I'd never found it on this forum. It was a little pricey, but everything for the SXS is and I figured this was a proven design that was guaranteed to work without trial and error.
DRD offers 2 sizes. The XL has 1 extra notch and the XXL has 2. I was worried the XXL would be a bit long when closed, and it is, but it hasn't caused any issues. I'm very glad I ordered the XXL instead of the XL.
Typically on a hot day we will run with it in the most extended handle position which gives good airflow but keeps the air from beating you in the face. It works great! One of the best mods I've done. Or at least it took care of one of the most frustrating things.
Installation: Well, I had taken some photos and intended to do this write up with "instructions" shortly after the install. That didn't happen so now I'm shooting from memory. Overall it's as simple as it seems. Pull the pin and swap out the handles. The spring is what was giving me fits. He provides a longer spring "just in case" you need it but the instructions weren't too clear on that aspect. I think I ended up using the original. He said something along the lines of including the longer one because sometimes it's needed or the original gets lost. I forget. He said the longer one needs cut to fit (which is why I contacted him because it was way too long so therefor confusing me).
I contacted the seller during install as mentioned above. He was very responsive and helpful. We ended up chatting a bit. Seemed like a nice fella with a small 1 man business providing some parts for a hobby he enjoys. (Like the parts/guys on here) He said he actually developed this for himself and people kept asking where he got it so that's how he started selling them. To be clear, I have no affiliation with him or the company. I just like supporting small business and was so very happy to find this upgraded part.
Link to the hard to find part again: (LINK REMOVED for being a malicious website.)


Quick Shield Installation:
I know this upgrade/mod is commonly known on this forum. It's where I heard about it. But I could not find any photos to get an idea of exactly what I would be purchasing. I had some concerns if it would work with the new model etc.
Link to product page: Heat Shield — Quick Shield
I contacted the seller @trigger via email with some questions before ordering. He was very responsive and answered all my questions. The photos below would have answered the questions that I had, that's why I wanted to share them.
1) How far does the shield cover? Covers under the seat & up the back of the front seat.
2) Is there a version for the rear seat? Not at the time of my purchase. He said the test pieces for the rear didn't sit the way he wanted.
3) Will it work with the under seat storage? Yes, just pull up the cover to access.
4) Does it help with heat, noise, and dust? Mostly for heat but also helps with noise and dust a little too.
My review:
1) Quick, easy to install, & fit well. Thick & nice material.
2) Definitely helps with heat. Way better! Still get some on the driver's side especially around the seat belt hole. It's just a hot area. I still tend to keep a windbreaker jacket rolled up in the gap between the seats behind my back. It serves two functions, reduces heat and can put on when it gets chilly.
3) Noise, probably some improvement but nothing really noticeable to me. We were mostly after heat reduction anyhow. Our previous 700 was nasty loud. Adding the bubble wrap insulation under the front seat all the way back to the rear under the bead made a huge difference. But it was still much louder than our 1000 as it came from the factory.
4) Dust, I'm sure it helped a decent amount but didn't notice specifically. The Kemimoto Mid Panel was a huge improvement for dust and was really cheap on Ebay.
5) You could attempt to make some thing similar yourself. But the DIY quality and fit would not be in the same ballpark as the Quick Shield. If you purchased equivalent materials, you would most likely have more money in it than just buying from Bryan. More than likely you would end up with far inferior materials with a poorer fit and have more money in it.
Installation:
Again, I had intended on a how-to write up but oops. The memory has faded. I can give the basic steps.
1) Pull the bottom seat.
2) Remove the seat back by removing the bolts from the mid panel area. Seems like some of these were a little hard to get just due to the bed being in the way and not going as high as I wanted.
3) Remove the center seat belt using 5/8" wrench. (Based on photo, not my memory)
4) Position the Quick Shield over all the buckles and bolts.
5) Fish the Seat Belt through and bolt it back down.
6) Reinstall Seat Back & Bottom.


I've also done some nice mods with parts from the Club Store. But those are pretty well covered already on the forum and through the store front. Also utilized Amazon and Ebay for a few things.
Some of my other favorite mods:
1) Plug and Play items from the Club Store. I like to DIY, but the factory fit connectors keep everything sealed and take the trial and error our of everything. I feel like it ends up being cheaper or at most barely more expensive and the end product is much better.
. a) Street legal kit
. b) Reverse Light
. c) Key On accessory plug
. d) LED Light Bar
2) Kemimoto Mid Panel. It was like $45 on Ebay! Works great and the window drops when we have rear passengers.
3) Accessory Fuse Panel from Amazon wired from relay. (connected with Club Store Plug)
4) Volt Meter with Dual USB charge ports. Fits in switch panel. Absolutely love this. Like $15 on Amazon.
5) Kemimoto Bluetooth Speaker. This one my wife likes. Overall we're ok with it for the price point & it was on sale, but it definitely leaves something to be desired. We may upgrade someday.
6) LED Headlight bulbs from Ebay. They did not work as intended. Left dark spots in the center during high beam. They were brighter than the factory bulbs but didn't light the area in front on high beam. This was before the LED Light bar was available for our model in the Club Store. Adding the Light Bar took care of the dark spot so we kept the LED Headlights to take some of the amp load off the charging system. Shared photos with the seller and he refunded the money (yeah that bad) but said he hadn't seen the issues with other SXS's. I may end up going back to the factory bulbs as winter hit us before testing the current setup well.
7) Tusk Terrabite tires. We haven't installed on the 1000 yet but absolutely loved them on the 700.
8) I hope to replace the horn with a train horn or such in the future. Just having trouble deciding where to mount and keep it protected from the mud.
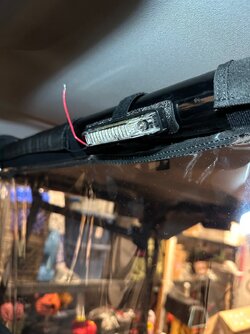
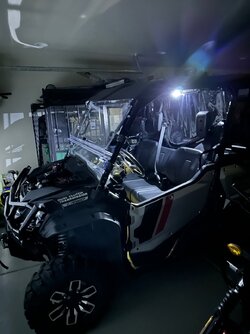
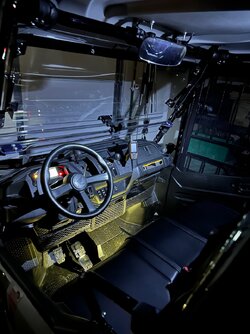
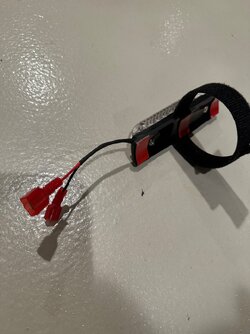
Wish List: I would like to see a "real" dome light become available in the Store. We have the little factory foot light LED on the Trail, but it doesn't do much. Would like to see a plug and play splitter (think I saw the Club Store owner say this is in the works) that ties into some overhead LED. I had considered adding an LED light strip down the center of the roof or along the roll bar but haven't attempted it yet. The strip lighting may come unglued so that's been part of my hesitation. Will eventually look into something if the Club Store doesn't come up with a plug and play item.
A couple more "action" shots. Sorry no good ones.


Early photo before the roof came in. It's not this clean at the moment.
Hope this has been helpful to someone. Let me know if you have any questions.
Short version: I want to share some information that I had a hard time finding or seeing detailed photos.
1) SuperATV flip out windshield upgrade: You can purchase an extended handle to get more airflow choices.
2) Quick Shield: Adding some photos of the product & installation process. Quick Shield
See below for photos and longer descriptions.
Background:
We finally purchased our 2023 1000-5 Pioneer Trail last April after a 6 month deposit & wait. Thank goodness the supply chain stuff is more back to normal at the time of this writing. Ordered the 2022 version but ended up with the orange 23. We love it! Much improvement over our previous 700-4. So much quieter than the 700 even comparing factory 1000 to the homemade sound insulated (construction bubblewrap) 700. The 1000 does everything better than the 700. If you're questioning an upgrade, just do it!
Currently has just over 1500 miles on it. It's amazing where thing thing can go just in Turf mode. We did learn that i-4wd will not come on from Turf mode if sitting still. We have gotten in the habit of switching to 2wd before getting to the rougher part of the trails. It engages fine if already in 2wd.
I'm a geek so check mpg. We regularly get between 18-22 mpg. The overall average has been 20.8. Doesn't seem to matter if we're on slow trails or running at speed on the back roads, it remains about the same. To be fair, the 700-4 averaged about the same as well.
Of course, photo is a requirement.
SuperATV Windshield Extended Handle upgrade:
I like the SuperATV flip out windshield but was always frustrated that it was basically either closed, barely open with air not really hitting you, or fully open with way too much air in your face at anything above 20mph. Seems like I searched all over the place with no luck for an extended handle. Was actually about to have a friend "create" one for me when I stumbled upon the Dirt Road Designs XXL handle. In all my searching I'd never found it on this forum. It was a little pricey, but everything for the SXS is and I figured this was a proven design that was guaranteed to work without trial and error.
DRD offers 2 sizes. The XL has 1 extra notch and the XXL has 2. I was worried the XXL would be a bit long when closed, and it is, but it hasn't caused any issues. I'm very glad I ordered the XXL instead of the XL.
Typically on a hot day we will run with it in the most extended handle position which gives good airflow but keeps the air from beating you in the face. It works great! One of the best mods I've done. Or at least it took care of one of the most frustrating things.
Installation: Well, I had taken some photos and intended to do this write up with "instructions" shortly after the install. That didn't happen so now I'm shooting from memory. Overall it's as simple as it seems. Pull the pin and swap out the handles. The spring is what was giving me fits. He provides a longer spring "just in case" you need it but the instructions weren't too clear on that aspect. I think I ended up using the original. He said something along the lines of including the longer one because sometimes it's needed or the original gets lost. I forget. He said the longer one needs cut to fit (which is why I contacted him because it was way too long so therefor confusing me).
I contacted the seller during install as mentioned above. He was very responsive and helpful. We ended up chatting a bit. Seemed like a nice fella with a small 1 man business providing some parts for a hobby he enjoys. (Like the parts/guys on here) He said he actually developed this for himself and people kept asking where he got it so that's how he started selling them. To be clear, I have no affiliation with him or the company. I just like supporting small business and was so very happy to find this upgraded part.
Link to the hard to find part again: (LINK REMOVED for being a malicious website.)
Quick Shield Installation:
I know this upgrade/mod is commonly known on this forum. It's where I heard about it. But I could not find any photos to get an idea of exactly what I would be purchasing. I had some concerns if it would work with the new model etc.
Link to product page: Heat Shield — Quick Shield
I contacted the seller @trigger via email with some questions before ordering. He was very responsive and answered all my questions. The photos below would have answered the questions that I had, that's why I wanted to share them.
1) How far does the shield cover? Covers under the seat & up the back of the front seat.
2) Is there a version for the rear seat? Not at the time of my purchase. He said the test pieces for the rear didn't sit the way he wanted.
3) Will it work with the under seat storage? Yes, just pull up the cover to access.
4) Does it help with heat, noise, and dust? Mostly for heat but also helps with noise and dust a little too.
My review:
1) Quick, easy to install, & fit well. Thick & nice material.
2) Definitely helps with heat. Way better! Still get some on the driver's side especially around the seat belt hole. It's just a hot area. I still tend to keep a windbreaker jacket rolled up in the gap between the seats behind my back. It serves two functions, reduces heat and can put on when it gets chilly.
3) Noise, probably some improvement but nothing really noticeable to me. We were mostly after heat reduction anyhow. Our previous 700 was nasty loud. Adding the bubble wrap insulation under the front seat all the way back to the rear under the bead made a huge difference. But it was still much louder than our 1000 as it came from the factory.
4) Dust, I'm sure it helped a decent amount but didn't notice specifically. The Kemimoto Mid Panel was a huge improvement for dust and was really cheap on Ebay.
5) You could attempt to make some thing similar yourself. But the DIY quality and fit would not be in the same ballpark as the Quick Shield. If you purchased equivalent materials, you would most likely have more money in it than just buying from Bryan. More than likely you would end up with far inferior materials with a poorer fit and have more money in it.
Installation:
Again, I had intended on a how-to write up but oops. The memory has faded. I can give the basic steps.
1) Pull the bottom seat.
2) Remove the seat back by removing the bolts from the mid panel area. Seems like some of these were a little hard to get just due to the bed being in the way and not going as high as I wanted.
3) Remove the center seat belt using 5/8" wrench. (Based on photo, not my memory)
4) Position the Quick Shield over all the buckles and bolts.
5) Fish the Seat Belt through and bolt it back down.
6) Reinstall Seat Back & Bottom.
I've also done some nice mods with parts from the Club Store. But those are pretty well covered already on the forum and through the store front. Also utilized Amazon and Ebay for a few things.
Some of my other favorite mods:
1) Plug and Play items from the Club Store. I like to DIY, but the factory fit connectors keep everything sealed and take the trial and error our of everything. I feel like it ends up being cheaper or at most barely more expensive and the end product is much better.
. a) Street legal kit
. b) Reverse Light
. c) Key On accessory plug
. d) LED Light Bar
2) Kemimoto Mid Panel. It was like $45 on Ebay! Works great and the window drops when we have rear passengers.
3) Accessory Fuse Panel from Amazon wired from relay. (connected with Club Store Plug)
4) Volt Meter with Dual USB charge ports. Fits in switch panel. Absolutely love this. Like $15 on Amazon.
5) Kemimoto Bluetooth Speaker. This one my wife likes. Overall we're ok with it for the price point & it was on sale, but it definitely leaves something to be desired. We may upgrade someday.
6) LED Headlight bulbs from Ebay. They did not work as intended. Left dark spots in the center during high beam. They were brighter than the factory bulbs but didn't light the area in front on high beam. This was before the LED Light bar was available for our model in the Club Store. Adding the Light Bar took care of the dark spot so we kept the LED Headlights to take some of the amp load off the charging system. Shared photos with the seller and he refunded the money (yeah that bad) but said he hadn't seen the issues with other SXS's. I may end up going back to the factory bulbs as winter hit us before testing the current setup well.
7) Tusk Terrabite tires. We haven't installed on the 1000 yet but absolutely loved them on the 700.
8) I hope to replace the horn with a train horn or such in the future. Just having trouble deciding where to mount and keep it protected from the mud.
Wish List: I would like to see a "real" dome light become available in the Store. We have the little factory foot light LED on the Trail, but it doesn't do much. Would like to see a plug and play splitter (think I saw the Club Store owner say this is in the works) that ties into some overhead LED. I had considered adding an LED light strip down the center of the roof or along the roll bar but haven't attempted it yet. The strip lighting may come unglued so that's been part of my hesitation. Will eventually look into something if the Club Store doesn't come up with a plug and play item.
A couple more "action" shots. Sorry no good ones.
Early photo before the roof came in. It's not this clean at the moment.
Hope this has been helpful to someone. Let me know if you have any questions.
Last edited by a moderator:


