You are using an out of date browser. It may not display this or other websites correctly.
You should upgrade or use an alternative browser.
You should upgrade or use an alternative browser.
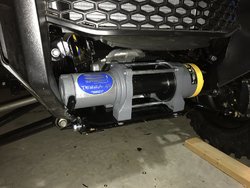
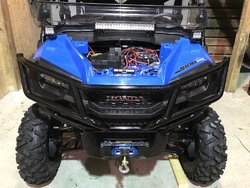
Got the winch finished, tested, and front bumper back on. Long story short, my SPST main power switch is coming from China and won't be here for a couple weeks. I was able to wire in a spare for the time being, just to test everything - and it worked, which is awesome.
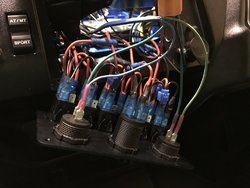
Got main LED and side LEDs installed and wired. Upon testing main LED I discovered how to blow a switch (by wiring the ground from the light through the switch). To test, I took the ground on the side lights straight to my fuse block ground and they works (and didn't blow up my switch). Lesson learned. I'll keep at it tomorrow and provide updates.
Made some cool mounts for the side lights using longer screws and rubber hose - will post tomorrow with pictures
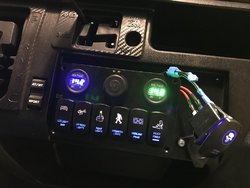


Last night I got the rear lights and interior lights mounted. Also got the "master" switch (runs solenoid to power panel and accessories) cut in. Have a temporary switch there running for now.
Pretty well got wrapped up today. Ran all the wiring and looms for the rear lights and interior lights. Ended up short on wire so I had to use some extra I had for the interior lights (basically no load, so not a big deal). Biggest part of the day was installing the fan and speed control. I ended up fabricsting a pretty sweet, super simple and inexpensive bracket. After riding today it seems to be working great. I'll post more details on it. Otherwise got the heat shield installed and zip tied everything except what's under the hood.
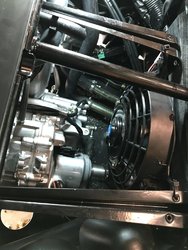
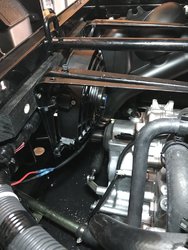
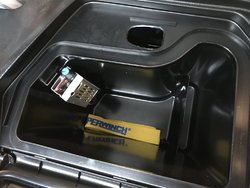
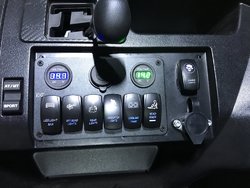
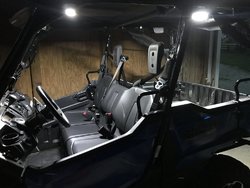
Pretty well got wrapped up today. Ran all the wiring and looms for the rear lights and interior lights. Ended up short on wire so I had to use some extra I had for the interior lights (basically no load, so not a big deal). Biggest part of the day was installing the fan and speed control. I ended up fabricsting a pretty sweet, super simple and inexpensive bracket. After riding today it seems to be working great. I'll post more details on it. Otherwise got the heat shield installed and zip tied everything except what's under the hood.


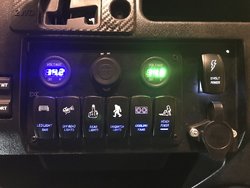
Still have a few items left. Need to extend the vent lines, finish running ground jumpers in the switch panel, swap out "master" switch when it arrives, and swap out switch for light bar I blew the other night. Then I think it's time to enjoy!
And clean up my shop, it's a disaster! Got some boxes for recycling
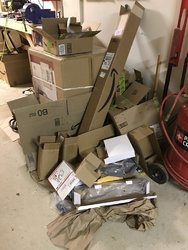
And clean up my shop, it's a disaster! Got some boxes for recycling

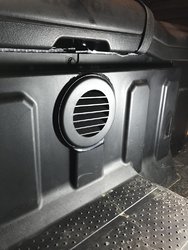
Alright, here's the fan mount I made. I kept searching around my shop until I came up with something, and it actually worked out fantastically. You can see the fan and speed control I bought on page 1 in my detailed list.
For the bracket, I took a scrap piece of 1x2 poplar, and two "L" shaped shelf brackets (the cheap kind but they're great for shop use). I set the fan and determined I needed a couple extra holes to get the fan mounts to sit exactly where I wanted them. I loosely zip tied everything in place (two brackets to fan. I dropped this down in space below the seat. There's a bar that runs under the seat, where the back of leg would be if driving. I put the 1x2 there, anchored with self tapping screws. Then mounted the brackets with the fan to the 1x2. Once devoted, tighter all the zip ties. Wired the fan to the speed control in the glovebox (Velcro'd in place), then on to the fuse panel. I'll post a new thread with a full parts list in the modifications section - I think this ended up being a decent, simple and budget friendly solution. I painted mine to make it look a little more "professional".
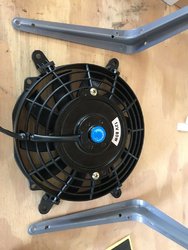
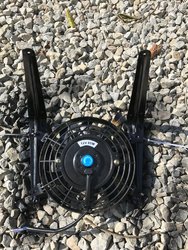
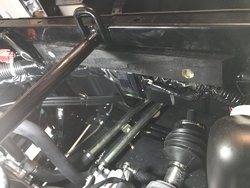
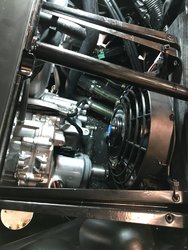
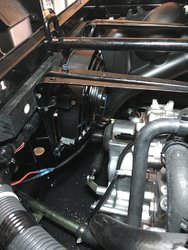
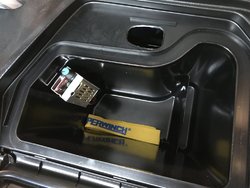
For the bracket, I took a scrap piece of 1x2 poplar, and two "L" shaped shelf brackets (the cheap kind but they're great for shop use). I set the fan and determined I needed a couple extra holes to get the fan mounts to sit exactly where I wanted them. I loosely zip tied everything in place (two brackets to fan. I dropped this down in space below the seat. There's a bar that runs under the seat, where the back of leg would be if driving. I put the 1x2 there, anchored with self tapping screws. Then mounted the brackets with the fan to the 1x2. Once devoted, tighter all the zip ties. Wired the fan to the speed control in the glovebox (Velcro'd in place), then on to the fuse panel. I'll post a new thread with a full parts list in the modifications section - I think this ended up being a decent, simple and budget friendly solution. I painted mine to make it look a little more "professional".


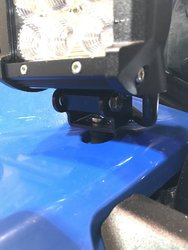
For my front side lights, I used slightly longer bolts (M6 x 35mm I think) then added about a 3/8" piece of rubber tubing around it and below the light mount. This pushed the light up off the plastic, allowed it to sit level, but can also be easily pivoted if needed. I'm sure there's some spacers you could buy but use what you got laying around I say

Great way to spend "Labor Day!"
Yes, it was fun. Some late nights but with my crew Santa's workshop runs 3rd shift or not at all, haha
Bigtee
Well-Known Member
Lifetime Member
Supporting Member
Got the winch finished, tested, and front bumper back on. Long story short, my SPST main power switch is coming from China and won't be here for a couple weeks. I was able to wire in a spare for the time being, just to test everything - and it worked, which is awesome.
Got main LED and side LEDs installed and wired. Upon testing main LED I discovered how to blow a switch (by wiring the ground from the light through the switch). To test, I took the ground on the side lights straight to my fuse block ground and they works (and didn't blow up my switch). Lesson learned. I'll keep at it tomorrow and provide updates.
Made some cool mounts for the side lights using longer screws and rubber hose - will post tomorrow with pictures
View attachment 53233 View attachment 53234
How hard was it to mount the light bar up by the windshield? I have a 32" I was going to mount to the stock front bumper but haven't figured out how to mount it yet.
advertisement
GlockMeister
The Bearded Wonder
Lifetime Member
Supporting Member
Like this.....How hard was it to mount the light bar up by the windshield? I have a 32" I was going to mount to the stock front bumper but haven't figured out how to mount it yet.
Bigtee
Well-Known Member
Lifetime Member
Supporting Member
GlockMeister
The Bearded Wonder
Lifetime Member
Supporting Member
I think these...not the best but they have held up for well over a year now.That's exactly what I want to do. What mounts did you use?
https://www.amazon.com/gp/aw/d/B0177BPJ5U/?tag=sxsweb24-20
Bigtee
Well-Known Member
Lifetime Member
Supporting Member
GlockMeister
The Bearded Wonder
Lifetime Member
Supporting Member
No problem bud.Thanks GlockMeister, just ordered a set.
How hard was it to mount the light bar up by the windshield? I have a 32" I was going to mount to the stock front bumper but haven't figured out how to mount it yet.
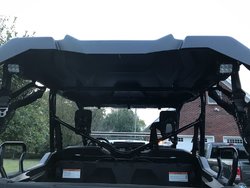
Not hard at all - drilled a couple holes for brackets and a third for wire. Plan to seal them with clear silicone. I was hesitant to put anything out front but I do like @GlockMeister setup for a larger bar. As an alternative, I used these clamps for my rear lights and they were hella stout - they come with different diameter rubber rings for different tube sizes.
LAMPHUS Cruizer LED Off-Road Light Horizontal Bar Clamp Mounting Kit 1"/ 1.5"/ 1.75"/ 2" [2 Clamps] [Includes Allen Hex Key] [User-friendly] - For Light Bar Bull Bar Tube Clamp Roof Roll Cage Holder
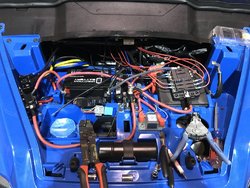
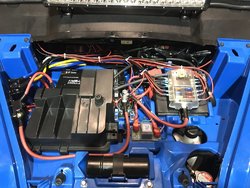
Was finally able to get the last bit of wiring done today after my switch (from the far away land of China) arrived yesterday. Cleaned up under the hood. I used Velcro to mount my fuse panel to the one battery strap - so far it's held great abs allows for easy movement if needed.
Also did the vent extensions - using the JKW Offroad kit. Very helpful between the instructions and forum here (I had some difficulty at first finding all the lines, particularly the fan - don't like just pulling and cutting hoses I don't know what they are!) Proceeding cautiously I got it done in about 2 hours from start to finish, including zip tying everything neatly. I ended up having to heat the ends of the tubing because they were so stiff and fittings were tight - that helped a lot. I realized when putting the filters on that I SHOULD NOT heat the gas tank vent... so don't do that, just in case. Thanks to @SteveJ for the kit.
Also did the vent extensions - using the JKW Offroad kit. Very helpful between the instructions and forum here (I had some difficulty at first finding all the lines, particularly the fan - don't like just pulling and cutting hoses I don't know what they are!) Proceeding cautiously I got it done in about 2 hours from start to finish, including zip tying everything neatly. I ended up having to heat the ends of the tubing because they were so stiff and fittings were tight - that helped a lot. I realized when putting the filters on that I SHOULD NOT heat the gas tank vent... so don't do that, just in case. Thanks to @SteveJ for the kit.


Last edited:
D
advertisement
Similar threads
P
- Replies
- 16
- Views
- 1K


