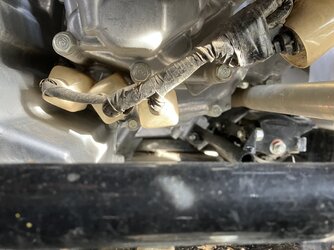
Back to the oil pressure issue. In previous posts back on Jan 6 & 11, I describe things related to the idiot light, the sensor it's connected to and actually measuring the oil pressure with an oil pressure guage. This posting is about installing an oil pressure guage.
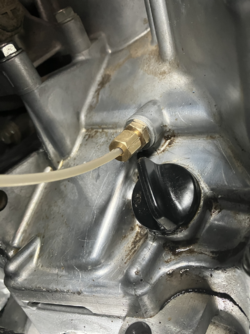
For me, the trickiest part by far was installing the guage tubing to the engine block. On the engine block near the oil dip stick, Honda uses an 8 mm (M8) bolt and soft washer as a plug. You may be able to install a guage using a factory-made adaptor: "M8, male X 1/4" NTP", female (available from
WWW.fitting.space). Then the, "tubing compression X 1/4" NPT" adapter, comes with the guage kit.
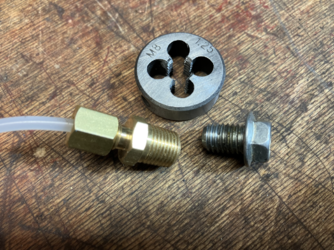
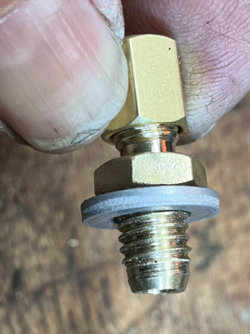
Because I'm fairly comptent, want a clean/factory looking job, plus didn't want to wait for a mail-order adaptor, I modified the supplied adaptor, "tubing compression X 1/4" NPT". On the 1/4" NPT end, there was enough meat (brass wall thickness) to cut it down to M8 threads, to then screw into the oil pressure test port on the engine. (see photo 1)
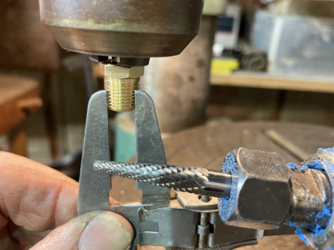
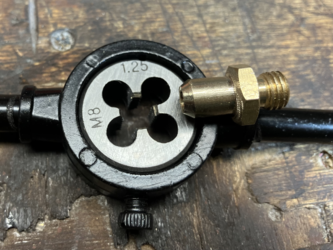
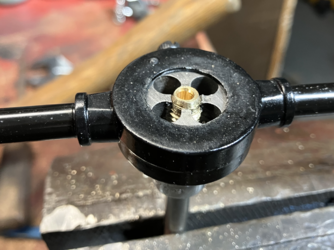
I don't have a metal lathe, so I used my "Red-neck lathe", consisting of a drill press and a die grinder (see photo below). First, put the nut on the compression end of the adapter to protect those threads > put that nut end of adaptor in the chuck > adjusted my calipers to the width of the treads on the M8 bolt that Honda uses as a plug in the port > put a straigh-walled burr in die grinder (see photo 2) > "turned" down the 1/4" NPT to width of calipers > put a robust champher on end, for the M8-1.25 (1.25 = thread spacing) thread-cutting die to get started (see photo 3)> to give myself room to work with the M8 die in its holder, on the 3/8" hex drive of the work-piece and to hold work-piece rigidly, I used a 9 mm socket in an extention tightened in bench vice (see photo 4) > once die is centered and level on top of adaptor to be threaded, rap it quite hard with a 16oz. hammer > pushing down hard on it by hand, turn die very slightly (1/64") to get cutters started > rap once more > as before, turn die very slightly > repeat about 6 more times; (This thread-starting process is not easy. Take your time. Be as precise as possible in keeping die alighned with work piece. If you think it is time to stop the rapping part of the process and just start turning, you could
EASILY RUIN what you have just done. There is no way to "test" if it's ready. It's either ready or not ready. Don't gamble.) > start turning without rapping > turn die, cutting down untill it makes contact with 3/8" hex > stop and carefully unscrew off of work-piece > flip die over 180* > carefully turn down on work-piece so that cutters cut all the way down to 3/8" hex > unscrew die off > use riffler file to make level, the bottom surface of the hex, as it will make a sealing contact with the previously mentioned soft washer > install washer and compression nut (see photo 5) > Congrats, your done with this part!!
Now, route the oil guage tubing from dashboard to oil pressure test port before you have either end hooked up > insert the M8 end of the modified adaptor into the oil test port and torque to 9ftlbs > insert to tubing into the adaptor all the way (if you have concerns about having to excesivly tighten the compression nut in order to bend the inside compression collar, to make it seal over 100lb/sq", like I did, remove the collar, finger tighen it onto a wood screw, so you can carefully/consistently bench grind the thin end down to zero) > tighten compression nut (caution: don't over-tighten!!) > same process and concerns in hooking up guage > before putting tools away, test for leaks ( P1000 engine does not reach top oil pressure until 5,000 RPM) > if you have a compression fitting oil leak at this point, I would highly recommend the compression collar thinning described above > Congrats!! You now have way more to go on than just that finicky idiot light.
Notes:
1) Go beyond wearing safty glasses while using Red-neck lathe with die grinder. Brass shavings are so fine, you may not even feel 1 land in your eye. My eye Doc, when I went in, said they can get on your clothing and then into your eye... like it did mine. He found it using his eye-microscope, invisable to the naked eye. It felt minor enough, what ever it was, it would go away in a day or 2. By day 5, it was still irritating, so I went in. He said outer layer of eye ball seals over small pieces like that and makes then a bigger deal to remove. A bigger deal yet, if it is ferrous & you go for an MRI!!
2) I learned the hard way, about putting the compression cap on the work-piece before putting it in the drill press chuck. The threads got buggered up enough to require chasing them with a die. After that, they were too loose to tighten! I was going to build them up with siver solder, but was fresh out. Thought about just squishing the nut a little with my 16oz hammer, but wanted a step more toward good. Adjusted the bench vice jaws to contact 2 of the hex facets, then used a 1/4"-faced punch and hammer on the opposite facet. Snuck up on the desired tightness...worked like a champ; that is with the help of the compression collar thinning described above.
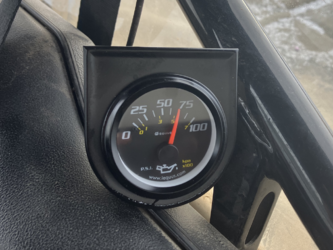
3) You may have noticed the guage reading 75lbs/sq" at idle, 1,200 RPM. It's specked to be 71-85 at 5,000 RPM. At 5,000 RPM, my machine is pegging the 100lb guage!! Maybe that cheep $20 guage is off? Just another thing to worry about...
Jake
P.S. Report on toy hauler conversion to winter Refuge coming soon, maybe under more appropriate heading.
