P500 p5 suspension

JCart

JCart

Well-Known Member
Lifetime Member
Jul 14, 2014
895
2,021
93
Kamloops, BC Canada.
Ownership

  1. 500
Thanks for all the support boys! I'm havin a good time doing this mod. There's one issue that I could use some input on: The way the air line(s) connect to the shocks is in a fairly vulnerable location, and they could get yanked out by brush, sticks, etc.. Some way of shielding this area, or a way to deflect stuff away from the lines would be a big help. My favorite type of riding is busting through the brush making new trails and just picking our way through the woods exploring. I've already tore one of my cv boots (made shields) got stabbed in the a** (made full aluminum skid plates) and beat up by branches (made full lexan enclosure) so I just KNOW I'm gonna tear these air lines off at some point:) Fortunately, with the on-board compressor, getting rolling again wouldn't be a day wrecker for me, but would really suck with out the compressor. So if any of you make something, or draw something up, I'd love to see it.

On my ARB front air locker it came with some spare hose and it looks to be stainless braided line, guessing 1/8". This type of braided encased line with a 90 degree elbow where it would attach directly the shock would be pretty tough, then you could run the line snug against the shock to the top of it where there might be less chance of snagging it on Keerap? Not sure if this makes sense as I'm not sure where the actual fittings are, how much room, thread type etc. Would think there is flexible braided line that could be plumbed in critical areas that might be more robust than plastic line. Also thinking a field repair kit, say a short length of hose with ability to pressure one shock stand a lone and air up with CO2 bike cartridge? Have a couple of those just in case compressor goes down AND you tear off a hose.

jrc
 
Last edited:
Montecresto

Montecresto

Montecresto el segundo
Lifetime Member
Supporting Member
Club Contributor
Jan 17, 2016
22,584
34,172
113
Eastern oklahoma
Ownership

  1. Other Brand

  2. 500

  3. 1000-3

  4. 1000-5

  5. Talon X4
Thanks for all the support boys! I'm havin a good time doing this mod. There's one issue that I could use some input on: The way the air line(s) connect to the shocks is in a fairly vulnerable location, and they could get yanked out by brush, sticks, etc.. Some way of shielding this area, or a way to deflect stuff away from the lines would be a big help. My favorite type of riding is busting through the brush making new trails and just picking our way through the woods exploring. I've already tore one of my cv boots (made shields) got stabbed in the a** (made full aluminum skid plates) and beat up by branches (made full lexan enclosure) so I just KNOW I'm gonna tear these air lines off at some point:) Fortunately, with the on-board compressor, getting rolling again wouldn't be a day wrecker for me, but would really suck with out the compressor. So if any of you make something, or draw something up, I'd love to see it.
Would you mind posting up some pictures of the front shocks so I can see where the air line attaches at and thus its vulnerability to brush/sticks and other crap coming at it may be?
 
C

Chooglin

Guest
@JWB after receiving my shocks , I noticed that the rubber air bladder is exposed to the elements. My concern with this is , mud , small rocks , debris......etc. could puncure the bladder. Have you had the chance to run these thru the mud ?
 
JWB

JWB

Well-Known Member
Lifetime Member
Oct 3, 2016
814
2,045
93
California MD
Ownership

  1. 500
@JWB after receiving my shocks , I noticed that the rubber air bladder is exposed to the elements. My concern with this is , mud , small rocks , debris......etc. could puncure the bladder. Have you had the chance to run these thru the mud ?

Did you get Monroes or Gabriels? The Gabriel's I have- you can see in previous posts- have a steel shell completely protecting the bladder. I did ride through mud when I was first testing with the singles, and actually came closest I have yet to burying the machine with no problems, but, that said, packing heavy stuff under the shell might cause a problem, but consider where these shocks were originally intended to live. That was another reason I didn't choose the Monroe's- the air bladder is totally exposed. It would probably be a good idea to flush out under the shell with the shocks fully extended after a wet ride anyways. I'm far more concerned about having an air line yanked out of it's fitting by sticks and brush. I haven't gotten any responses on the shield thing yet, and I'm away from the shop for a week.
 
C

Chooglin

Guest
I have the Gabriels. Mine also has the protective shell but the underside/bottom
Is exsposed. Just wondered if you had any concerns.
 
JWB

JWB

Well-Known Member
Lifetime Member
Oct 3, 2016
814
2,045
93
California MD
Ownership

  1. 500
On my ARB front air locker it came with some spare hose and it looks to be stainless braided line, guessing 1/8". This type of braided encased line with a 90 degree elbow where it would attach directly the shock would be pretty tough, then you could run the line snug against the shock to the top of it where there might be less chance of snagging it on Keerap? Not sure if this makes sense as I'm not sure where the actual fittings are, how much room, thread type etc. Would think there is flexible braided line that could be plumbed in critical areas that might be more robust than plastic line. Also thinking a field repair kit, say a short length of hose with ability to pressure one shock stand alone and air up with CO2 bike cartridge? Have a couple of those just in case compressor goes down AND you tear off a hose.

jrc
Thanks for the idea! It gives me a different approach to the (possible) problem. The more I think about this, the more I keep coming back to some type of deflector, vs making the line tougher. As it stands, I think if something grabs the line, I think it will just yank it out of the shock fitting, as that is just two little o-rings squeezed onto a plastic tube, and I'm pretty sure I could yank it out with my hand (haven't tried that) and at worst, might have to cut a fresh piece of line to run the short distance to the "T" fitting on the frame.
A 'field repair' kit is gonna be as important as a tire repair kit for us air shock guys. Some extra line, some extra fittings, and a way to inflate the system. Hell, considering the price of a pair of these shocks, and how light they are, you could take a pair with you on those really long runs.
 
Last edited:
  • Like
Reactions: solrus
JCart

JCart

Well-Known Member
Lifetime Member
Jul 14, 2014
895
2,021
93
Kamloops, BC Canada.
Ownership

  1. 500
A shield made with 3mm thick UHMW affixed to the shock body same end as air fitting would work too. You could even heat the UHMW in the oven and form around the shock, once formed how you like clamp with T band clamps. UHMW is very robust material and relatively easy to work with.

j
 
  • Like
Reactions: JWB
JWB

JWB

Well-Known Member
Lifetime Member
Oct 3, 2016
814
2,045
93
California MD
Ownership

  1. 500
A shield made with 3mm thick UHMW affixed to the shock body same end as air fitting would work too. You could even heat the UHMW in the oven and form around the shock, once formed how you like clamp with T band clamps. UHMW is very robust material and relatively easy to work with.

j
Yes. That is totally doable. Possibly clamped to frame in front of shocks instead of wrapping.... that stuff is pretty easy to mold into shape when heated. I think I'll re-make my rear cv boot protectors outta that too. I made lexan (polycarbonate) shields, and one cracked- probably because I over-heated it and made it brittle at the bends.
 
JCart

JCart

Well-Known Member
Lifetime Member
Jul 14, 2014
895
2,021
93
Kamloops, BC Canada.
Ownership

  1. 500
Yes. That is totally doable. Possibly clamped to frame in front of shocks instead of wrapping.... that stuff is pretty easy to mold into shape when heated. I think I'll re-make my rear cv boot protectors outta that too. I made lexan (polycarbonate) shields, and one cracked- probably because I over-heated it and made it brittle at the bends.

Fastening onto the frame would work too, as I'm not sure how the shock air inlet is situated relative to the frame it's kinda hard to picture. But to fasten to frame could also use nutserts in the frame if there is room. For the rear protectors I used 3mm thick black UHMW and some iirc 12" sections of 1/2 angle aluminum, have pictures in my link below of what I did. They work well just have to clean out the mud and this time of year snow as it will freeze into ice. I usually just do a quick clean out with a stick to push the snow/ice out at the end of ride. Mud gets the hose and they clean up quick.

J
 
  • Like
Reactions: JWB
pFive

pFive

Well-Known Member
May 3, 2016
668
1,256
93
Greenwood IN
Ownership

  1. 500
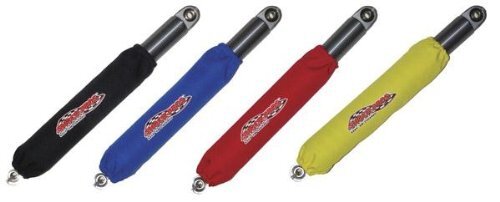
I would think some zip on shock covers from a Jeep would be a cheap way the keep mud from packing into the shell.
413Z4dNfMWL
 
advertisement
pFive

pFive

Well-Known Member
May 3, 2016
668
1,256
93
Greenwood IN
Ownership

  1. 500
I pretty much get everything from Ebay or Amazon.... I have not used those but if I were going to get some I would just order them right from China for about $1.89... LOL

Seriously tho, do a search for off road shock covers or "Gators"... seal saver may have some, those are a popular method for CV boot protection, they might make shock covers also.

Nylon seems like a good approach?
2003-2007 Polaris Predator 500 Shock Absorber Dust Cover Set of 3 Nylon wr
 
  • Like
Reactions: CumminsPusher
JWB

JWB

Well-Known Member
Lifetime Member
Oct 3, 2016
814
2,045
93
California MD
Ownership

  1. 500
Fastening onto the frame would work too, as I'm not sure how the shock air inlet is situated relative to the frame it's kinda hard to picture. But to fasten to frame could also use nutserts in the frame if there is room. For the rear protectors I used 3mm thick black UHMW and some iirc 12" sections of 1/2 angle aluminum, have pictures in my link below of what I did. They work well just have to clean out the mud and this time of year snow as it will freeze into ice. I usually just do a quick clean out with a stick to push the snow/ice out at the end of ride. Mud gets the hose and they clean up quick.

J
Good pictures- Thanks J
 
JWB

JWB

Well-Known Member
Lifetime Member
Oct 3, 2016
814
2,045
93
California MD
Ownership

  1. 500
Would you mind posting up some pictures of the front shocks so I can see where the air line attaches at and thus its vulnerability to brush/sticks and other crap coming at it may be?
You can see the fitting on the left side of third shock from left. I'll take some better pictures when I get a chance. The shocks are all mounted with fittings facing inboard, but that still leaves alot of line exposed because the fittings face down, so the lines have to make a relatively gentle loop back up, or over to frame before they have any protection.
DSCN1039
 
C

Chooglin

Guest
Have you mounted yours yet?
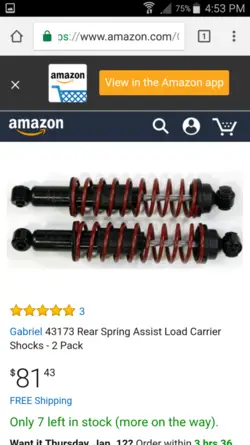
No , I changed my mind once again. I took the air shocks back to Summit Racing for a refund and I ordered these.
Screenshot 2017 01 10 16 53 25
I am going to try to run them with the stock shocks (dual shocks per side).

I also thought about just adding a shock (no coil) along with the stock shocks!!
 
Last edited by a moderator:
  • Like
Reactions: CumminsPusher
pFive

pFive

Well-Known Member
May 3, 2016
668
1,256
93
Greenwood IN
Ownership

  1. 500
You can see the fitting on the left side of third shock from left. I'll take some better pictures when I get a chance. The shocks are all mounted with fittings facing inboard, but that still leaves alot of line exposed because the fittings face down, so the lines have to make a relatively gentle loop back up, or over to frame before they have any protection.
View attachment 30798


So I have a question,my p5 is really just a slow crawler, my goal is to keep the front tires on the ground more (due to the lack of a locker), could I just mount a pair of these shocks on each side of the front and install schrader valve right on that shock itself and not run any hoses? Or would I not get any real articulation performance since the left will not see the right? The thing that really interested me the most was the photo you shared with the jack under one front tire and the other side still on the ground. I need to do that on the trail.
 
Last edited:
JWB

JWB

Well-Known Member
Lifetime Member
Oct 3, 2016
814
2,045
93
California MD
Ownership

  1. 500
So I have a question,my p5 is really just a slow crawler, my goal is to keep the front tires on the ground more (due to the lack of a locker), could I just mount a pair of these shocks on each side of the front and install schrader valve right on that shock itself and not run any hoses? Or would I not get any real articulation performance since the left will not see the right? The thing that really interested me the most was the photo you shared with the jack under one front tire and the other side still on the ground. I need to do that on the trail.
Ya, they need to 'see' each other to do that, so the single fill point system that comes with the shocks would be the simplest install. Keep in mind that you may need to run in excess of 140psi to carry any load more than two 200lb riders. As you could see in the pictures, the articulation is amazing, and so is the improvement in ride. It also made a big difference in keeping the rear wheels on the ground too. Something new I've discovered, is that it's really difficult to get the shocks equally pressurized when using a single fill point for individual shocks using the air hose. The air volume of the shock is so small that just 'bumping' the trigger on my fill/pressure tool will make a 10-12psi change instantly, and just lifting the chuck off the fill valve can change pressure 2-5psi, and that's on mine with double shocks on each corner. I think- even if doing singles, you should add a pressure gauge into the system so you can over pressurize, and then 'tweak' it down to the desired pressure with the fill valve while watching the system gauge. Don't let me scare you off, this all sounds difficult but it really isn't. I'm just trying to share as much as I can as I gain insight and experience with this mod. When I finally get the whole system completed, and head out on the first real hard-core run (like the H.M. trails) I'm going to take all four of the stock shocks with me. So far, this suspension mod has attained, or exceeded, every goal I had in mind when I started. It is just soooo cool to drive over obstacles now and have all four wheels firmly planted on the ground!
EDIT/UPDATE: the shocks need to be doubled on each wheel
 
Last edited:
  • Like
Reactions: pFive and Chooglin
trigger

trigger

Old Ironsides
Vendor
Lifetime Member
Supporting Member
Feb 13, 2016
25,104
185,513
113
Bay City, Michigan
www.quickshieldutv.com
Ownership

  1. 500
Been keeping an eye on this thread and still have a question...what exactly is trying to be achieved? Does any of this give you an extended length of travel? Couldn't you just put adjustable's on the front and add more preload on all four to keep from bottoming out? I understand the air shock idea for quick adjustment on the fly but...? It looks cool as hell, just don't know the functional goal.
 
JWB

JWB

Well-Known Member
Lifetime Member
Oct 3, 2016
814
2,045
93
California MD
Ownership

  1. 500
Been keeping an eye on this thread and still have a question...what exactly is trying to be achieved? Does any of this give you an extended length of travel? Couldn't you just put adjustable's on the front and add more preload on all four to keep from bottoming out? I understand the air shock idea for quick adjustment on the fly but...? It looks cool as hell, just don't know the functional goal.

See page 27. In this particular case suspension travel is increased by at least 3"- I thought I had measured more,(front) but have not confirmed again, but it is definitely over 3" additional. Equal ground pressure can't be accomplished with springs, and in the case of the P500, with no front locker, keeping the front wheels in contact with the ground, and having the same down force on each tire is as good as can be done (at this point) with our s**tty open differential. Load adjustment, ride quality, ability to lean into a hill, push a particular wheel down, or lift one wheel off the ground without a jack, all just icing on the cake. My initial goal was to get the independant suspension to actually work (keep tires on the ground) and soften the ride a bit. The machine can be driven with all air released from system, but it only has about 4" of ground clearance- click on the pic.DSCN1072
 
Last edited:
advertisement

About us

  • Our community has been around for many years and pride ourselves on offering unbiased, critical discussion among people of all different backgrounds. We are working every day to make sure our community is one of the best.

User Menu

Buy us a beer!

  • Lots of time and money has gone into making sure the community is running the best software, best designs, and all the other bells and whistles. Care to buy us a beer? We'd really appreciate it!

    Beer Fund!

    Club Membership!