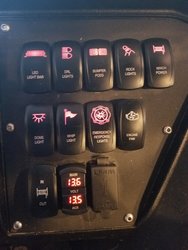
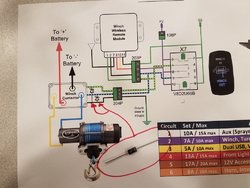
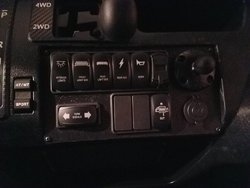
How do I go about wiring my winch to the multi rocker switch panel I plan on installing on my P1k5? I don’t want to use the rocker that comes with the winch. I’m hoping I can use a rocker on the switch panel for a cleaner look. Thanks
You can do that, but you will need a switch that has three position. (In, out, and off.) If you can find one that will work on your panel. If you can't you you can do I with two switches,one for In, one for out. The relay that controls the winch will have two terminals, one for in, the other for out. You just have to run power to those two terminals to control direction. Hope that helps.
What I did was mount the winch rocker switch supplied with the winch below the light switch. This way you can operate the winch with left hand, and shift/steer with right hand.
How do I go about wiring my winch to the multi rocker switch panel I plan on installing on my P1k5? I don’t want to use the rocker that comes with the winch. I’m hoping I can use a rocker on the switch panel for a cleaner look. Thanks
BTW: You don't need to include the diodes shown in the schematic, they are only required if you are using a PDM60 to provide the power to the winch contactor solenoid.
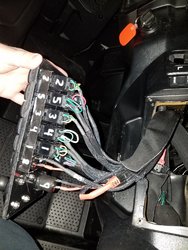
Like many others on this forum, I have replaced the "WARNING" plate with my own custom switch plate. I purchased the rocker switch from OTRATTW and modified the wiring so that both upper and lower LEDs remain ON so that I can see that at night in the dark. I also put quick disconnects on the back side of my switches because is seems like I am adding and modifying accessories constantly so all of my cable harness are designed to be easily removed.
Very Nice Work! I really like how clean the install and wiring are! Do you have a Build thread? Curious as to aux battery location PDM mount location on your build
I don't have a build thread. I probably should have started one, but I am still relatively inexperienced when it comes to posting on these forums. I am going to spend a little more time in the future and document my work, especially as I find issues and resolutions to them. I have really come to appreciate the knowledge on this forum and it has been incredibly helpful.
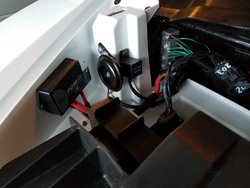
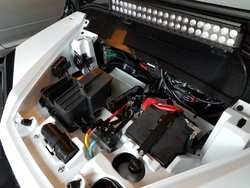
I learned a lot from accessorizing my Pioneer 700 and did not want to make the same mistakes with the 1000. I spend a fair amount of time thinking through the cabling and made certain that all of the cables could be removed so that I could remove any panel. I use WeathPack connectors everywhere. To make my Pioneer street legal in Washington, I had to add turn signals and a horn. You can see the horn and flasher next to the PDM60 in the picture. I tapped into the wiring of the Pioneer to use the existing tail lights for the rear turn signals. Due to the way the PDM60 works, I ruined by first tail-light controller. I do like the PDM60, but it has been a learning curve.