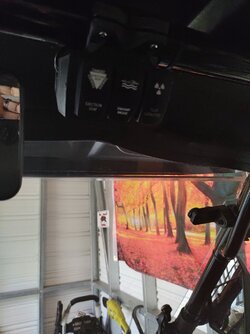
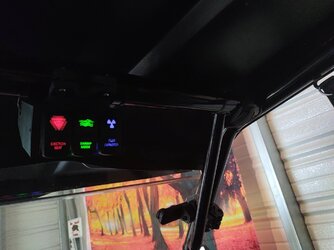
I will check when it quits raining. It will be much easier to see once I cut the panel out and get a good light source back there.Randy,
I cut out the panel with a multi tool. You could also use an exacto knife with the blade set out 1/4" Those 4 mounts hold wires not associated with the switches. the black red wire is ignition on power Pin 2 on the switch connector blocks is fed ignition on power. Do you have the accessory fuse panel? is so, it looks like the switch output ends up as a fused output. If not then I'm guessing that there is no power fed to the switch and the switch wires are buried in the blue tape bundle. I don't see a blue tape bundle on mine. Maybe that was removed when the accessory fuse block was put in by the dealer
Joe
You are using an out of date browser. It may not display this or other websites correctly.
You should upgrade or use an alternative browser.
You should upgrade or use an alternative browser.
I Love Makita as well! You know why the DeadWalts are yellow? yellow is a caution colour, The manufacturer is cautioning you against buying their productAn oscillating multi-tool is best, I think, as it allows a high degree of precision, plunge cutting, great depth control, doesn't tend to melt plastic (as would a cutting blade in an angle grinder) and is just dang nice to have around the shop. Things like cutting the rectangular hole for a new rocker switch become a piece-of-cake.
Buy one . . . you won't be sorry. I've standardized on Makita for all my battery powered tools, so they can all use the same style battery, but there are other good brands as well.
Ok, installed the new rocker panel from Crossroads tonight. Here are a few pics from the install which shows the wire harness brackets behind the “don’t kill yourself” warning. The crossroads panel allowed me to keep those in the same place. I have a round punch out on each side of the rocker switches that I will add a usb charger and additional cig light plug.
one thing I haven’t figured out is how to wire my light bar and my 2 rear cubes to separate rockers. Currently they all work off the main led rocker. I purchased them altogether and the wiring harness has a relay and only came with one switch. I purchased 2 switches to replace but don’t see how I can do that without bypassing the relay.


one thing I haven’t figured out is how to wire my light bar and my 2 rear cubes to separate rockers. Currently they all work off the main led rocker. I purchased them altogether and the wiring harness has a relay and only came with one switch. I purchased 2 switches to replace but don’t see how I can do that without bypassing the relay.
Yeah, the package I purchased only came with one relay and one switch to control the rooftop LED and the 2 cubes on the back. I want to control the back cubes and the LED on the roof with 2 different switches so that if people are riding behind me don’t have to be blinded by them. I have not found any posts or diagrams that show how to wire this configuration. I can make it happen if I bypass the relay but I don’t think that’s a good idea. I also am not a very good electrician so trial and error is not a good thing to do either. I installed both switches but only wired up the one for now. I figured at some point I would come across someone that could help me out and I would wire it up then.two switches=two circuits= two relays?
It should be easy for you to do this, Just duplicate the wiring provided with the roof top LED for the 2 cubes. You should be able to get a relay w/harness from the club store
Good Luck!
Good Luck!
I’ll see if I can find one. The harness I have is all together for the cubes and the main LED light. All combined in one harness heat shrinked connected to one switch. I would have to somehow split out the cubes before they hit the relay and cut in a new relay and run it to the new switch. The other problem is that the current relay is powered from the fuse hot lead and I would have to splice in to that lead or add another one. I don’t know why I have to be so difficult. LOLIt should be easy for you to do this, Just duplicate the wiring provided with the roof top LED for the 2 cubes. You should be able to get a relay w/harness from the club store
Good Luck!
A real simple way would be to splice in a switch between the relay and the cubes. The current the cubes draw will be very small and will not exceed the switch capacity. The down fall to this method is you cannot have the cubes on without the light bar being on. If you want to run the cubes without the light bar, you will have to find a key in power source to feed the cubes
That’s what I was worried about. Didn’t want to overload the switch. I currently have the lights wired to my aux battery on my bus bar so I can use them without having the key on or risk running my main battery down. So, I suppose I could cut the cubes out of the main harness before the relay, run a new power lead from by aux bus bar, and connect to my rear switch. I think I can also run a jumper from my main switch to the rear switch for the Key On light to light the blue switch backlight. Thanks for the suggestion!!!!A real simple way would be to splice in a switch between the relay and the cubes. The current the cubes draw will be very small and will not exceed the switch capacity. The down fall to this method is you cannot have the cubes on without the light bar being on. If you want to run the cubes without the light bar, you will have to find a key in power source to feed the cubes
Hondasxs
Club Founder
Staff member
Lifetime Member
Supporting Member
Reading this... I agree.A real simple way would be to splice in a switch between the relay and the cubes. The current the cubes draw will be very small and will not exceed the switch capacity. The down fall to this method is you cannot have the cubes on without the light bar being on. If you want to run the cubes without the light bar, you will have to find a key in power source to feed the cubes
Just adding a cube switch after the relay would be the best option. But light bar would need to be on for them to work.
Anything else you would need to split them all together.
Sent from my SM-G996U using Tapatalk
advertisement
That’s what I was worried about. Didn’t want to overload the switch. I currently have the lights wired to my aux battery on my bus bar so I can use them without having the key on or risk running my main battery down. So, I suppose I could cut the cubes out of the main harness before the relay, run a new power lead from by aux bus bar, and connect to my rear switch. I think I can also run a jumper from my main switch to the rear switch for the Key On light to light the blue switch backlight. Thanks for the suggestion!!!!
Got it working but had to completely separate roof light from cubes. Cubes and switch are not behind a fused power source so I probably need to add in a fuse link. Other than that I can know control roof light and cubes separately and have them on at the same time if needed. I did power from a key on so they didn’t get left on accidentally. Thanks to all that offered suggestions.Reading this... I agree.
Just adding a cube switch after the relay would be the best option. But light bar would need to be on for them to work.
Anything else you would need to split them all together.
Sent from my SM-G996U using Tapatalk
Yeah, the package I purchased only came with one relay and one switch to control the rooftop LED and the 2 cubes on the back. I want to control the back cubes and the LED on the roof with 2 different switches so that if people are riding behind me don’t have to be blinded by them. I have not found any posts or diagrams that show how to wire this configuration. I can make it happen if I bypass the relay but I don’t think that’s a good idea. I also am not a very good electrician so trial and error is not a good thing to do either. I installed both switches but only wired up the one for now. I figured at some point I would come across someone that could help me out and I would wire it up the
I've purchased a overhead switch panel from crossroads 3d and Iam very impressed with the quality and fit of there product. Your crossroads panel gives your rocker panel a nice clean look.Ok, installed the new rocker panel from Crossroads tonight. Here are a few pics from the install which shows the wire harness brackets behind the “don’t kill yourself” warning. The crossroads panel allowed me to keep those in the same place. I have a round punch out on each side of the rocker switches that I will add a usb charger and additional cig light plug.
one thing I haven’t figured out is how to wire my light bar and my 2 rear cubes to separate rockers. Currently they all work off the main led rocker. I purchased them altogether and the wiring harness has a relay and only came with one switch. I purchased 2 switches to replace but don’t see how I can do that without bypassing the relay.
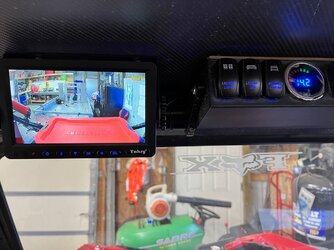
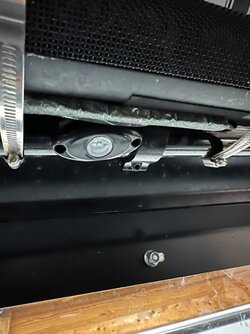
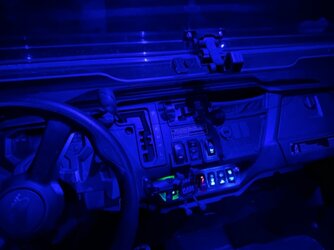
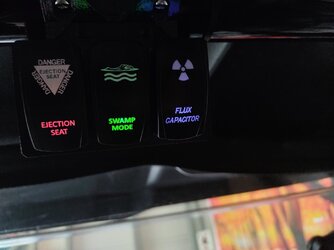
View attachment 365980View attachment 365981View attachment 365982View attachment 365983
I finally finished up the dash. I moved the factory switches around, I changed the courtesy light switch from key on power to live always. this way I can turn on the lights so I can find where to put the key in. I said lights, because I added a license plate light to the ROPS above my head and some clear penny clearance lights in the rear passenger area

Last edited:
Honda really needs to add some dash lights for gear shifter and 2w/4wd/turf. I may add some LEDs later to add some light to the dash when the lights are on.I finally finished up the dash. I moved the factory switches around, I changed the courtesy light switch from key on power to live always. this way I can turn on the lights so I can find where to put the key in. I said lights, because I added a license plat light to the ROPS above my head and some clear penny clearance lights in the rear passenger areaView attachment 367022
Similar threads
- Replies
- 10
- Views
- 1K


