Adam490
HFA Grand High Wizard
Lifetime Member
Supporting Member
This was so easy, thanks to all of you who did the trial and error!


He can't, he bought a base..@100Acre
I know... he’ll have to do like @Plumber32 did and add the panels.He can't, he bought a base..
That's what I was planning, so I can get the color I want.add the panels.
He didn't buy a 1000, just the stickers and spacers for his P5@100Acre
Welcome and great to hear your getting your daughter out and about! Do the fan under the seat for heat. Only way to fly! Done all the other stuff, got to cool the headers down. We are neighboring States, keep your eye on the regnal forums ( South West ) for some rides in south/central Arkansas, and come ride. We do a lot of eating! HA!Hey guys, I'm new here. Just got my 1000-5 deluxe last week. First thing I did is look at mods for the Heat Shielding issues.
I already ordered door latches, dry bags and RB3 bushings for this setup. I was kind of disappointed in the amount of storage, but I needed the 2 back seats (disabled daughter). So glad I noticed this post, give me a week or 2 and I'll try to add some pics.
Welcome and great to hear your getting your daughter out and about! Do the fan under the seat for heat. Only way to fly! Done all the other stuff, got to cool the headers down. We are neighboring States, keep your eye on the regnal forums ( South West ) for some rides in south/central Arkansas, and come ride. We do a lot of eating! HA!
Be safe!I already ordered 2 of the 4" bilge fans, Header Titanium Wrap, and Plenty of the bubble wrap.
I love Arkansas trails. We will be heading back to Mena over the 4th with a group of friends From SWLA
Welcome to the forum, look forward to the pictures. Awesome to hear ya getting your daughter outHey guys, I'm new here. Just got my 1000-5 deluxe last week. First thing I did is look at mods for the Heat Shielding issues.
I already ordered door latches, dry bags and RB3 bushings for this setup. I was kind of disappointed in the amount of storage, but I needed the 2 back seats (disabled daughter). So glad I noticed this post, give me a week or 2 and I'll try to add some pics.


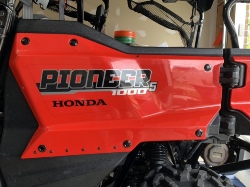
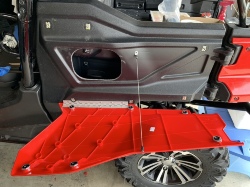
I finished my panels and took pics and added some tutorial notes. It turned out really nice and I’m happy with it.
I forgot to mention one thing so far in the pics. You have to either drill out the plastic on the back of the top three holes or cut the new threaded ball ends to length. I drilled them out and used the nut that came with them on the backside.
Parts list of what I used are in the description of the how to video, it’s just a slideshow. I didn’t know how to make an album and share it publicly with relative ease. Hope this helps some of you.
Thanks to everyone who did the trial and error. I read through this entire post a lot. Lol.
View attachment 138197
View attachment 138198
He can't, he bought a base..
That’s what I did. Somewhere on these pages is how I had to do it. Mine was a base model and I bought panels and the plugs to install them later that year. So there isn’t the metal brackets to screw the pins to. It takes a little kanutinvalve type engineering with a Langston 7” gangly wrench to do it but it works.I know... he’ll have to do like @Plumber32 did and add the panels.
View attachment 92221 View attachment 92222 View attachment 92223 I finally got to this mod. Had the chit sitting on my bench a while. Still need to tidy up a few things. I have the push pins on the top and henge on the bottom. My panels were put on later so I had to drill my own holes with rubber jack nuts for fastening. Well that made thing a bit of a whore to install the push pins but I made them work. First I used a step bit to counter sink the plastic and installed the nut backwards so that the flange of the nut sunk flush to the plastic setting the ball as close as possible. I also used some red locktight on the threads for that nut. In the inside to tighten the ball bolt, I used a flat washer then a lock washer then had to use a vise grip to hold the outer nut flange to get it (old German word) “good N tight” they will not back out.
Question, those of you with the hinge, what did y’all use to fill/decorate the three holes on the bottom ?
Where did you buy the green panels? Every where I look they dont have the green. I'm assuming cause they dont make a green deluxe. I found the front and rear doors, and 2 small rear panels for $300 on ebay. You can get all 8 panels for that if it was red or white from a few places. I only want the 4 rear panels.View attachment 92221 View attachment 92222 View attachment 92223 I finally got to this mod. Had the chit sitting on my bench a while. Still need to tidy up a few things. I have the push pins on the top and henge on the bottom. My panels were put on later so I had to drill my own holes with rubber jack nuts for fastening. Well that made thing a bit of a whore to install the push pins but I made them work. First I used a step bit to counter sink the plastic and installed the nut backwards so that the flange of the nut sunk flush to the plastic setting the ball as close as possible. I also used some red locktight on the threads for that nut. In the inside to tighten the ball bolt, I used a flat washer then a lock washer then had to use a vise grip to hold the outer nut flange to get it (old German word) “good N tight” they will not back out.
Question, those of you with the hinge, what did y’all use to fill/decorate the three holes on the bottom ?
I got them on eBay only to find out they were coming from a shop in GranRapids near me go figure. Anyway, they were 300$ for all 4 back ones and front doors with hardware. I couldn’t find them anywhere neither at the time. That was in 16’Where did you buy the green panels? Every where I look they dont have the green. I'm assuming cause they dont make a green deluxe. I found the front and rear doors, and 2 small rear panels for $300 on ebay. You can get all 8 panels for that if it was red or white from a few places. I only want the 4 rear panels.
That's what I figured. Every parts diagram I looked at for the green was a non-deluxe and it wouldn't have a part # for the rear panel, just the door itself. I got push pin latches in the mail yesterday. I will just have to order the panels from ebay for $300. I really want that added storage. Thanks for the response.@TripleB I think some of the reason the green is hard to find panels is that I’ve never seen a deluxe in my green. If they did it was for a very short time and very few.

