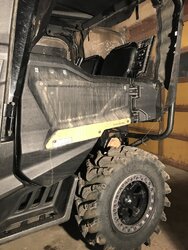
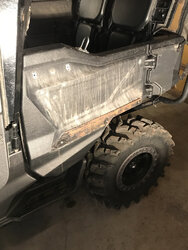
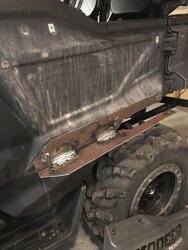
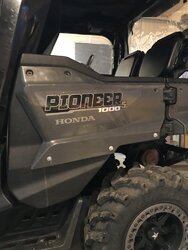
P1000m5 1000-5 Rear Door Inside Storage Modification

N

noisewater

Active Member
Aug 3, 2017
59
188
33
west michigan
Ownership

  1. 1000-5
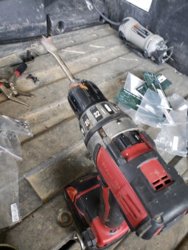
I took my dewalt cordless drill with 1/2" chuck and gently tightened that around the ball end. Then hit the trigger and it went right in. Then I just loosened the chuck to take it off.
 
  • Like
Reactions: BigOL3
BigOL3

BigOL3

Well-Known Member
Lifetime Member
Oct 27, 2017
2,994
8,918
113
Deep in the heart of Dixie, Kentwood, La.
Ownership

  1. 1000-5
I took my dewalt cordless drill with 1/2" chuck and gently tightened that around the ball end. Then hit the trigger and it went right in. Then I just loosened the chuck to take it off.
Good idea, I will give that a try. Sounds better than me having to cut all if them.

Great ...... worked like a charm!

Sent from my SM-G965U using Tapatalk
 
Adam490

Adam490

HFA Grand High Wizard
Lifetime Member
Supporting Member
Apr 7, 2019
7,659
56,482
113
Covington, LA
Ownership

  1. 1000-5

  2. Talon R LV
For the stud with the ball end ...... how did you get it to screw in so far or did you cut it off? It seems to get it to screw it would require vise grips which would ruin the threads.
I just drilled a small pilot hole through the plastic in each mounting hole and ran them through. Wrapped electrical tape around the shoulder near the ball and used a vise grip to get them where I needed them. I was going to go back and cut off the excess but got lazy.
 
  • Like
Reactions: BigOL3
BigOL3

BigOL3

Well-Known Member
Lifetime Member
Oct 27, 2017
2,994
8,918
113
Deep in the heart of Dixie, Kentwood, La.
Ownership

  1. 1000-5
I just drilled a small pilot hole through the plastic in each mounting hole and ran them through. Wrapped electrical tape around the shoulder near the ball and used a vise grip to get them where I needed them. I was going to go back and cut off the excess but got lazy.
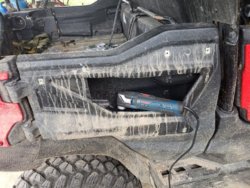
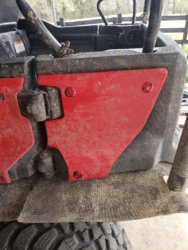
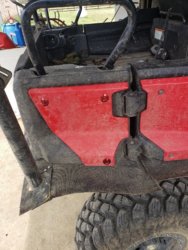
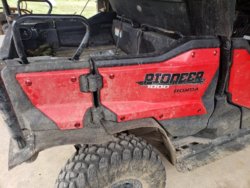
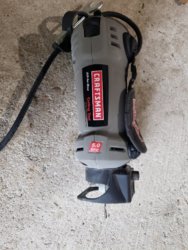
I had already cut one before @noisewater mentioned the drill, that made it easy. I did the back 2 small sections first, and then the right rear door. For the RR door I also cut the lower 3 bolts/pins so any bag would not be getting hung up on them. I only had 12 of those 'buttons', so I will have to do the left rear door later. I cut the first 2 holes out with the Craftsman all in one cutting tool, but did the big door with the Bosch Multi tool. The Bosch was MUCH better, cutting faster, smoother and all round easier. I also used it to cut the 4 bolts/pins. I used a paddle wood bit to open up the holes for the buttons.
Cb1e73f6414cee091d34b524cd822c61B09ef7ccb1482353b9f5517b37cf4a536156f11c2305e33fd832e9b25da4f00979972accd030bc02327a648e52a8c267E763e23aaf43432430e744b220c471387deed45bc4bd6d19468988f6fd066bd8
 
Last edited:
S

Sampson

New Member
Mar 15, 2020
1
0
1
GA
Ownership

  1. 1000-5
Subbing for future reference. Great idea!
 
B

Ballardslaw

New Member
Sep 13, 2020
4
3
3
SD
Ownership

  1. 1000-5
Would you happen to have a recommended parts list so that I can buy everything before I start? Do you have a step-by-step instructions? How long should the quick latch hood pins be? Why did you use rivets to attach the hinge versus screws?
 
joeymt33

joeymt33

i4WD=imitated 4WD
Moderator
Lifetime Member
Supporting Member
Club Contributor
Mar 17, 2015
11,092
39,079
113
Guntersville, AL
Ownership

  1. 1000-3

  2. 1000-5
Would you happen to have a recommended parts list so that I can buy everything before I start? Do you have a step-by-step instructions? How long should the quick latch hood pins be? Why did you use rivets to attach the hinge versus screws?

Just buy some of the hood pins and cut off the extra if you want to.

The rivets with a washer on the back will hold much stronger than a screw in that thin plastic.
 
Remington

Remington

Deputy Fife POIDH Enforcement Officer
Lifetime Member
Supporting Member
Jul 24, 2016
18,376
104,730
113
Michigan
Ownership

  1. 1000-5

  2. Talon X
Would you happen to have a recommended parts list so that I can buy everything before I start? Do you have a step-by-step instructions? How long should the quick latch hood pins be? Why did you use rivets to attach the hinge versus screws?
Read the first couple pages and you should have those answers you desire. Some aspects to the mod is a preference to you.
 
GlockMeister

GlockMeister

The Bearded Wonder
Lifetime Member
Supporting Member
May 11, 2016
7,604
35,567
113
Greenville, Mo
Ownership

  1. 1000-5
Would you happen to have a recommended parts list so that I can buy everything before I start? Do you have a step-by-step instructions? How long should the quick latch hood pins be? Why did you use rivets to attach the hinge versus screws?
All the links to the parts are in this thread...
No...
I left mine full lenght...
And finally as Joey said rivet with a washer is stronger because the plastic is thin.
 
tjoreo

tjoreo

Well-Known Member
Lifetime Member
Feb 18, 2015
1,010
1,929
113
Southern Idaho
Ownership

  1. 1000-5
I did mine earlier this summer. I didn't end up using the hinge but instead I used 4 studs per panel leaving the middles empty. This way I can take the panel completely off. 1 thing I would recommend is to install the ball stud first before drilling the holes for the push button in the panel. My first panel is a little hard to install and I ended up bending the ball stud to help with getting the panel back on. On my second side I installed the stud, then lined up the panel to know where to drill the holes. The rear studs kind of run towards the back so I offset the back holes a little to compensate for the angle. Take your time but it is a great idea for storage.
 
B

Ballardslaw

New Member
Sep 13, 2020
4
3
3
SD
Ownership

  1. 1000-5
How did you go about assuring proper alignment with bolts holes while attaching the piano hinge?
I just finished my door modification. I found an easy way to get the piano hinges to measure correctly. (I bought black anodized aluminum 12 inch hinges from Amazon so I did not have to paint them and they work perfectly.) Once I installed all the top door hood pins and hinges on the bottom of each door with rivets on the body panels then I taped in flat head thumb tacks to the holes of the inside part of the hinge. Then I installed the door on the 3 top hood pins and held out the bottom of the panel where the hinge is THEN I carefully pressed in the hinge all across the bottom and it left perfect indents were each hole for the piano hinge needed to be on the door itself. Thought I would share so everyone did not have to go through the pain of trying to tape and remeasure multiple times like I did on my first door. Sure saved a lot of time to get it placed perfectly!

FYI: I did not see on this thread, it may have already been listed, but if you buy the ~1.2 inch diameter hood pins with the ~2.15 inch length screws they thread perfectly into the holes that are there from the bolts you took out to takeoff the decorative panel. There is a plastic backer behind the screw in threads BUT don’t worry if you just start slowly screwing in the threaded screws for the hood pins with a drill attached to the head it will slowly just push through nicely and give it extra support. No need to cut off the backside of the screws NOR pre-drill out the plastic.

See my follow up post hereinafter for more details on parts/tools.
 
Last edited:
Remington

Remington

Deputy Fife POIDH Enforcement Officer
Lifetime Member
Supporting Member
Jul 24, 2016
18,376
104,730
113
Michigan
Ownership

  1. 1000-5

  2. Talon X
I just finished my door modification. I found an easy way to get the piano hinges to measure correctly. (I bought black anodized aluminum 12 inch hinges from Amazon so I did not have to paint them and they work perfectly.) Once I install the hinges with rivets on the body panel that comes off then I taped in flat head push pins to the holes of the inside part of the hinge. Then I installed the door on the hood pins and held the bottom mount while I carefully pressed in the hinge all across the bottom and it left perfect indents were each hole for the piano hinge needed to be on the door itself. Thought I would share so everyone did not have to go through the pain of trying to tape and remeasure multiple times like I did on my first door. Sure saved a lot of time to get it placed perfectly!

FYI: I did not see on this thread, it may have already been listed, but if you buy the ~1.2 inch diameter hood pins with the ~2.15 inch length screws they thread perfectly into the holes that are there from the bolts you took out to takeoff the decorative panel. There is a plastic back or behind the screw in threads but don’t worry if you just start slowly screwing in the threaded screws for the hood pins with a drill attached to the head it will slowly just push through nicely and give it extra support. No need to cut off the backside of the screws.
Got any pics?
 
  • Like
Reactions: Ballardslaw
B

Ballardslaw

New Member
Sep 13, 2020
4
3
3
SD
Ownership

  1. 1000-5
My mod looks the same as everyone's that used the chain and hinge method. Happy to send specific pics to help out anyone or give my 2 cents. I would say that having the hinge system is really cool, impressive to your buddies and nice for a beer table on the trails BUT it does add a lot of time to the project. If looking to get done and useable quickly then the hood pins and just replacing all of the bolts is the fast way to get'r done. Then just need the hood pins (I purchased on Ebay as much cheaper and faster than Tansy website and cheaper than Amazon). I've tried to put together a listing below of all the recommended parts for the project to have on hand below (can throw out the thumb tacks, chain/strapping and hinges if going with quick install method and not having the folding down feature). Assume you have the following tools on hand: Jigsaw, drill with bits up to .75" and hex heads but be careful not to strip panel hex head bolts because they're really locked in (suggest first breaking them loose manually with hex wrench before using drill as I stripped one with the drill and it was a nightmare to get it out then), box cutter with new blade, loctite, rivet gun/tool (only need if using hinged method), sandpaper to smooth off plastic after it's cut--I used a hand torch first then sandpaper.

Here's the flathead thumb tack picture of what I used to tape inside the piano hinge holes:
1601318525463

Hinge & rivets (search on Amazon for: USA Premium Store A Pair 2 Aluminum Anodized Black Piano Hinge & cost me $10.74 with shipping for 2) Hinge fits 3/16 medium length rivets just right--get black ones to match up your project nicely or you can use silver if you don't mind. Be sure you space the hinge off of the inside of the plastic panel with some 3/16" washers so it doesn't bend when riveting. Due to needed backing for rivets in plastic and support of the hinge I'd suggest having #8 or 3/16" stainless steel washers/rivet washers on hand ~60-70 would be nice to give yourself a cushion:

1601318653104

1601321144138

154F381F 6ACD 440D B1CF B49B4D2BF9C7

Here's the hood pins that worked great for me after drilling out old bolt holes in plastic decorative panels to .75" and the deeper holes needed a little trimming on the backside with a sharp box cutter to be able to get the threads to show. Use some loctite on the threads. (search eBay for 10x hood pins for best prices of which I paid $30.38 for 10x & free shipping from China--other colors available than black too):

8A3B918C 1A5C 4A64 8BCD 753C15380BEA

Last thing is to use either Heavy Duty poly strapping or light weight No.16 single jack chain if using the hinged method--buy no more than 3.5-4'. Chain probably best bought at Home Depot since they sell super cheap by the foot:
1601321625935
1601321828016

I have also added this weatherstrip seal (available at Walmart) and put it on the slightly raised 1" wide ridge that goes all the way around and above the hole that I cut out of the door. First I cleaned the plastic really well with soap and water then I rubbed it down really well with rubbing alcohol. After cutting and fitting on top of the ridge which is the perfect width for this stripping: This weather stripping expands and fits tightly against the door and really helps with keeping out dust and water. Seemed to stick really strongly to the plastic. It is not completely weatherproof but helps a ton!
95D16CDF CADB 440D AEB3 157EB50ED09F


Dry bags recommended for large door storage no larger than 5-6 Litre. Back area ~2L. I really liked this bag, seems well made and translucent. Cheapest varied between Amazon OR shipped from China on eBay.
1601322264069
 
Last edited:
C

CiK

New Member
Oct 22, 2020
1
0
1
Indiana
Curious. Is there any big difference in installation between the 25mm or 32mm hood pins?

I see both used and wonder why and what might change.

Thanks!

Pic of my 2020.

C4ba305b5f765ce26c29c94948f2018b


Sent from my iPhone using Tapatalk
 
B

Ballardslaw

New Member
Sep 13, 2020
4
3
3
SD
Ownership

  1. 1000-5
Curious. Is there any big difference in installation between the 25mm or 32mm hood pins?

I see both used and wonder why and what might change.

Thanks!

Pic of my 2020.

View attachment 234835


Sent from my iPhone using Tapatalk
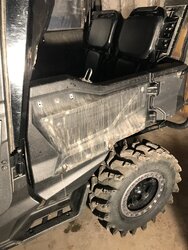
I'd use the larger version as it covers the recess the best but either will work.
 
Parkspremier

Parkspremier

Active Member
Dec 18, 2020
51
171
33
Central oregon
Ownership

  1. 1000-5
Now just waiting for my hood pins to be delivered, test fit everything, disassemble it, clean up the steel and paint it black, cut the excess threads showing from the outward screws and paint the outer washers-nuts-screws black to match my black pushpins and done! I just didn’t feel good about drilling holes and riveting in a hinge. This way I have no permanent modifications to the plastics aside from cutting the hole for the storage. Hopefully this gives others another idea for this modification 👍🏻

589FC3A1 55C7 45AB BE27 B1E656D82A7F 05F2ED61 8BC0 483C 9439 9ED09614931B BA71473A 0016 417B A43D 8AA8D325E554 AEE67697 6DC7 4940 BADA 7611DA03078D 93FCF4D1 B767 4EFF 964A E8C709A2AC7A
 
DenMachine

DenMachine

Active Member
Supporting Member
Jun 30, 2020
58
116
33
Wisconsin/Arizona
Ownership

  1. 1000-5
Do you think a scissor jack will fit in there? I have pretty much decided this is the route i want to go as well
I think it would fit. I don't carry spare tire. After I had a 1" slash in my rear tire on the trail, I thought it was all over for me. But my buddy patched that tire with 3 or 4 plugs.... So Now I know how it's done for a severe gash, I'm not afraid to go without a spare. Remember you only need 5 lbs inflated to limp her back home. What one does need is a good air pump. I lost no air limping back to base 5 miles away.
 

About us

  • Our community has been around for many years and pride ourselves on offering unbiased, critical discussion among people of all different backgrounds. We are working every day to make sure our community is one of the best.

User Menu

Buy us a beer!

  • Lots of time and money has gone into making sure the community is running the best software, best designs, and all the other bells and whistles. Care to buy us a beer? We'd really appreciate it!

    Beer Fund!

    Club Membership!