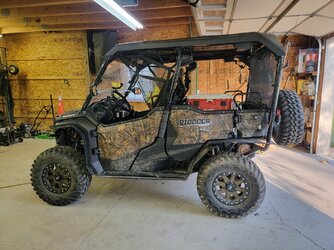
P1000 Scoop's 2021 P1K5 Deluxe Phantom Camo Build

Scoop

Scoop

Well-Known Member
Lifetime Member
Supporting Member
Sep 7, 2021
4,206
15,731
113
Michigan
Ownership

  1. Other Brand

  2. 1000-5

  3. Talon R LV
Bunch of post-LaFollette fixes/changes completed today:

1. Fixed the slow leak in RR tire (metal in tire; easy one plug fix)

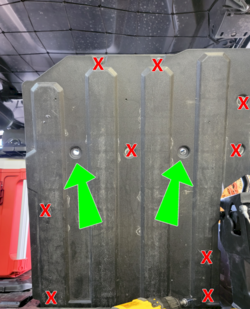
2. Cut about 1" off the front of the skid plate (both sides @ the back of the front wheel well. The larger tires were rubbing under full compression. Turns out Trail Armor updated these skids because THEY removed these front turnups from thier design/product for the same reason.

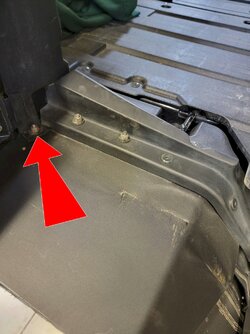
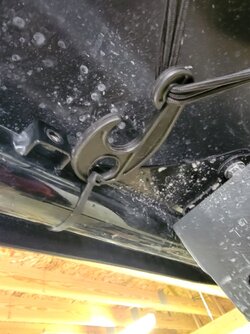
3. I had to flip six (three on each side) nuts & bolts that secure the rear MudBuster flaps. The one in my pic marked with the red arrow is the one that was gouging the tire under full compression. I'm kinda pissed and will be reaching out to the manufacturer because this caused damage to both rear tires (1/8 cut/rip in the lugs all the way around the tires. The lugs will eventually wear down where these cuts are no longer present, but I'm still not too pleased. I went ahead and flipped the other two (see pic) just for good measure, but I doubt those would have hit anything.

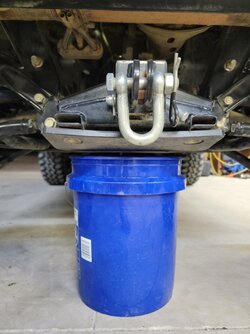
4. Pulled all four Fox QS3 shocks and adjusted them all to ensure vehicle was level (it had a very slight list to the driver's side). Added more preload, so now I can clear a 5 gallon bucket with no problem ... ;) Have I mentioned how much I like these shocks (compared to the stock cushions)?

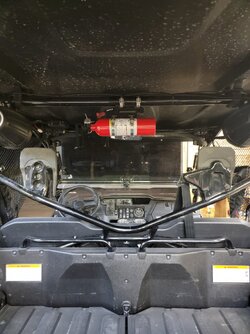
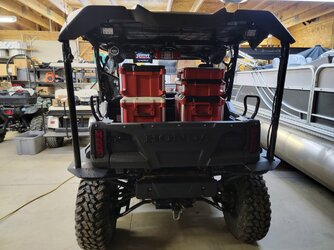
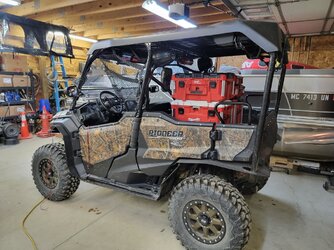
5. Moved the fire extinguisher to the roof ROPS in the middle. Need to do this to make room for my Milwaukee Packout setup, which I'll be working on in the next few days.

I spent about 2 hours washing it yesterday. Now we have plenty of Tennessee red clay and direct forever on our property. Removed (and washed) the CEC enclosure and hung it up until winter returns.
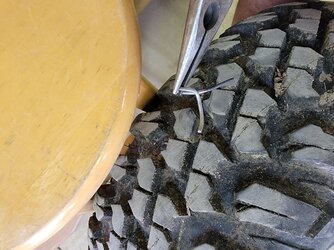
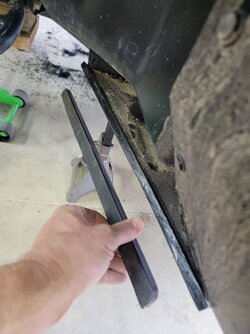
20230506 144857
20230506 184504 Badone
20230506 212944 20230506 212909
 
Last edited:
Scoop

Scoop

Well-Known Member
Lifetime Member
Supporting Member
Sep 7, 2021
4,206
15,731
113
Michigan
Ownership

  1. Other Brand

  2. 1000-5

  3. Talon R LV
Received the red 2 gallon RotopaX pack and the two DLX mounts. Now I just need Packibletool to ship my Monkeybars so I can mount the RotopaX mounts to my Milwaukee Packout boxes.
 
Scoop

Scoop

Well-Known Member
Lifetime Member
Supporting Member
Sep 7, 2021
4,206
15,731
113
Michigan
Ownership

  1. Other Brand

  2. 1000-5

  3. Talon R LV
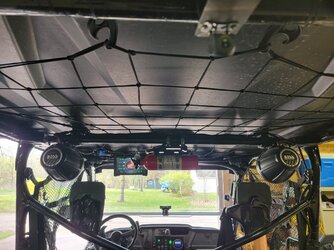
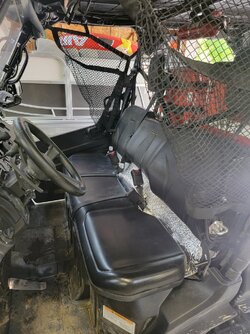
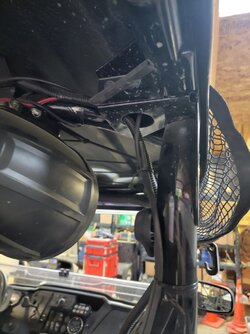
Added a stretching bungee style net underneath the OEM roof. Seemed like a good place to be able to tuck away light jackets, rain gear, or other similar type things.

20230507 120334
 
Scoop

Scoop

Well-Known Member
Lifetime Member
Supporting Member
Sep 7, 2021
4,206
15,731
113
Michigan
Ownership

  1. Other Brand

  2. 1000-5

  3. Talon R LV
Got the Milwaukee Packout adapters bolted down to the seat backs. Not as easy as I thought it would be but not too terribly difficult.

20230507 213548
20230507 213538

Oh, and if you ever need to remove the rear seat cushions, there's only two bolts that need to be removed. But feel free to remove them all before checking, just so you can put almost all of them back in. :rolleyes: Oh, and don't try to force the screws back in. It's a funky design on the nut (inside the headrest) and if you push too hard, you can dislodge it and make it impossible to screw back in without repositioning the nut. What a pain.

1683512559731
 
Last edited:
Scoop

Scoop

Well-Known Member
Lifetime Member
Supporting Member
Sep 7, 2021
4,206
15,731
113
Michigan
Ownership

  1. Other Brand

  2. 1000-5

  3. Talon R LV
(The post below is redirected to from this post)

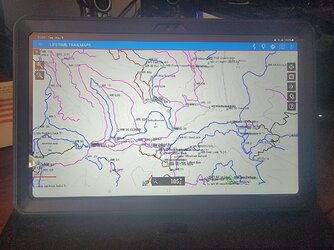
RAM mount products used for tablet:

All are RAM Mount products. Best there is. I don't do off brand stuff, either. Amazon should sell it. Or rammount.com. Just search the part numbers.

RAM-HOL-TAB20U - Tab-Tite Holder for 9"-10.5" Tablets with Heavy Duty Cases Compatible with RAM B 1" and C 1.5" Size Round Ball Bases

RAM-B-108BU - Strap Hose Clamp Ball Base with B Size 1" Ball for Rails 1" to 2.1" in Diameter

RAM-B-201U-A - Short Arm Compatible with RAM B Size 1" Ball Components

RAM-B-202U - Round plate with B Size 1" Ball

Power: I was originally going to have just this 12V socket ...

Attwood 11862-6 Universal 12V socket

... Then just push one of these in there to convert to USB 3.0 charger ...

Car Charger, JSAUX Quick Charge

... but then I remembered I still had one of this two pack, and you can literally replace the 12v socket with this (same male spades on the ends) and keep the weather resistant cover and wires to finish up the wiring ...

[2 Pack] 12V USB Outlet QC 3.0

I drilled two small holes in the tablet holder and mounted the socket/charger combo right on the back of it. Then I found a short 1' USB-A male to USB-C male cable to run from the USB outlet to power the tablet.

The USB outlet has its own touch switch built into it so you could wire it to always on power (with an inline fuse) if you wanted to run it with the key off, but since I have my entire fuse box on a DPDT switch to energize key-on or key-off, I just wired it to the fuse box like everything else.
 
Last edited:
Scoop

Scoop

Well-Known Member
Lifetime Member
Supporting Member
Sep 7, 2021
4,206
15,731
113
Michigan
Ownership

  1. Other Brand

  2. 1000-5

  3. Talon R LV
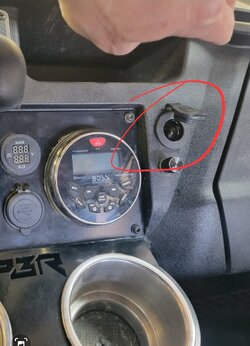
When I installed my heater, I removed the 12V socket in the lower dash to make way for one of the vents.

The other day, I got a 12V water pump/sprayer (to clean my radiator when it's full of mud) and it has a 12V cig lighter plug on it.

I figured I might get other things with the same plug, so I went ahead and installed the 12V socket in a different location on the dash.

Screenshot 20230509 191238 Gallery
 
Scoop

Scoop

Well-Known Member
Lifetime Member
Supporting Member
Sep 7, 2021
4,206
15,731
113
Michigan
Ownership

  1. Other Brand

  2. 1000-5

  3. Talon R LV
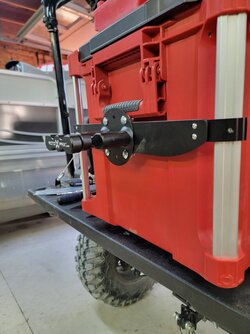
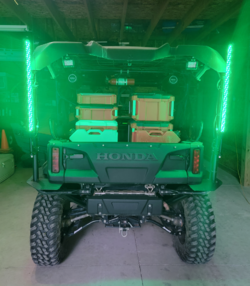
I mentioned the RAM (rail mount adapters) from Packibletool.com (support your USA small businesses!) for my Milwaukee Packout boxes. I was able to get those mounted today. Actually, I (also) bought a product from them called 'Monkeybars'. They are essentially the RAM mounts with a steel bar that is intended to be used for magnetic tools. Honestly, the only PITA part was figuring out how to remove the rails from the Packout box so that I could install the rail mount adapters for the Monkeybars. I made a short video on that, but I suck at that kind of stuff, so I don't know if/when I'll post that.

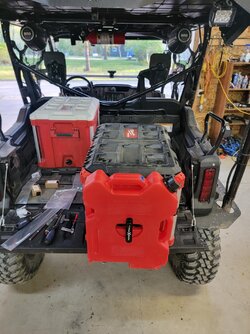
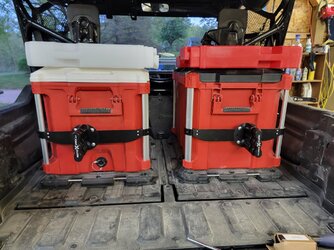
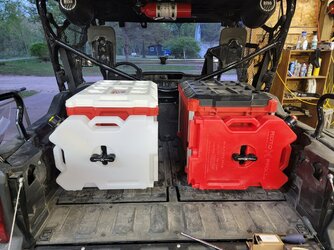
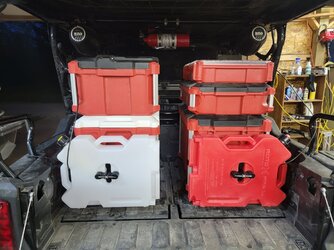
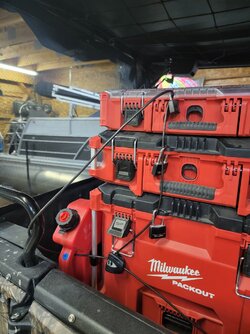
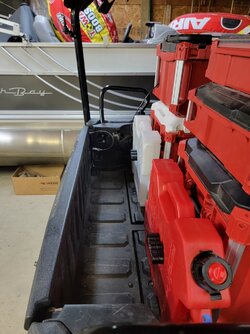
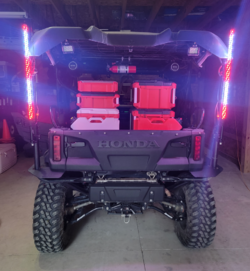
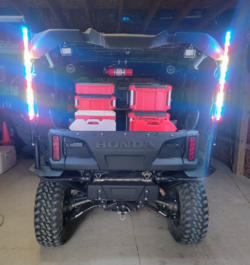
My plan all along was to mount the Rotopax DLX mounts to the RAMs/Monkeybars, and everything turned out really well. At first, I though I would mount the Rotopax packs so that they were vertical, but the mounts/bars interfered with the handles on the ends of the XL Packout box and the 40QT Packout Cooler. By mounting them horizontally, I was able to eliminate that problem, and I positioned them so that the areas between the outside of the Packout boxes and the walls of the dump bed were kinda "walled in" by the Rotopax pack on each side, and the middle area (between the two Packout box stacks) was open to allow longer items to be laid down the entire length of the dump bed. Each pack is 2 gallons (one for fuel and one for potable water).

As previously mentioned, two Packout adapter plates are mounted to the backs of the two jump seats so that I can remove all the boxes and the jump seats can still be used normally. I can also throw my Kemimoto dump bed liner in there if I want to haul crap (dirt, wood, etc.) without making a mess inside the Packout adapters.

Finally, while not a high dollar security system, I put a Master Lock padlock on each of the Packout boxes, then threaded a Master Lock Python cable lock (one on each side) through all the of the locks, through the Rotopax pack handles and around part of the Pioneer bed. Clearly, if you have something to cut the cable, you'll be able to walk away with the boxes, but my intent of doing all this was to deter the causal passerby from reaching in and opening up a box and/or from grabbing one or a Rotopax pack while we were having lunch or otherwise away from the machine while on road trips. The Rotopax mounts with the locks built in are notorious for seizing up after only a short period of time in the elements, which is why I chose to use the non-locking DLM mounts.

Yes, I probably have more Packout boxes than I will likely run at one time, but I wanted to have different sizes to pack depending upon how long we were going to be gone, where we were going, what I wanted to bring, etc..

A few POIDH:

Original plan that was scrapped (vertical orientation of the pack, which required horizontally oriented mount), as that would not allow me to use the Packout handles to carry the XL box or cooler:
2023 05 15 195935 2023 05 15 195903

Horizontal orientation of the packs (vertical orientation of the mounts):
2023 05 15 205209 2023 05 15 205506

Not sure how I'll run the cables, but you get the idea:
2023 05 15 212049 2023 05 15 220534

Also leave room @ the rear (nomo):
2023 05 15 215142

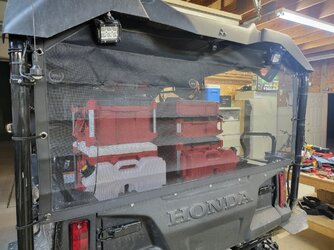
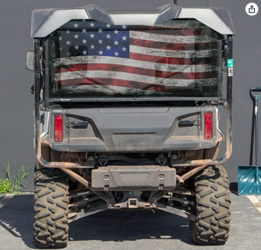
Finally, I found a heavy duty rear mesh dust screen specifically for the Pioneer 1000-5. It was a little pricey for what it is, but I didn't want to hack away at something that wasn't the correct size and end up with a ghetto looking screen. This is fresh out of the package, so I expect the folds/lines to disappear after a while. I may add a couple of snaps there at the bottom rear (re-use the snaps from my CEC Enclosures winter enclosure), but likely not necessary, as it's pretty tight:
2023 05 15 220419
 
Last edited:
Scoop

Scoop

Well-Known Member
Lifetime Member
Supporting Member
Sep 7, 2021
4,206
15,731
113
Michigan
Ownership

  1. Other Brand

  2. 1000-5

  3. Talon R LV
Last edited:
Scoop

Scoop

Well-Known Member
Lifetime Member
Supporting Member
Sep 7, 2021
4,206
15,731
113
Michigan
Ownership

  1. Other Brand

  2. 1000-5

  3. Talon R LV
A few hours were spent in the pole barn completing a few relatively minor tasks.

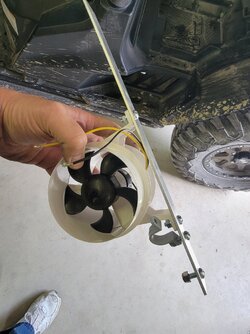
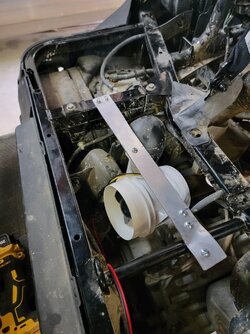
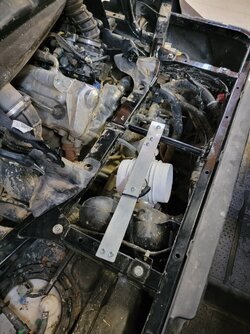
Installed an Attwood 1749-4 12V bilge fan under the seat to reduce some of the heat that comes up into the cab. It's a 4" 200CFM marine rated fan. Moves the air pretty good, but only pulls ~2.1A @ 12.0V (~2.45A @ 13.2V per my multimeter). I'm waiting on Amazon to drop off a potentiometer for it so that I can regulate the fan speed instead of just an ON-OFF switch. I played around with the fan w/my bench power supply and it doesn't seem to have an issue with adjusting voltage down pretty low, so I think it will work out well. Twisted the ends of the aluminum stock before installing so that the fan points down and towards the bulk of the exhaust headers.

2023 05 20 152136 2023 05 20 152150
2023 05 20 161437 2023 05 20 180042

Also waiting on some of the foil-backed heat insulation material to show up as well. My '21 had the rubber sheets below the seat, but I'll be adding this as well for extra protection.

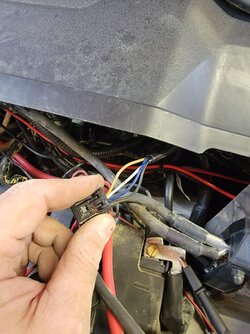
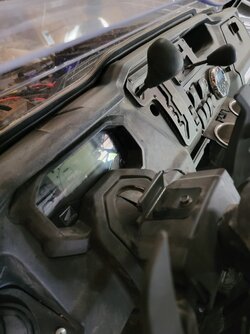
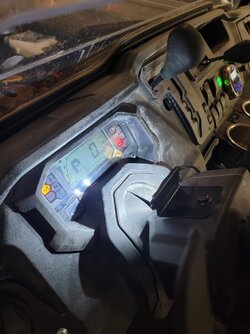
My speedo light went out a few months back. If I pulled the PCB and replaced the LED, I'm sure it would go out again, so instead, I crafted a small bracket, shot it with some black Rustoleum, and mounted a rock light on it, pointed at the speedo cluster. I was able to locate the brown wire that's energized whenever the headight switch is on (low and high beam), so the rock light only lights up when the headlights are on. I'm not a big fan of T-Taps, but it works. Likely just a temporary solution, but we'll see how it goes. No, you can't see the reflection of the two LEDs when in the driver's seat. It actually lights things up nicely.

2023 05 20 172122 2023 05 20 181628
2023 05 20 181653
 
Scoop

Scoop

Well-Known Member
Lifetime Member
Supporting Member
Sep 7, 2021
4,206
15,731
113
Michigan
Ownership

  1. Other Brand

  2. 1000-5

  3. Talon R LV
OK, handful of things completed today.

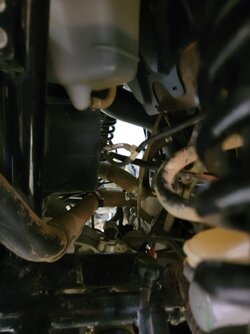
Finally got off my duff and installed the vent kit I got from @Bayouownbeer last year. I didn't take any pictures during the install, but snapped just a couple when done. Extended the rear diff, shift box, sub trans and fuel tank all the way up to the roof, and right now, the front diff and radiator fan are extended up to right about the top of the hood near the windshield - not sure if I'm going to run those higher or leave as is. I should probably cover the ends of the vent tubes ...

2023 05 21 200030 2023 05 21 200049

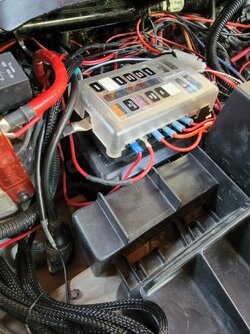
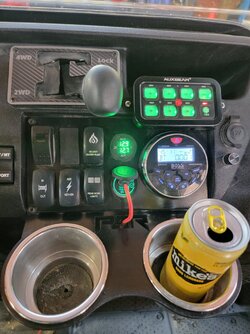
Next, my 12 circuit fuse box was nearly full (one spot left), so I decided to install an Auxbeam 8 gang switch panel. I was able to squeeze the main unit (not sure what they call it - it's the box with where you connect all your wiring to) in between the AUX battery and my fuse panel, the latter of which has been Velcro'd to the AUX battery without any issues. Enlarged one of the two small holes in the upper cubby and that's where I ran the wire for the 8 gang LED control panel. I'm really pleased with how easily this install went.

The only thing I have hooked up right now is my recently installed bilge fan, which I decided to NOT install a potentiometer for. When I was testing it out on my bench PS, it was fine. But when I received the rheostat today and did a test connection, the motor was vibrating and humming at lower speeds. I guess it really likes full 12V. Not to worry, I'm sure that, once I install the foil backed heat insulation (awaiting arrival) and get it all buttoned back up, it won't be too terribly loud, relatively speaking.

2023 05 21 151244 2023 05 21 155010

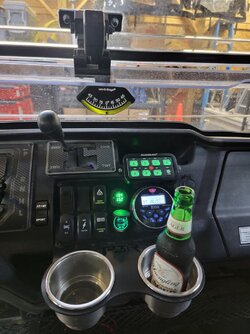
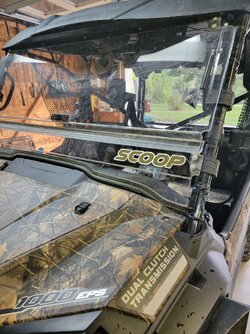
Finally, I wasn't having a lot of luck finding a place to install the Lev-O-Gage that would make it high enough to see yet out of the way, so I modified a bracket I found in one of my many boxes of crapola, mounted it to one of the screws for the SuperATV windshield latch and then attached the Lev-O-Gage to it. It's right there while being out of the way (no interference when shifting) and I was able to alter the bracket so the gage is at the perfect angle.

2023 05 21 211255

All in all, a very constructive day. Getting the last bits and pieces in place so I'm not rushing around doing last minute things the day before we leave for Takeover (next week).
 
Last edited:
Scoop

Scoop

Well-Known Member
Lifetime Member
Supporting Member
Sep 7, 2021
4,206
15,731
113
Michigan
Ownership

  1. Other Brand

  2. 1000-5

  3. Talon R LV
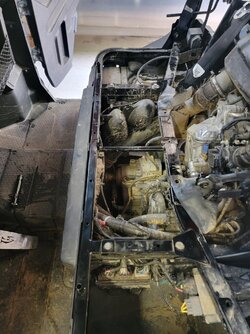
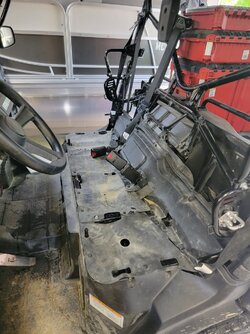
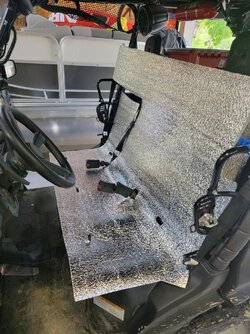
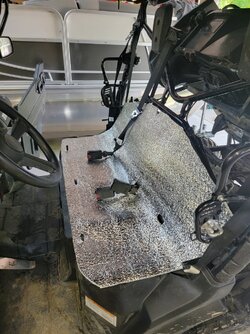
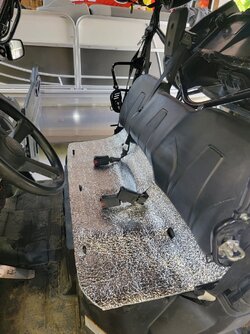
Yanked the seat and seat back and installed some foil backed heat insulation.

It's one full piece. Kinda looks like the lunar module but I want to see if it holds up.

Might try to cover it with something a little more sturdy (black duct tape?). Otherwise, I'll just cut the middle out. Meh.

20230527 113544 20230527 114921
20230527 121329 20230527 122952
20230527 130506
 
Scoop

Scoop

Well-Known Member
Lifetime Member
Supporting Member
Sep 7, 2021
4,206
15,731
113
Michigan
Ownership

  1. Other Brand

  2. 1000-5

  3. Talon R LV
Last edited:
Scoop

Scoop

Well-Known Member
Lifetime Member
Supporting Member
Sep 7, 2021
4,206
15,731
113
Michigan
Ownership

  1. Other Brand

  2. 1000-5

  3. Talon R LV
Tablet Info:

I purchased this shortly after I bought my P1K5 because I knew I would be running SOME kind of GPS mapping/trail software on an Android tablet and would mount it in the SXS ... but I did not know I would buy LTM.

It's a Samsung Tab A7 10.4" Wi-Fi (only) tablet with 64GB internal memory and an microSD card slot. I got it when it was on sale @ Costco and it came with a 64GB microSD card, too.

As long as it's a relatively newer-ish Samsung tablet, it will have the GPS chip so you're not depending upon cellular service when using it for mapping.
 
Last edited:
Scoop

Scoop

Well-Known Member
Lifetime Member
Supporting Member
Sep 7, 2021
4,206
15,731
113
Michigan
Ownership

  1. Other Brand

  2. 1000-5

  3. Talon R LV
Been looking at the @SuperATV spare tire carrier for some time. Today's 15% off sitewide 4th of July sale (and free shipping) got me to finally pull the trigger.

Already detailed the reasons I did NOT go with a bed extender in this post, as well as knowing I might have to tweak the SuperATV version to get it to operate nice and smooth, as well as knowing I will need to open it to access the dump bed.

But it seems to be a perfect fit for my needs. $314 shipped to my door seemed fair.

Post-install pics forthcoming ...

Screenshot 20230703 112455 Gallery
 
Scoop

Scoop

Well-Known Member
Lifetime Member
Supporting Member
Sep 7, 2021
4,206
15,731
113
Michigan
Ownership

  1. Other Brand

  2. 1000-5

  3. Talon R LV
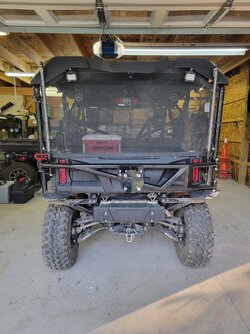
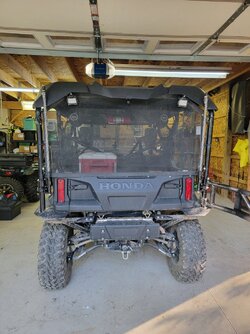
The @SuperATV spare tire carrier arrived today. Snagged it with 15% off and free shipping during the recent 4th of July sitewide sale. Woot!

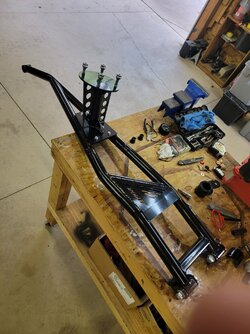
Only took me about 1.5 hours for the install, including having to R&R&R (remove, relocate, and reinstall) my whip lights and adjust the ham antenna.

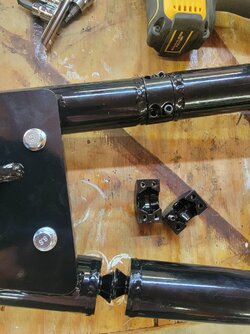
I was a bit worried at first that the two halves were not going to line up correctly. Instructions show to orient the two halves of each clamp so that they are on the front and back, but mine didn't work that way. I turned them 90 degrees so they were in a top and bottom orientation, and that pulled everything together nicely.

2023 07 06 175419

Bench assembly continued. It's a pretty solid and good quality product.

There are six bushings - two for each bolt on the right side and two for the pin end. Pay attention, as while the all have the same OD, the two for the pin end have a smaller ID (pin is smaller in diameter than the bolts). If you pound the wrong bushing in somewhere, have fun getting them out.

2023 07 06 181437

Installed the carrier to the buggy without too much fanfare. Only used two arms and one leg to do it, too.

Again, I did have to relocate my whip lights, but I was able to keep the whips entirely inside the ROPS and behind/under the roofline. This should minimize any chances of damaging the whips from low hanging trees or scraping against rock walls. Ham antenna is purposely a little higher, but still behind the vehicle.

I did have to ream out the lower hole of the clamp on the pin side, as it wasn't perfectly aligned with the upper hole. Now the pin goes in and out smoothly.

2023 07 06 192249

Swings open nicely to allow dump bed access/use.

If you have a tire/wheel combo on there, the weight will definitely cause the left side to sag a little when open. I'm sure it will be fine with normal use, as it will almost always be in the locked position. I will try to avoid putting any unnecessary downward pressure on it. Seem stout, though. 'Murica!

2023 07 06 192217

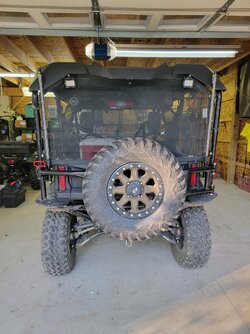
I can now enjoy toting my spare tire/wheel combo with me when needed.

I'm running Tusk Aramid 10-ply 30x10-15 tires on a Tusk Uinta Beadlock 4/137 15x7 5+2 bronze wheels all the way around, and the spare fits nicely on the carrier. Now if I can only get the beadlocks to stop their slow leak ... :rolleyes:
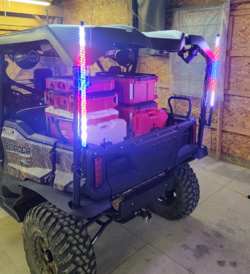
My 2-gallon potable water and gasoline Rotopax packs are mounted to a Milwaukee Packout XL box and 40 QT XL cooler with MonkeyBars from PackibleTool.com and Rotopax RX-DLX-PM pack mounts, so no need to hang them on the spare tire carrier. This keeps more weight forward instead of hanging it further behind the buggy.

2023 07 06 192806

I ran out of Loc-Tite before I was able to re-attach my whip light brackets, so I need to R&R those screws once I get some more 242.

All in all, I'm pleased with the way things turned out. Props to the gang @ @SuperATV for the seemingly great product. Time will tell how well it holds up.

2023 07 06 193619
 

About us

  • Our community has been around for many years and pride ourselves on offering unbiased, critical discussion among people of all different backgrounds. We are working every day to make sure our community is one of the best.

User Menu

Buy us a beer!

  • Lots of time and money has gone into making sure the community is running the best software, best designs, and all the other bells and whistles. Care to buy us a beer? We'd really appreciate it!

    Beer Fund!

    Club Membership!