Made at all they wayView attachment 16873
That made me lol, not sure why. Little guy just wanted to go home.
Made at all they wayView attachment 16873
You could put two welding rods thru the hose to keep filter from sucking thru place rods thru hose from 6oclock to 12oclock and 3 to 9 o'clock looking in it would look like cross hairs in a scopeWell...
I need to flag my post as a defective. Lol.
Went to check it today and the pre-filter is gone. Guess it got sucked down the pipe.
View attachment 16872
You can bend a 90 in each end of rods to keep them in placeYou could put two welding rods thru the hose to keep filter from sucking thru place rods thru hose from 6oclock to 12oclock and 3 to 9 o'clock looking in it would look like cross hairs in a scope
I used this tube - http://amzn.to/1UA5iLKHonda sxs what type fitting did you use to attach hose to intake box and how did you attach it also what type hose did you use I like your set up .im not going to submerge mine but would like to have a little piece of mind on splashing or crossing creeks hunting and riding.
Looks like from the color of your engine compartment you probably need a snorkel waaaaaay more than I will ever need. I did mine as minimal as I could, for just in case I run into a situation where it would be necessary. I think your design is probably the best way to go for serious wheeling. Rock on!Here is my version, might have to be modified a little if you have have a mid panel. Copied from my build.
Messed around with installing a snorkel. I like the way it turned out!
2" I.D. shop vac hose
2- 2" street 90
4- hose clamps
1' or so of 2" ABS pipe
4- 1" self tapping screws
2" rubber coupler
I removed the section of pipe under the seat and both couplers. Used the coupler from the front to attach the vac hose to the air box.
IMG_0981 by AK_Centurion posted Jun 19, 2016 at 10:40 PM
li" data-history="on">- Media
- Information
Ran the hose foward and looped it back up the drivers side, behind the filler panel and seat back.
IMG_0982 by AK_Centurion posted Jun 19, 2016 at 10:40 PM
li" data-history="on">- Media
- Information
Came up right next to the air box. Had to trim the access cover a little.
IMG_0993 by AK_Centurion posted Jun 19, 2016 at 10:40 PM
li" data-history="on">- Media
- Information
Then up between the roll cage and seat back. Trimmed the plastic on the top edge of the bed.
IMG_0991 by AK_Centurion posted Jun 19, 2016 at 10:40 PM
li" data-history="on">- Media
- Information
From there, up behind the head rest, to the top roll bar.
IMG_0994 by AK_Centurion posted Jun 19, 2016 at 10:40 PM
li" data-history="on">- Media
- Information
Add the 2" rubber coupler, street 90, with a couple of hose clamps. then the 2" pipe and the other 90. I used self tappers to hold the pipe and 90s together and still be able to disassemble if needed. Hoses clamp the snorkel to your roll bar. I re used the original prefilter, trimmed and stuffed in the last 90. It should keep water out when washing and the self tappers will keep the filter from being sucked in.
IMG_0989 by AK_Centurion posted Jun 19, 2016 at 10:40 PM
li" data-history="on">- Media
- Information
IMG_0990 by AK_Centurion posted Jun 19, 2016 at 10:40 PM
li" data-history="on">- Media
- Information
System is leak free and will choke out the engine in seconds when covered.
Mine also will choke out the engine in 3 seconds. Pretty much air tight.Here is my version, might have to be modified a little if you have have a mid panel. Copied from my build.
Messed around with installing a snorkel. I like the way it turned out!
2" I.D. shop vac hose
2- 2" street 90
4- hose clamps
1' or so of 2" ABS pipe
4- 1" self tapping screws
2" rubber coupler
I removed the section of pipe under the seat and both couplers. Used the coupler from the front to attach the vac hose to the air box.
IMG_0981 by AK_Centurion posted Jun 19, 2016 at 10:40 PM
li" data-history="on">- Media
- Information
Ran the hose foward and looped it back up the drivers side, behind the filler panel and seat back.
IMG_0982 by AK_Centurion posted Jun 19, 2016 at 10:40 PM
li" data-history="on">- Media
- Information
Came up right next to the air box. Had to trim the access cover a little.
IMG_0993 by AK_Centurion posted Jun 19, 2016 at 10:40 PM
li" data-history="on">- Media
- Information
Then up between the roll cage and seat back. Trimmed the plastic on the top edge of the bed.
IMG_0991 by AK_Centurion posted Jun 19, 2016 at 10:40 PM
li" data-history="on">- Media
- Information
From there, up behind the head rest, to the top roll bar.
IMG_0994 by AK_Centurion posted Jun 19, 2016 at 10:40 PM
li" data-history="on">- Media
- Information
Add the 2" rubber coupler, street 90, with a couple of hose clamps. then the 2" pipe and the other 90. I used self tappers to hold the pipe and 90s together and still be able to disassemble if needed. Hoses clamp the snorkel to your roll bar. I re used the original prefilter, trimmed and stuffed in the last 90. It should keep water out when washing and the self tappers will keep the filter from being sucked in.
IMG_0989 by AK_Centurion posted Jun 19, 2016 at 10:40 PM
li" data-history="on">- Media
- Information
IMG_0990 by AK_Centurion posted Jun 19, 2016 at 10:40 PM
li" data-history="on">- Media
- Information
System is leak free and will choke out the engine in seconds when covered.
Almost forgot I ordered some waterproof fabric to build a custom prefilter.Here is my entry into the DIY simple snorkle setup.
WARNING - UPDATE, do not use the pre-filter like I did below. See this post DIY Snorkel
-------------------
I have no plans to go deep. So a extension up higher up under the dash might work for me. I will be replacing the pre-filter with a new clean one so I can gauge mud entry. If a lot then back to drawing board!
View attachment 16686
View attachment 16687


I've thought about putting frogz skin over the intake, and not even use a extended pipe. Do you think it would work?Almost forgot I ordered some waterproof fabric to build a custom prefilter.
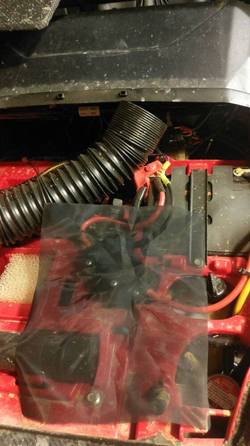
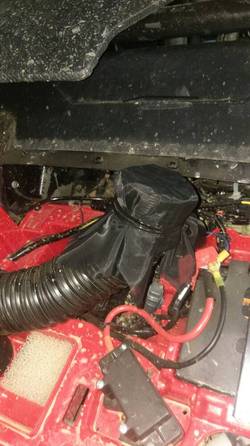
This fabric is Frogzskin mesh. It is "supposed" to keep all water out while allowing it to breath 100%.
I ended up ordering a bunch as I figured I could find a future use for it. I am willing to sale some to save you some $ and recope some on my end.
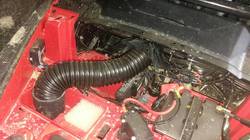
I attached it to the tube with some zip ties at current. I will look for a cleaner method to attach it in the future.
View attachment 22022View attachment 22023View attachment 22024
Idk.. Thought about that too. Lol.I've thought about putting frogz skin over the intake, and not even use a extended pipe. Do you think it would work?
Nice. I was wondering of it would fit up in there.Can't really tell from picture but it just goes in and points up , dont ever plan on going real deep but now have the option to go to top of the dash , noticed it was dusty up in there so I put a air filter , can't tell of any power loss so far but just took it for spin in yard
View attachment 22174
It's tight but it goes in . I wanted to go up and to the left but wasn't able to get it to go that wayNice. I was wondering of it would fit up in there.

