Multi Field Stripping a Tie Rod

lee

lee

Village Idiot
Lifetime Member
Club Contributor
Apr 4, 2013
2,383
13,487
113
Springfield Ohio
Ownership

  1. 500
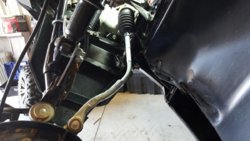
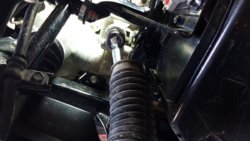
Does your tie rod look like this?
Thought you would customize your Pioneers looks on an old stump?
Upload 2016 2 5 23 16 10


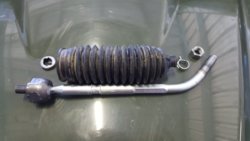
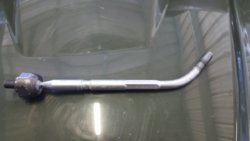
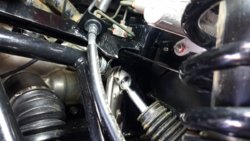
In case you where wondering, it is supposed to look like this:
Upload 2016 2 5 23 16 39


This guide is intended to help you get on your way, it is not a copy of the official factory service manual. Be carful working with tools and under the vehicle, if you are not sure about doing any of this take it to a trained professional and have it done right. I will share the tips and tricks I know But to be honest they are mostly my ‘guys’ tricks, he has years of experience working on dirt bikes, ATVs and SxS.

And, since I’m being super honest about all this, the bent tie rod is not mine and I didn’t bend it. I took the picture while pumping gas, this person was on the other side filling up at the same time. So as not to be a jerk and embarrass @JACKAL I’m not going to name names.
 
Last edited by a moderator:
lee

lee

Village Idiot
Lifetime Member
Club Contributor
Apr 4, 2013
2,383
13,487
113
Springfield Ohio
Ownership

  1. 500
Starters:

1)The tie rods between the Pioneer models is the same except for the length (as far as I can tell from the parts fiche). Removal and installation will be similar.
2)You don’t need to memorize all the steps now, you don’t even need to read it all, just remember that this post exists and you can look it up when you need it – hopefully you will have cell reception half way down the mountain when you pretzelize your tie rod.
3)The tie rods are not left / right so if you only need to carry one as a spare, or steal one off a donor SxS to get you back to camp. Again this is from a parts fiche.

Room to Work

Loosen the lug nuts and get the tire in the air (jack or hang it off a log). Make sure the vehicle is stable because you are going to be pushing on it pretty hard. Take the tire off to make room to work.

Removing the tie rod end (wheel side).

This step is sort of optional but it makes life easier if you can remove it. I have a ball joint tool from maintaining a fleet of Honda cars.
Upload 2016 2 5 23 18 43
 
Last edited:
  • Like
Reactions: sharp
lee

lee

Village Idiot
Lifetime Member
Club Contributor
Apr 4, 2013
2,383
13,487
113
Springfield Ohio
Ownership

  1. 500
Remove the cotter pin and loosen the nut, 17mm wrench. I leave the nut on but unscrew it so the tool is pushing on the nut. In case something gets messed up the nut is easy to replace. Also, now is the time to loosen the jamb nut locking the tie rod end to the tie rod, 19mm wrench.

I forgot to take a picture of this operation so I threw the ball joint tool on the Odyssey to show how it fits. Finger on the bottom pushes the tapered stud up when you tighten the bolt. It lets go with a bang.

Now you can unscrew the tie rod end.
Upload 2016 2 5 23 19 36


There are other methods to remove a tapered stud tie rod end that you can find on the net. I have tried several with varying degrees of un-needed expense. A ‘pickle fork’ will get it off but I always destroy the boot. I tried the ‘2 hammer’ method once and chipped the steering arm on the knuckle (don’t try it if the knuckle is cast iron (in fact don’t try this at all)).

Plan B – leave the tie rod end attached to the knuckle

You might be able to loosen the jamb nut (19mm wrench) and rotate the tie rod to unscrew it from the end with out removing the end from the knuckle. If this looks easier give it a try, if the tie rod is bent too much it may not turn all the way around in which case you will need to remove the tie rod end from the knuckle.
 
Last edited:
  • Like
Reactions: sharp
lee

lee

Village Idiot
Lifetime Member
Club Contributor
Apr 4, 2013
2,383
13,487
113
Springfield Ohio
Ownership

  1. 500
Remove das Boot

How many of you saw that movie in the original German language with sub titles? It was freaky when the only English you heard was from guys the sub crew was machine gunning and you weren't quite sure who to cheer for. Like mini Stockholm syndrome from watching the world from the U-boat perspective.

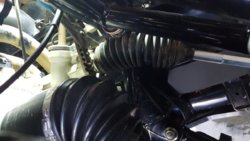
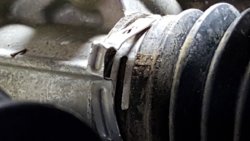
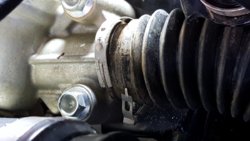
Anyway, the outer clip is removed with pliers, it is just one of those spring hose clamps. Squeeze the tabs together and slid it out of the way.
Upload 2016 2 5 23 21 53


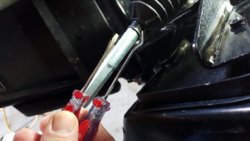
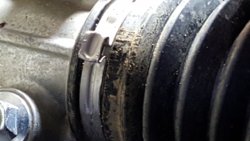
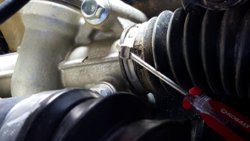
Hot Tip: To get the boot out of the grove in the tie rod stick a small screwdriver in between the boot and the tie rod and move it around in a circle while applying pressure to slide the boot off. You just need to get the boot started out of the groove it is mounted in.
Upload 2016 2 5 23 22 16


Reassembly tip: when you reassemble the boot put a little grease in the groove (both inner and outer) to make sure the boot seals. The boot is plastic and might leak otherwise.
 
lee

lee

Village Idiot
Lifetime Member
Club Contributor
Apr 4, 2013
2,383
13,487
113
Springfield Ohio
Ownership

  1. 500
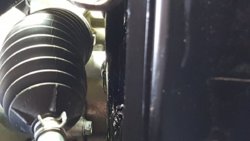
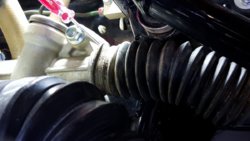
The inner end of the boot has a CV joint band on it. On mine the crimp was on the back side and I could not get to it. Use channel locks or vice grips to rotate the band until you have access to the crimp.

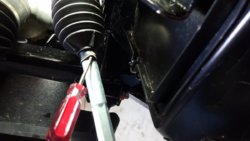
I used a punch to stretch the crimp out then unhook the band. Didn't think to take a picture until after the deed was done, but you get the idea.
Upload 2016 2 5 23 23 11


Hot Tip: When replacing the band use Honda part # 95018-46250, BAND, AIR CLEANER CONNECTING TUBE (46). This band is easy to put on and take off for next time!

Upload 2016 2 5 23 23 41


Some aftermarket steering racks use zip ties, and I have seen people use worm drive hose clamps. These are not recommended with the plastic boot. They can leave a gap for dirt / water to get in. As a temporary measure I have a zip tie holding mine together until Amazon delivers the clamp. The air cleaner band is made to seal all the way around to keep dirt out of the engine, good enough for a steering rack.


Reassembly tip: remember to put a little grease in the groove between the boot and the steering rack body to make sure the boot seals.
 
Last edited:
lee

lee

Village Idiot
Lifetime Member
Club Contributor
Apr 4, 2013
2,383
13,487
113
Springfield Ohio
Ownership

  1. 500
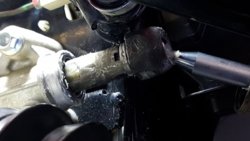
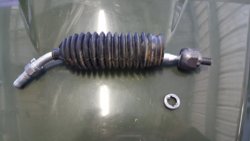
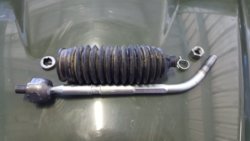
Unscrew the inner end of the tie rod

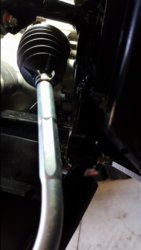
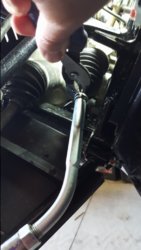
Use a 32mm wrench to unscrew the inner socket joint. What no 32mm wrench? Me neither, I broke in to the tractor tools and found a 1 ¼” open end that fit just right. In a pinch a pair of vice grips will do. If you have a large crescent wrench it may fit but the space is a little tight.

It unscrews like a normal bolt – but it is hard to get started – put your foot on it.
Upload 2016 2 5 23 26 3


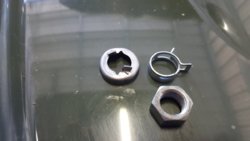
There is a locking washer keeping the inner socket joint from coming lose. The washer is punched in to notches in the socket joint (red arrow) and there are tabs that fit in to the rack end (green arrow).
Upload 2016 2 5 23 26 24
 
  • Like
Reactions: JTW and sharp
lee

lee

Village Idiot
Lifetime Member
Club Contributor
Apr 4, 2013
2,383
13,487
113
Springfield Ohio
Ownership

  1. 500
End of the rack showing the notches the tabs fit in to.
Upload 2016 2 5 23 27 0


Reassembly tip: When you screw the socket joint back on punch the lock washer to make it lock. On mine I was punching almost the same spot as the factory punch mark.

Also, I heard that the little tabs often get ripped off on disassembly. They are cheap, order a few when you order your parts.
Upload 2016 2 5 23 27 26
 
  • Like
Reactions: sharp and JACKAL
lee

lee

Village Idiot
Lifetime Member
Club Contributor
Apr 4, 2013
2,383
13,487
113
Springfield Ohio
Ownership

  1. 500
Reassemble the tie rod end. Set the toe, you can count how many turns to remove the tie rod end and get a rough setting from that.

Reinstall the cotter pin, mount the wheel and your good to go.
Upload 2016 2 5 23 28 4


Wow this got long. Wonder if I could get a job writing the official accessory installation instructions?

The End
Upload 2016 2 5 23 28 27
 
Last edited:
JACKAL

JACKAL

Ancient Honda fanboi
Moderator
Lifetime Member
Supporting Member
Club Contributor
Jun 11, 2015
39,809
271,877
113
Pioneer, TN
Ownership

  1. 1000-5

  2. Talon X4
@lee That is good write up. love the submarine movie reference. You are right on about the washer, the little tabs all but ripped off when I removed mine. Aslo note the 1 1/4" wrench fits so tight you will swear it is too small but it does fit at a perfect angle, I used vise grip to loosen my bent tie rod after I was sure my $23 wrench I just bought would not fit. Very tight in there.

20160206 145200 20160206 145221 20160206 145229
 
Last edited:
  • Like
Reactions: sharp
Hondasxs

Hondasxs

Club Founder
Staff member
Lifetime Member
Supporting Member
Feb 13, 2013
18,450
66,821
113
Charlotte, NC
HondaSxS.com
Ownership

  1. 1000-5

  2. Talon R
Wow this got long. Wonder if I could get a job writing the official accessory installation instructions?
No... Because you did not require the dash to be removed!

Otherwise, Thanks for the write up.
But.. I dont know a single person with a ball joint separator. So plan B for that.
 
advertisement
JACKAL

JACKAL

Ancient Honda fanboi
Moderator
Lifetime Member
Supporting Member
Club Contributor
Jun 11, 2015
39,809
271,877
113
Pioneer, TN
Ownership

  1. 1000-5

  2. Talon X4
@lee Here is several detailed pictures I took removing my tie rod today, in case you want to substitute any in the above. Thank god for chain hoist I don't want to ever lie down in the mud to get one off. Wasn't bad at all standing up getting to it.
20160206 132728 20160206 132745 20160206 132801 20160206 132819 20160206 132940 20160206 133018 20160206 135110 20160206 135138 20160206 135234 20160206 135317 20160206 135522 20160206 135648 20160206 135753 20160206 135806 20160206 144625 20160206 144954 20160206 145200
 
  • Like
Reactions: sharp
joeymt33

joeymt33

i4WD=imitated 4WD
Moderator
Lifetime Member
Supporting Member
Club Contributor
Mar 17, 2015
11,096
39,129
113
Guntersville, AL
Ownership

  1. 1000-3

  2. 1000-5
Did something hit the tire rod? Or did your tire hit a rock or stump or something else which caused the bend?
 
  • Like
Reactions: sharp
PioneerPete

PioneerPete

Well-Known Member
Lifetime Member
Jan 3, 2016
1,496
3,517
113
Chattanooga, TN
Ownership

  1. 1000-5
I sense that there are some things not being said here.... :rolleyes:
 
  • Like
Reactions: sharp
advertisement

About us

  • Our community has been around for many years and pride ourselves on offering unbiased, critical discussion among people of all different backgrounds. We are working every day to make sure our community is one of the best.

User Menu

Buy us a beer!

  • Lots of time and money has gone into making sure the community is running the best software, best designs, and all the other bells and whistles. Care to buy us a beer? We'd really appreciate it!

    Beer Fund!

    Club Membership!