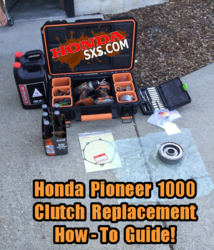
P1000 Honda Pioneer 1000 Clutch Replacement - A How To Guide!

CumminsPusher

CumminsPusher

Just a Honda doing Honda things.
Lifetime Member
Supporting Member
Club Contributor
Oct 14, 2015
41,720
319,346
113
Washington/Idaho
Ownership

  1. Other Brand

  2. 1000-5

  3. Talon X LV
E67c2881f0681faccf619ec6aa0d3598

Lets talk CLUTCH REPLACEMENT!

The 2016 Honda Pioneer 1000 seems to be getting a reputation for having clutch failures and it has been common perception that Honda was taking care of these issues as they come up for all its loyal riders. WRONG!

Lets say if you are stock and haven't drove through a puddle of water 10" or more, then you have a fairly good chance the Honda will approve your replacement. But if you have modified your Pioneer outside "there liking"... well.... You best just read up on the below!

But... Not to worry. For less then $350 and a few hours time you can be back on the trial!

BUT I HAVE NEVER REPLACED A CLUTCH BEFORE?
If you can replace an alternator or water pump in your car/truck then you are more then capable of completing this clutch replacement!

Time needed!
  • Stealership = 7 + Hour$$$$$.
  • Novice mechanic = 3-4 hours.
  • Home mechanic = 3 hours.
  • Back yard mechanic = 2 hours.

Parts list.
Oil Filters and Oil.
See: Honda Pioneer 1000 Oil Change Guide!

The below is from a 2016 Honda Pioneer 1000-5 Deluxe.
 
Last edited by a moderator:
CumminsPusher

CumminsPusher

Just a Honda doing Honda things.
Lifetime Member
Supporting Member
Club Contributor
Oct 14, 2015
41,720
319,346
113
Washington/Idaho
Ownership

  1. Other Brand

  2. 1000-5

  3. Talon X LV
Getting Ready!
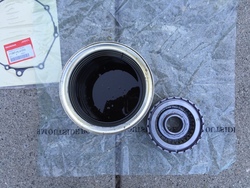
First place new clutches in oil and let sit at least a couple hours but I prefer overnight. Not sure if this is required from factory but I believe it's a good idea. This will help insure that the clutches are well lubricated during start up. If you are familiar with this type of setup then remove the snap ring and soak individually making sure it's reassembled haw they came out-if not then continue on.
A7be113465c0f4645036822a2e309aa1
Go ahead and drain both engine and the dct oils. Refere to the P1000 - Honda Pioneer 1000 Oil Change Guide! if you need help!
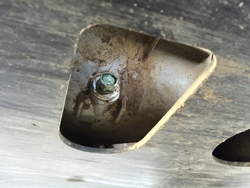
Once drained replace drain bolts and tighten so you don't forget later. You can replace the washers on thes bolts but it's just not necessary and most people don't. I will after many uses sometimes or if there is any visible damage to one. These bolts are two 12 mm close to one another towards the back of the motor, slightly hidden by the skid plate, there are a total of three drains but the front one is for the transfer case. Engine drains roughly a gallon and transmission holds just over.
8f4663604f2b2ed92cd82626a6e1b547B60485a68a5607a98fed726741927ec508aee80fa6dcd9a0afd69d38f11d74b8
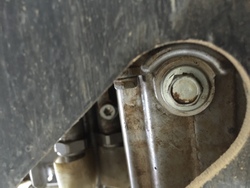
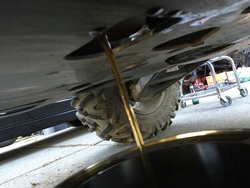
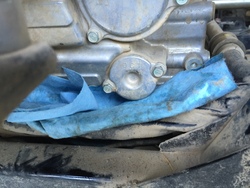
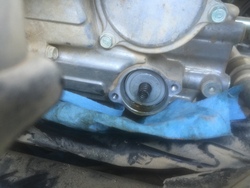
Since you're replacing clutches and there is probably fibers in the oil and filters might as well change both. They are towards the back of the motor and say "eng" and "dct" it's best to place a towel down underneath on the skid plate to catch the extra.
De012c26cfdda527b77099414fd6e2e64d561ff2bea7ff35a8217d4907a09ea9
These both are held in by 10mm bolts. Watch the center spring it's easy to loose. Needle nose pliers or two small regular screw drivers may be needed to pull them out. After the fluids drained, filters changed and everything tightened back up place blocks under the wheels as a precaution and place vehicle in neutral.
Take the center of the rear floor board out which have push clips, lightly push the center down and pull the clips out.
F3dd1e118c4949d03f5e9d559b95adfe
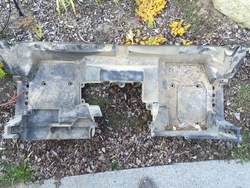
Then take the surrounding floor board out. This may just be my least favorite part. There are a series of Allen bolts and push clips. These clips you pull center up then pull the clips.
D0ac2b4186e80ef68781bb74f04490f9
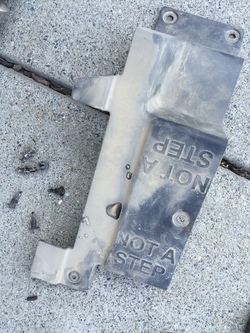
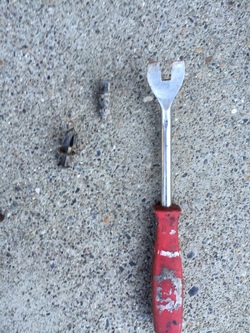
A clip popper tool is bestbut a set of needle nose pliers or side cutters carefully will work also. Here is the floorboard out and gives you a good idea of all bolt/clip locations.
9f8e0e8224baca3a5102709ebba377f6
A couple are hidden.
Factory takes the the skid plates off but I see no real reason as access is good. If you were so inclined that is pretty easy and is just a series of 10mm bolts on the underside of the vehicle.
 
Last edited by a moderator:
CumminsPusher

CumminsPusher

Just a Honda doing Honda things.
Lifetime Member
Supporting Member
Club Contributor
Oct 14, 2015
41,720
319,346
113
Washington/Idaho
Ownership

  1. Other Brand

  2. 1000-5

  3. Talon X LV
The tear down!
You are looking for this unit towards the right.
E1ccc2cb23d2e4f19e3c437a09cdd8f8
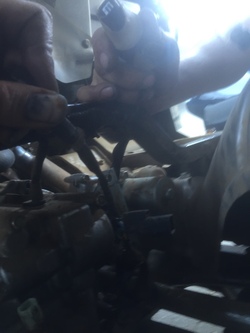
Disconnect any of the plugs in this area and tape them up out of the way.
B2ca699240ce2d751401dccf2ed7438a
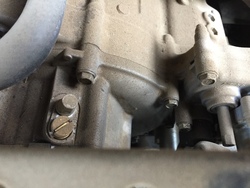
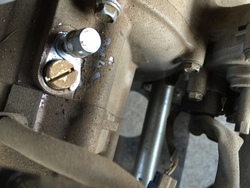
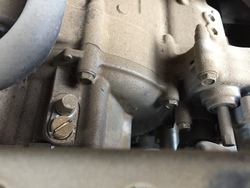
You'll have to unplug the clips that hold the wiring harness to the brackets on the clutch cover as well and don't worry about what the order of the plugs are as they will not plug in to the wrong sockets. There is a 10mm on top that holds a keeper
B4d0db9310df5552ebc7fa5c9c4b3d3e
you'll see it barely behind a large slotted bolt there is no need to turn the regular but this needs to be removed for access to the 10mm behind it on the case.
A total of 8 bolts hold the clutch cover on. Some are a little deep but be careful you only remove these.
Cae62b14160ac8f7f0188697fb20d01c
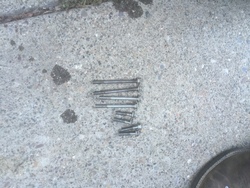
The bolts are 3 different sizes
82e78f9b1ed1c13bc0098ea853c9d8cb
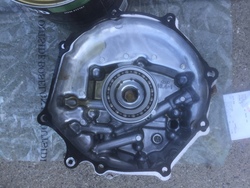
but don't be concerned about that just pull the bolts. A magnet may be used to assist on a couple. With these 8 bolts out the cover
2c274f00448a84d2e407eacd570ee1dd
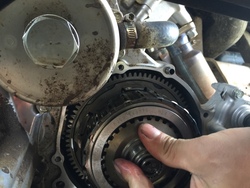
will come off however a light couple "taps" with the handle end of a hammer may be required place the cover aside and pull out clutch basket
899fb6f015b5db1b69e18eb106b740e3.
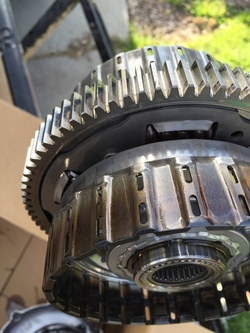
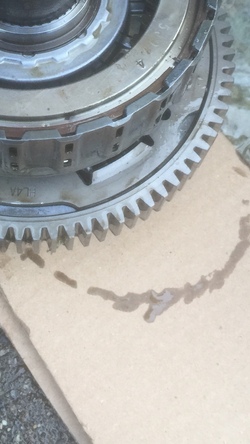
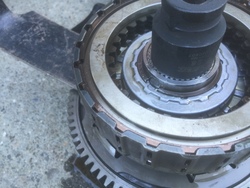
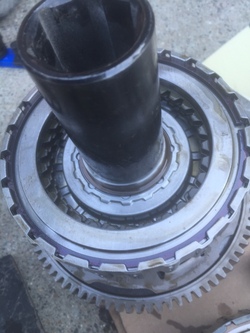
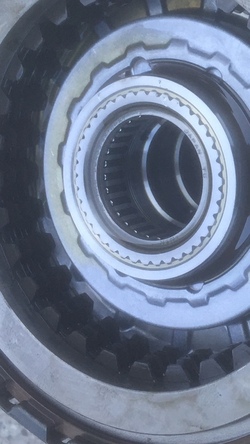
There is a gear with a washer behind the basket on the shaft it may or may not come out with the basket. If it comes just place them back on the shaft for later. There is another gear and washer on the outside as well on the unit you just pulled out place them aside for later. (You are separating both of these gears because they are different) The basket that was just pulled out has two sides of clutches and the ones on the outside as you removed the cover were reverse,1st,3rd,and 5th and are the ones that will more then likely burn up. It's a problem I believe because of the high reverse gear. They are what we're going to replace. Possibly will be blackened/blue from heat
9d6d176b57bb15c7c6cb926133675191
Make sure to place cardboard on the ground and place the basket with bad clutches up(the clutches you saw as you pulled them out)
337cbbff10ffdb93265fc523c662ac06
these are what we are replacing. Keep track of which side is which, especially after replacement!
 
Last edited by a moderator:
CumminsPusher

CumminsPusher

Just a Honda doing Honda things.
Lifetime Member
Supporting Member
Club Contributor
Oct 14, 2015
41,720
319,346
113
Washington/Idaho
Ownership

  1. Other Brand

  2. 1000-5

  3. Talon X LV
Now a tricky part so go slow.
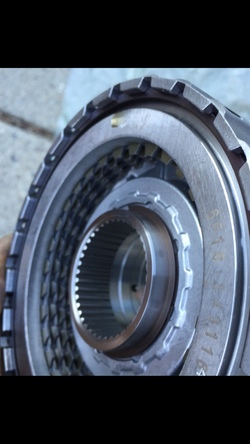
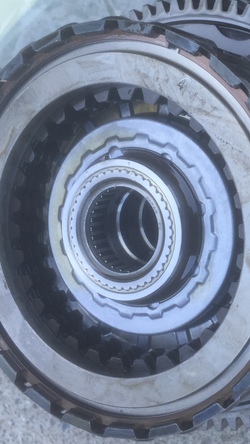
Without a press you need to be a little careful so you don't mar the gears. If you look at the next two next pics (first is new unit and second is the unit you have to separate that you just pulled out)
Ee91d75e947a26e1223ecb23a3e174e7026b24771f2ce8f80d9b1404318a98ab
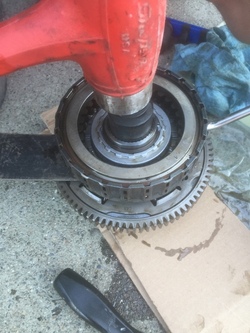
it's a pretty tight fit but you don't need a press. Simply find a socket that fits barely inside the gear hole on the NEW basket. Place it on the old old unit as shown.
3b0304e00ad4ff4089b05661e3eec426
have a friend use two screw drivers between the large gear and the old basket and slowly and easily pry them apart as you are tapping lightly on that socket as shown
3359f9dd810de34b8edc69e2a3faa813
just go nice and slow no need to rush it comes off nicely but it's a Honda it fits well.
1d6ac7182c46673e6740fff8fdd09194
you're now down to this. Fully apart. Go grab yourself a beer and take a break.
 
Last edited by a moderator:
CumminsPusher

CumminsPusher

Just a Honda doing Honda things.
Lifetime Member
Supporting Member
Club Contributor
Oct 14, 2015
41,720
319,346
113
Washington/Idaho
Ownership

  1. Other Brand

  2. 1000-5

  3. Talon X LV
Reassembly
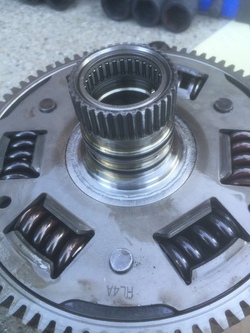
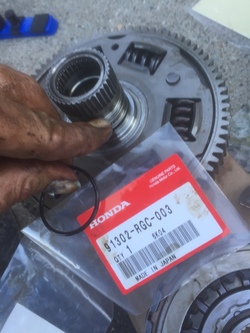
There are two rubber o rings that need to be replaced on the shaft. Now is the time.
C47f363f5f4f4743dc287d637773c686
Place the new clutch basket onto the shaft and once aligned use a slightly larger socket to lightly tap on the outer gear this time down the shaft making sure you're still on cardboard so you don't mar anything make sure it's on all the way down and the gears are flush.
7874e40272da2cae70c2f93c542e854c
Ok now new clutches are installed keep track of the side you just replaced. Now align the clutches inside the basket carefully with a couple small screwdrivers. This shows how it should look
7b05d0cd4f6aee7581da7f7745e62a28
There was a gear and washer on both sides of the basket. One came out and one is still inside the transmission (the one that was mentioned to leave inside) place the ones that came out with this unit, washer first onto and in the clutches. This requires a little patience. Wiggle it a little back and forth till flush. Look on the inside to make sure there is no gap and it's sitting all the way in. Here's a shot of what the gear should look like while in correctly. Be sure it is. You may have to do this a couple times with the gear because it a little tough to align it and make sure the washer us under the gear centered each time. Once it looks like the picture slowly while holding the gear in flip it onto this side on the cardboard and repeat alignment with the original clutches on opposite side using the gear and washer that were inside the transmission. Same thing make sure the gear (with washer) is flush and installed all the way into the clutches. Repeat if necessary.
When done the upper side should be original and lower is new.
 
Last edited by a moderator:
CumminsPusher

CumminsPusher

Just a Honda doing Honda things.
Lifetime Member
Supporting Member
Club Contributor
Oct 14, 2015
41,720
319,346
113
Washington/Idaho
Ownership

  1. Other Brand

  2. 1000-5

  3. Talon X LV
On the end of the transmission shaft there are two plastic o rings that have to be replaced. Take them off carefully (in case you bung a new one up later) but don't replace at this point! Careful (very very carefully at this point till it's all in) pick up your clutch assembly making sure the new side is on the outside place onto the shaft. Keep everything as tight as possible making sure the gears on both sides stay in tight. Wiggle just a bit and turn just a bit as needed till it's all the way in. The first 3/4 is easy the last 1/4 your trying to align the large gear on the outside of the assembly with a smaller one on the inside on the left of the transmission. It all needs to be in flush and cozy.
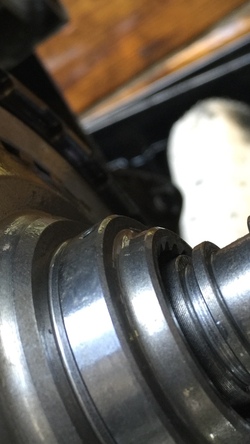
1569161b8a8ef8f5e730f25a96189bdc
if it doesn't look like this carefully jiggle in some more if still not then pull assembly back out and repeat making sure again the gears on the assembly are fully in.
Once you've confirmed it sits as picture the place the new plastic split rings on the transmission shaft
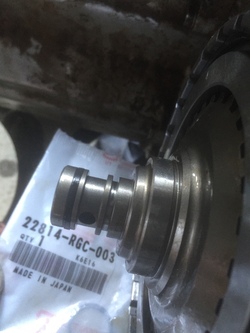
D4419779dff470ee98913afef7fad1d1
and place a little grease on these rings. Place new outer gasket onto the the transmission. There is a large oil port on lower left that will help with placement.
Place clutch cover over the clutches onto the transmission with a light couple taps possibly needed but nothing hard. It needs to fit very tight without use of the tightening the
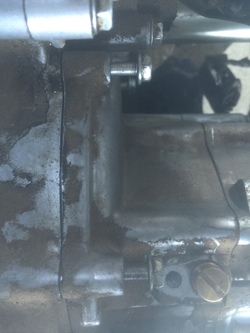
E4bd91ffeadcdf2a055689086c24aab0
bolts to assure you loaded everything correctly. Place bolts lightly back in. The should all have closely the same length when placed in. Just put one at a time and assure they are all about 1/2 of threads as seen also in the above picture. Make sure you can finger tighten most of the way then tighten till they are snugged up against the cover. Now start at top and tighten a little go to bottom and tighten a little,then left and right then repeat with the others. You want to tighten the cover evenly. Now tighten all up in the same fashion. Start back up top and go clockwise counting all 8 as you go for a final check. Keep in mind these do not need cranked super tight. Replace the 10mm and the lock at the top
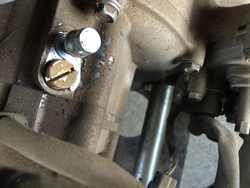
Ded4cbeafca3f0f0c526838ffb57e54a
and plug all plugs back in making sure the clips holding the wiring are back into correct spots.
Fill with 6.1quarts of oil
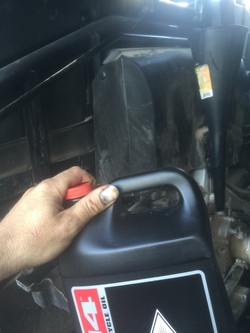
Bb8650e05793ab12d913f96ae8fe1168
check everything. Make sure you feel good and everything is off the exhaust tools out of the way ect.
Let sit a for a minute and start the vehicle. Your dash will look like this don't freak out its normal
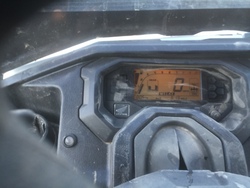
59ed2b7841424804e2deeb78c5038414
After its warmed up a little place into drive carefully if done correctly it's moving if not you do not have it loaded correctly. Shut off the vehicle and perform the transmission reset.

P1000 - Reset the DCT Clutch / Clutch Initialize Learning Procedure

Start the Pioneer and let warm up, get it out and ensure everything is good and feels good (no one knows your Pioneer as well as you do they all feel different because they learn you) go through the gears. Come back check oil with dipstick not screwed in all the way(check it by setting it in not tight) and perform another quick glance ensuring everything is snug and ready for battle. Then simply go enjoy your work. Have fun guys and gals!

Thanks very much to @JACKAL for sharing this link. Follow the steps and your golden. Enjoy your new clutches and enjoy your 1000 plus in savings I sure did.
 
Last edited:
CumminsPusher

CumminsPusher

Just a Honda doing Honda things.
Lifetime Member
Supporting Member
Club Contributor
Oct 14, 2015
41,720
319,346
113
Washington/Idaho
Ownership

  1. Other Brand

  2. 1000-5

  3. Talon X LV
Final Step - Posting about this guide!
If you found this guide useful please post and let me know. Not only does that show its usefulness, but it also bumps the post for other members to see and maybe we can save them some time and $$$ too!

If you need further help please post below.
If you see an error, mistake or something out of order or missing please let us know so it can be corrected.
Note: No claim of accuracy is made. The above is a guide based off my personal machine.
 
Last edited by a moderator:
joeymt33

joeymt33

i4WD=imitated 4WD
Moderator
Lifetime Member
Supporting Member
Club Contributor
Mar 17, 2015
11,092
39,079
113
Guntersville, AL
Ownership

  1. 1000-3

  2. 1000-5
This is great! Thanks CP! You da man! I'm sorry that you had to be the first to perform this task at home but I'm glad you shared your knowledge.


SIGNATURE:
CumminsPusher quote: Boredom + Pioneer = trouble for me. I can't stop. Damn these things guys. I thank god I'm not the only one though. If it's just you then you're crazy if it's a group it's a sport!
 
CumminsPusher

CumminsPusher

Just a Honda doing Honda things.
Lifetime Member
Supporting Member
Club Contributor
Oct 14, 2015
41,720
319,346
113
Washington/Idaho
Ownership

  1. Other Brand

  2. 1000-5

  3. Talon X LV
This is great! Thanks CP! You da man! I'm sorry that you had to be the first to perform this task at home but I'm glad you shared your knowledge.


SIGNATURE:
CumminsPusher quote: Boredom + Pioneer = trouble for me. I can't stop. Damn these things guys. I thank god I'm not the only one though. If it's just you then you're crazy if it's a group it's a sport!

Absolutely no problem! I hope it's useful and saves someone some money not to mention time. Clutches are available at time of the article and were to me in a couple of days. It's really not something to be afraid of just a pretty standard wet clutch, just double. Go slow and look close at the pictures as you go especially loading the baskets into the transmission. Don't worry anymore about the clutches and run hard.


Sent from iPhone
 
Last edited:
joeymt33

joeymt33

i4WD=imitated 4WD
Moderator
Lifetime Member
Supporting Member
Club Contributor
Mar 17, 2015
11,092
39,079
113
Guntersville, AL
Ownership

  1. 1000-3

  2. 1000-5
Run it hard? Hear that @Delton?!


SIGNATURE:
CumminsPusher quote: Boredom + Pioneer = trouble for me. I can't stop. Damn these things guys. I thank god I'm not the only one though. If it's just you then you're crazy if it's a group it's a sport!
 
Delton

Delton

Honda Fanboy
Vendor
Lifetime Member
Club Contributor
Jan 6, 2016
9,967
31,485
113
Middle TN
Ownership

  1. 1000-5
Run it hard? Hear that @Delton?!


SIGNATURE:
CumminsPusher quote: Boredom + Pioneer = trouble for me. I can't stop. Damn these things guys. I thank god I'm not the only one though. If it's just you then you're crazy if it's a group it's a sport!
What is this "hard" you speak of?? Lmfao
 
Delton

Delton

Honda Fanboy
Vendor
Lifetime Member
Club Contributor
Jan 6, 2016
9,967
31,485
113
Middle TN
Ownership

  1. 1000-5
CP great write up!! I've replaced more clutches in motorcycles and atv's than I could possibly count. Been very curious about the clutches in these things, but not so much that I'd tear into a running machine lol. So for 260 bucks you get the basket as well? Hell, why are so many people crying about the price?? The clutches in my 900RR and 1100XX motors I dragraced ran me over 200 bucks (fibers and metals). And I replaced those at least twice a year lol. Got a couple questions but I'll post them separately so they're easier to answer. Again, great job!!!
 
Delton

Delton

Honda Fanboy
Vendor
Lifetime Member
Club Contributor
Jan 6, 2016
9,967
31,485
113
Middle TN
Ownership

  1. 1000-5
Any chance the pickup for the oil pump was visible with clutch cover removed? Reason I ask is tiny bits of the fibers love to accumulate in the screen of the pickup. Not to mention gasket adhesive if you happen to use any. Not too big of a deal with it being first time you've replaced the clutches, but if you happen to roast another set (you know, by riding HARD), I would definitely take a look at that pickup. I'm basing this off my experience with motorcycle engines, but didn't this thing come from an African model bike? Also I remember seeing an oil screen in my service manual somewhere. Might be a good idea to inspect that next oil change. If the openings in the screen are tiny, there's probably fiber material trapped there.
 
Delton

Delton

Honda Fanboy
Vendor
Lifetime Member
Club Contributor
Jan 6, 2016
9,967
31,485
113
Middle TN
Ownership

  1. 1000-5
Did you happen to notice how loose the springs were in the clutch basket gear? I've had a couple baskets where they were very loose and bike would shudder bad when trying to launch. I ground off the factory rivets and shimmed the springs to tighten them up, then spot welded the cover back in place. That would eliminate the shuddering. Just wondering if this has anything to do with the shuddering some people feel with their 1000s. Some bike clutches (particularly Honda) have a concave shaped spacer ring that goes into basket before you install the first fiber plate (called a judder spring). It kept slight resistance on you pack to help eliminate shuddering. Okay, no more questions lol. I only got up for a pee break (part of getting old I guess) but now you've got me more curious than ever about these clutches. I'd hate to tell @drfubar I can't go riding in the morning cause I went outside and tore mine down lmao.
 
drfubar

drfubar

TheDonFather
Lifetime Member
Club Contributor
Jun 7, 2016
5,889
19,233
113
Mary's Ridge (Dayton Mtn), TN
Ownership

  1. 1000-3
Did you happen to notice how loose the springs were in the clutch basket gear? I've had a couple baskets where they were very loose and bike would shudder bad when trying to launch. I ground off the factory rivets and shimmed the springs to tighten them up, then spot welded the cover back in place. That would eliminate the shuddering. Just wondering if this has anything to do with the shuddering some people feel with their 1000s. Some bike clutches (particularly Honda) have a concave shaped spacer ring that goes into basket before you install the first fiber plate (called a judder spring). It kept slight resistance on you pack to help eliminate shuddering. Okay, no more questions lol. I only got up for a pee break (part of getting old I guess) but now you've got me more curious than ever about these clutches. I'd hate to tell @drfubar I can't go riding in the morning cause I went outside and tore mine down lmao.
Don't trifle with the Godfather @Delton .
 
Delton

Delton

Honda Fanboy
Vendor
Lifetime Member
Club Contributor
Jan 6, 2016
9,967
31,485
113
Middle TN
Ownership

  1. 1000-5
Ignore my question about steel plates, just broke out service manual. And it does have a judder spring (they calling it a wave spring now).
 
sharp

sharp

Well-Known Member
Lifetime Member
Supporting Member
Jan 27, 2016
3,757
14,955
113
Tennessee
Ownership

  1. 1000-5
Final Step - Posting about this guide!
If you found this guide useful please post and let me know. Not only does that show its usefulness, but it also bumps the post for other members to see and maybe we can save them some time and $$$ too!

If you need further help please post below.
If you see an error, mistake or something out of order or missing please let us know so it can be corrected.
Note: No claim of accuracy is made. The above is a guide based off my personal machine.
Great info. This will save people on here some money, along with many other how tips. If your not a life time member, or a supporting member now would be a great time to do so. I think it's $40 or so. I am just a member not staff, so I was not told to post this. So if you can donate that would be great it keeps the forum running like a well oiled machine!
 

About us

  • Our community has been around for many years and pride ourselves on offering unbiased, critical discussion among people of all different backgrounds. We are working every day to make sure our community is one of the best.

User Menu

Buy us a beer!

  • Lots of time and money has gone into making sure the community is running the best software, best designs, and all the other bells and whistles. Care to buy us a beer? We'd really appreciate it!

    Beer Fund!

    Club Membership!