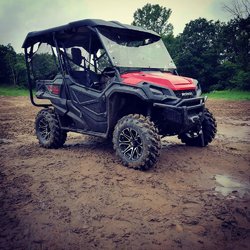
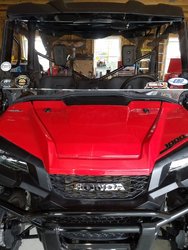
P1000 My hot rod

JailCop

JailCop

Member
May 2, 2017
33
91
18
Northern NY
Ownership

  1. 1000-5
Well I got home last night and my hand operated windshield wiper had arrived. It was a long 8 hours in prison last night so I went straight to bed, but got up early this morning to install it before our ride today. The EMP kit is nice, but comes with absolutely no directions whatsoever. It looked pretty straight forward, but I watched a couple youtube videos just to be safe before I took the drill to the windshield. Got it all installed and working within 10 minutes or so.
Honda14
Honda15

I tell you what, this was the most handiest thing to have on our ride today, since it rained most of the time we were out. It was also nice to clear the splashes off. The wife has also informed me that I will be buying a second kit to install on the passenger side for her. It came with a 12" wiper blade, but I've already replaced that with a Rain-X 14" blade for more coverage.

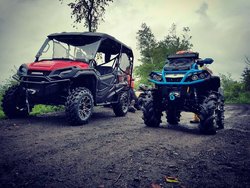
Couple shots the wife took today, she loves playing with instagram filters. Along with my buddies XMR, we also had a grizzly and another outlander 650 in our group.
Honda16

Honda17

I washed the windshield tonight after I switched over the wiper blade but that's about all for tonight, had some straightening to do in the garage before family comes over tomorrow evening for our 4th picnic.
Honda18
Honda16 Honda17 Honda18
 
E

elkguide

Well-Known Member
Lifetime Member
Supporting Member
Mar 14, 2017
3,377
7,963
113
Vermont
Ownership

  1. 1000-3
Good to prepare for the long weekend.
 
JailCop

JailCop

Member
May 2, 2017
33
91
18
Northern NY
Ownership

  1. 1000-5
Been a while since I updated, we went to VA Beach for a week to visit family and have been busy with life and work.

Well, I discovered that after we rode before the 4th of July, we got water in the oil. The hot rod was never sunk, just went through some water holes that were maybe as deep as the tires. What I think happened is water got into the intake when we hit the water holes, it splashed up, hit the windshield and ran down under the hood and into the intake. After the biggest water hole, the machine stalled. I let it sit for about 5 minutes then started it back up, it puffed white smoke for about 3 seconds and then ran fine for the rest of the day.

We had a ride planned for July 4th that I ended up cancelling. I spent the next week doing 5 oil changes and waiting on new oil and DCT filters to arrive. It's all good now but I made a command decision and ordered a snorkel kit. We by no means are the type to sink our machines (on purpose) and I've never even considered a snorkel kit before because of horror stories, so I did some research, and I'm glad I checked the oil before we rode again.

I ended up ordering a kit from Munnster Snorkel Systems out of Alaska. The install was challenging, but not impossible however I would not suggest someone unfamiliar with installing things try it alone. I left a pretty honest review on their Facebook page that I'm catching hell from fanboys over, but life goes on. Overall, I'm happy with it and hope it'll be a little extra insurance from getting water in the oil again.

My buddy just got rid of his grizzly for a new Viking 700 so we're planning on riding tomorrow to test it out.

Pics from the install:

After removing the cover and secondary filter, you install a 2" boot over the intake with some PVC piping. You have to trim the red plastic a bit by the hose clamp in order to fit the pipe through. Please excuse the nest of wires, it's on my list to clean up.
Honda19


You have to remove the passenger side door and fender, and also have to cut a hole in the bottom of the passenger side cup holder to run the pipe in. IMHO, this is the most poorly designed part of the kit, it's very flimsy and moves around a lot. I put a ton on silicone down in between the pipe and the cup holder to try to help secure it.
Honda20


They give you enough pipe to run it well above the roll cage if you wanted to, I trimmed it to fit nicely under the hood. However, the pipe is very much there and in the way of the passenger, and it's in a spot close enough to the grab handle that I can see it getting tugged on by people boarding the machine. It needs to be more secure but we'll see how it holds together. You also have to paint the piping yourself with a provided can of Rustoleum spray on bed liner. That proved to be a messy job, I would have paid a little extra for either pre-painted piping or some other colored material.
Honda21

Front view after install.
Honda22

ETA: Forgot to mention, they also give you a 20 ft length of vinyl tubing to extend your vent lines. The included directions were terribly vague here, it literally just says to extend your vent lines, doesn't give you a clue where they might be or what's involved in the process for someone like me that's never messed with vent lines before. I was able to get it done fairly easily, I extended the gas tank and rear diff vent lines up so they now sit behind the seat just above the air filter cover. I looked at the front diff vent line and decided to leave it be, it's already vented well up into the front dash. If I'm that deep, then I'm in bigger trouble.
 
Smitty335

Smitty335

Well-Known Member
Lifetime Member
Supporting Member
Oct 3, 2016
35,368
208,011
113
NWA Arkansas
Ownership

  1. 1000-3

  2. 1000-5
Been a while since I updated, we went to VA Beach for a week to visit family and have been busy with life and work.

Well, I discovered that after we rode before the 4th of July, we got water in the oil. The hot rod was never sunk, just went through some water holes that were maybe as deep as the tires. What I think happened is water got into the intake when we hit the water holes, it splashed up, hit the windshield and ran down under the hood and into the intake. After the biggest water hole, the machine stalled. I let it sit for about 5 minutes then started it back up, it puffed white smoke for about 3 seconds and then ran fine for the rest of the day.

We had a ride planned for July 4th that I ended up cancelling. I spent the next week doing 5 oil changes and waiting on new oil and DCT filters to arrive. It's all good now but I made a command decision and ordered a snorkel kit. We by no means are the type to sink our machines (on purpose) and I've never even considered a snorkel kit before because of horror stories, so I did some research, and I'm glad I checked the oil before we rode again.

I ended up ordering a kit from Munnster Snorkel Systems out of Alaska. The install was challenging, but not impossible however I would not suggest someone unfamiliar with installing things try it alone. I left a pretty honest review on their Facebook page that I'm catching hell from fanboys over, but life goes on. Overall, I'm happy with it and hope it'll be a little extra insurance from getting water in the oil again.

My buddy just got rid of his grizzly for a new Viking 700 so we're planning on riding tomorrow to test it out.

Pics from the install:

After removing the cover and secondary filter, you install a 2" boot over the intake with some PVC piping. You have to trim the red plastic a bit by the hose clamp in order to fit the pipe through. Please excuse the nest of wires, it's on my list to clean up.
View attachment 50085

You have to remove the passenger side door and fender, and also have to cut a hole in the bottom of the passenger side cup holder to run the pipe in. IMHO, this is the most poorly designed part of the kit, it's very flimsy and moves around a lot. I put a ton on silicone down in between the pipe and the cup holder to try to help secure it.
View attachment 50082

They give you enough pipe to run it well above the roll cage if you wanted to, I trimmed it to fit nicely under the hood. However, the pipe is very much there and in the way of the passenger, and it's in a spot close enough to the grab handle that I can see it getting tugged on by people boarding the machine. It needs to be more secure but we'll see how it holds together. You also have to paint the piping yourself with a provided can of Rustoleum spray on bed liner. That proved to be a messy job, I would have paid a little extra for either pre-painted piping or some other colored material.
View attachment 50083
Front view after install.
View attachment 50084

ETA: Forgot to mention, they also give you a 20 ft length of vinyl tubing to extend your vent lines. The included directions were terribly vague here, it literally just says to extend your vent lines, doesn't give you a clue where they might be or what's involved in the process for someone like me that's never messed with vent lines before. I was able to get it done fairly easily, I extended the gas tank and rear diff vent lines up so they now sit behind the seat just above the air filter cover. I looked at the front diff vent line and decided to leave it be, it's already vented well up into the front dash. If I'm that deep, then I'm in bigger trouble.
Did you change dash penetrations from one picture to the next?
 
Smitty335

Smitty335

Well-Known Member
Lifetime Member
Supporting Member
Oct 3, 2016
35,368
208,011
113
NWA Arkansas
Ownership

  1. 1000-3

  2. 1000-5
Not sure what you mean but I didn't change anything between pictures, other than finishing the piping obviously.
Looked like the first picture, you used the cup holder, second looks like it came up in front of the cup holder?
 
E

elkguide

Well-Known Member
Lifetime Member
Supporting Member
Mar 14, 2017
3,377
7,963
113
Vermont
Ownership

  1. 1000-3
Looks like a good job, well done.
 
JailCop

JailCop

Member
May 2, 2017
33
91
18
Northern NY
Ownership

  1. 1000-5
Had some much needed trail therapy today with my buddy and his new Viking 700. The hot rod didn't miss a beat this time and the Viking performed flawlessly as well! Now it's Miller time and grillin' time!

Honda23

Honda24

Honda25

Honda26
 
E

elkguide

Well-Known Member
Lifetime Member
Supporting Member
Mar 14, 2017
3,377
7,963
113
Vermont
Ownership

  1. 1000-3
Looks like fun!
 
swsebek

swsebek

Red,White And Blue Collar Soul
Lifetime Member
May 4, 2014
2,854
5,828
113
pa
Ownership

  1. 700-4
Selfy time:)
Nice work and glad to see you getting it dirty
 
JailCop

JailCop

Member
May 2, 2017
33
91
18
Northern NY
Ownership

  1. 1000-5
Just a quick update this afternoon, got home from work and the wife had been out fixing horse pasture fence all day with the boy. The Throttle Max I ordered for her came as well so I threw that on in about 2 minutes, I'm now the hero of the day since her and her 4'9" height can now smoothly operate the gas pedal.

Honda28

Honda27
 
  • Like
Reactions: elkguide
E

elkguide

Well-Known Member
Lifetime Member
Supporting Member
Mar 14, 2017
3,377
7,963
113
Vermont
Ownership

  1. 1000-3
Just a quick update this afternoon, got home from work and the wife had been out fixing horse pasture fence all day with the boy. The Throttle Max I ordered for her came as well so I threw that on in about 2 minutes, I'm now the hero of the day since her and her 4'9" height can now smoothly operate the gas pedal.

View attachment 50394
View attachment 50393

Gotta keep Momma happy!
 
JailCop

JailCop

Member
May 2, 2017
33
91
18
Northern NY
Ownership

  1. 1000-5
Got the wife her bluetooth soundbar tonight, Memphis audio 20" marine grade. Got a good price on it from a local car audio place, cheapest I could find it on ebay was $460. GOt it mounted up tonight but I need more wire to run to the battery so I'll finish it up tomorrow. As always, now it's Miller time.

Honda29
 
  • Like
Reactions: Dragon21
JailCop

JailCop

Member
May 2, 2017
33
91
18
Northern NY
Ownership

  1. 1000-5
Got the soundbar wired up, we love it. Lots of volume and super easy to use.

I'm expecting delivery of my red colored body panels from Honda today, as well as my white LED lights for reverse lights. I've always liked the look of the deluxe with the color panels, and have been wanting to add these. The instructions call for a 9.5mm drill bit, I don't have anything metric for drill bits and can't even find a close equivalent, anyone got any ideas?

For reverse lights I'm just using a set of emergency LED grill lights, it looks like a somewhat simple install so I'm hoping for the best! Here's where I hope to mount the lights:
Honda281
 
  • Like
Reactions: Neohio
Neohio

Neohio

Beast of the East
Lifetime Member
Supporting Member
Club Contributor
Dec 22, 2016
13,324
64,653
113
Painesville Ohio
Ownership

  1. 1000-5
Got the soundbar wired up, we love it. Lots of volume and super easy to use.

I'm expecting delivery of my red colored body panels from Honda today, as well as my white LED lights for reverse lights. I've always liked the look of the deluxe with the color panels, and have been wanting to add these. The instructions call for a 9.5mm drill bit, I don't have anything metric for drill bits and can't even find a close equivalent, anyone got any ideas?

For reverse lights I'm just using a set of emergency LED grill lights, it looks like a somewhat simple install so I'm hoping for the best! Here's where I hope to mount the lights:
View attachment 51194
@JailCop
9.5mm drill bit converts to 0.374" Round up to 0.375" and feel free to use a 3/8" drill.
 
  • Like
Reactions: JailCop
JailCop

JailCop

Member
May 2, 2017
33
91
18
Northern NY
Ownership

  1. 1000-5
Well my reverse lights apparently went to the wrong post office, so I didn't get them today. My body panels did come today, and I was able to get them installed. I can't stress enough to people to read the instructions fully before starting! I won't get into details but suffice it to say I ended up having to use a couple drywall screws to secure a corner. I plan to use gloss red enamel model paint to paint them to make it less noticeable.

Overall though, I'm happy with them and love the way the hot rod looks. Hopefully my install was good enough and they don't go flying off on the trail somewhere!
Honda30
Honda31
 

Similar threads

About us

  • Our community has been around for many years and pride ourselves on offering unbiased, critical discussion among people of all different backgrounds. We are working every day to make sure our community is one of the best.

User Menu

Buy us a beer!

  • Lots of time and money has gone into making sure the community is running the best software, best designs, and all the other bells and whistles. Care to buy us a beer? We'd really appreciate it!

    Beer Fund!

    Club Membership!