P500 P500 aluminum roof build

trigger

trigger

Old Ironsides
Vendor
Lifetime Member
Supporting Member
Feb 13, 2016
25,107
185,551
113
Bay City, Michigan
www.quickshieldutv.com
Ownership

  1. 500
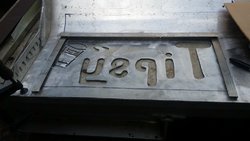
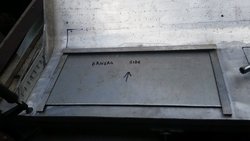
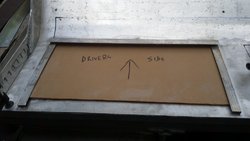
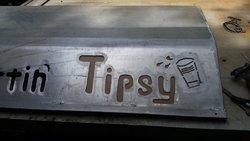
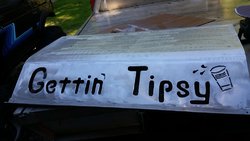
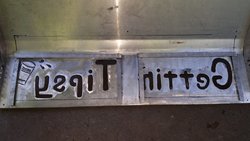
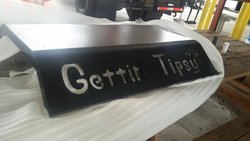
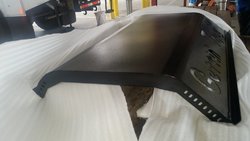
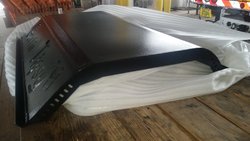
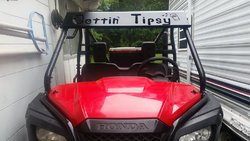
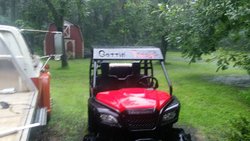
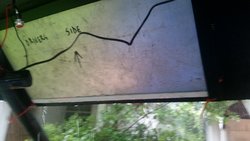
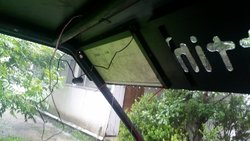
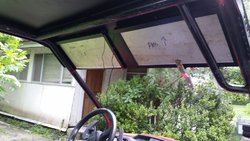
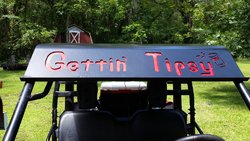
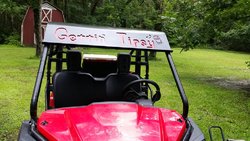
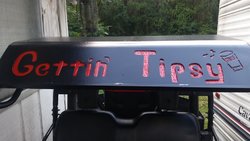
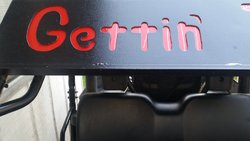
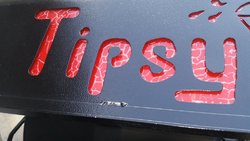
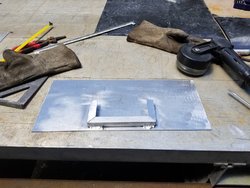
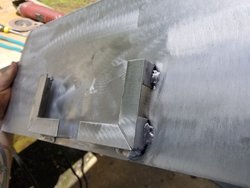
Wow its been awhile since i updated this! I wish i could say ive made good progress, but i cant. Its just sooo damn hot in florida. I wish i lived up north. We've been doing lots of boating and playing in the water instead of me fabricating. I got out there today and welded on the rear drip rail to my roof and i filled in the messed up plasma cut lines on the solo cup with weld bead and sanded it down smooth. I put the roof on the sxs and marked with a sharpie marker where the roll cage is so i know where to frame in on the backside for the frame thats gonna hold the plexiglass and l.e.d. light strips. Once i got to that point i said 'screw it' and decided to take a shower and chill in the a/c. I got a 4 day weekend for the 4th of july so maybe i can get it framed in then. I hope yall are doing good. Heres a few pics.

View attachment 47487 View attachment 47488 View attachment 47489

Wondered what happened to you? Glad to hear you're ok other than sweating your ass off.
 
Alan aka Davinci

Alan aka Davinci

Mr. Meme Master
Lifetime Member
Apr 25, 2015
16,790
183,384
113
Grand Junction, CO
Ownership

  1. 500
You should have put gittin tipsey upsidedown so everyone could read if it does end up on it's lid and at least get a giggle out of the mishap.
 
Bastardchild

Bastardchild

Well-Known Member
Nov 3, 2016
1,978
7,251
113
Orange Heights, fl
Ownership

  1. 500

  2. 1000-5
Ok i got a little update. I framed in the backside of my roof behind the word 'Tipsy' and around the solo cup. I will frame in around 'Gettin' at another time. I just used small aluminum angle trim. The top horizontal piece is about 1/2" and that will allow me to stick the l.e.d. light strip to the underneath side of it so it can shine into the plexiglass. The side pieces of aluminum angle i cut down so it can hold the plexiglass with the aluminum backing plate snug but still allow me to slide the plexiglass and backing plate out. I havent figured out the bottom part yet that is gonna hold the plexiglass up inside so it dont slide down and out. Im keeping the brown protective film on the plexiglass until the roof is done then i'll put the red film on the plexi. Anyway, here's a few pics..

20170702 105024 20170702 105150 20170702 105536 20170702 105820
 
Bastardchild

Bastardchild

Well-Known Member
Nov 3, 2016
1,978
7,251
113
Orange Heights, fl
Ownership

  1. 500

  2. 1000-5
Also, the backing plate isnt finished. Its going to have a strip of aluminum across the top where it slides underneath the horizontal angle strip that will block the light from coming out. After roof is painted or powdercoated and i install the l.e.d. light strips and button up everything, if there is any red light coming out of any cracks or anything i'll just put beads of black silicon caulking on the seams. That will still allow me to take it apart pretty easily. Im sure it wont need to be opened up all that often.
 
Bastardchild

Bastardchild

Well-Known Member
Nov 3, 2016
1,978
7,251
113
Orange Heights, fl
Ownership

  1. 500

  2. 1000-5
Thats a possibility trigger. Good suggestion. I was kinda thinking of a piece of aluminum flat stock that can fill the gap underneath the plexiglass and the plexiglass and backing plate can rest on it. Maybe have it held in with something as simple as zip ties. To remove it, just cut zipties, and the flat stock will slide out along with the plexi and back plate.
 
  • Like
Reactions: trigger
Bastardchild

Bastardchild

Well-Known Member
Nov 3, 2016
1,978
7,251
113
Orange Heights, fl
Ownership

  1. 500

  2. 1000-5
Well i got a little update on this super long roof build: i got the frames built around the 'Gettin Tipsy' words on the inside of the roof. I stopped by the powdercoat shop in gainesville this past friday and asked the guy what it would cost to powder coat it gloss black. He quoted me $200, but recommended against gloss black because of the scratches and stuff in the aluminum. He recommended a semi gloss orange peel type black. He said it will hide any of the imperfections from the build process and a lot of his customers who are d.i.y. fabricators like the finish. He said it will be a week or so before i get it back. When i get to the powdercoat shop i will take a pic of the little sample card of the color im getting and post it on here later. Have a good one!

20170710 091624 20170710 091707
 
Bastardchild

Bastardchild

Well-Known Member
Nov 3, 2016
1,978
7,251
113
Orange Heights, fl
Ownership

  1. 500

  2. 1000-5
Ok i dropped it off at the powdercoat shop. They said they can have it done by august first. I took a pic of the color sample for yall. Not sure if you can see the texture in the finish or not.

Screenshot 2017 07 10 10 46 06
 
  • Like
Reactions: trigger
Bastardchild

Bastardchild

Well-Known Member
Nov 3, 2016
1,978
7,251
113
Orange Heights, fl
Ownership

  1. 500

  2. 1000-5
Got an awesome update! The powdercoat shop got done early and called me to come pick up the roof! Im super happy with how it turned out! The guy was right, the orange peel finish was the way to go. I couldnt be happier! I will probably just set it on the rollcage when i get home, but i wont mount it until this weekend probably if i get time. Heres a few pics. :)

20170713 164524 20170713 164540 20170713 164604
 
advertisement
Bastardchild

Bastardchild

Well-Known Member
Nov 3, 2016
1,978
7,251
113
Orange Heights, fl
Ownership

  1. 500

  2. 1000-5
Just got home and set the roof on top of the rollbars. I think it looks cool as hell! Before i mount it permanent im gonna go to Home Depot of somewhere and get some of that foam tape thats like an 1" wide and maybe 1/4" thick and comes in rolls. The kind that you peel the plastic film off the back and its like tape. Anyway, im gonna stick that to the roof where it would lay against the rollbars and it would possibly keep it from rattling. Also i want to get on amazon and order some black 3/16" rivets with big heads on them for mounting the roof instead of the regular shiny aluminum rivets. Heres a pic.

20170713 174950
 
Bastardchild

Bastardchild

Well-Known Member
Nov 3, 2016
1,978
7,251
113
Orange Heights, fl
Ownership

  1. 500

  2. 1000-5
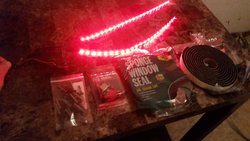
Ok. I thought i would have this roof done by now, but life gets in the way. We've been going out on the boat and the springs alot and other chores and projects, blah, blah. I have been collecting stuff to finish the roof build though. I ordered black rivets, and a couple of red l.e.d. strip lights for the insides of the little compartments that the plexiglass slides up in. I stopped by Home Depot and got a couple of those rolls of the sticky foam tape like you put around windows. Im gonna put this between the roof and the roll bars to minimize rattling. Im gonna stick it to the roof, not the rollbars, that way if i decide to take the roof off or something for repairs i wont have sticky foam all over the rollbars. I also got one of those fancy on/off switches with the little red cap over it that you gotta flip up before you turn the switch on. Thats about all. I really hope to have it done this weekend. Anyway, heres a pic. :)

20170724 170233
 
  • Like
Reactions: trigger
Bastardchild

Bastardchild

Well-Known Member
Nov 3, 2016
1,978
7,251
113
Orange Heights, fl
Ownership

  1. 500

  2. 1000-5
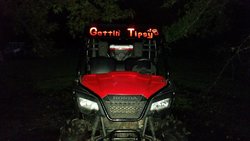
Ok i got a chance to work on the roof today. As luck would have it, it started raining so i didnt get to finish. I tinted the plexiglass and made the bottom piece that will keep the plexiglass and the aluminum backing plate up inside the slot. I just drilled a hole on each side of the slot and matching holes on the bottom piece and it is held in by a zip tie on each side. Quick and easy. Of course when everything is finished the backing plate and bottom piece will be painted black to make it blend in. I was going to build a switch pod and mount it to the rollbar overhead to house the switch for the l.e.d. lights that light up 'Gettin' Tipsy' and 3 or 4 other switches, but i think i'll just order a switch pod that mounts to the rollbar. I gotta go for now but maybe if i get home tonight and its not raining i can take a pic of what it looks like with the one side lit up. Heres a few pics.

20170730 121908 20170730 122031 20170730 122049
 
Bastardchild

Bastardchild

Well-Known Member
Nov 3, 2016
1,978
7,251
113
Orange Heights, fl
Ownership

  1. 500

  2. 1000-5
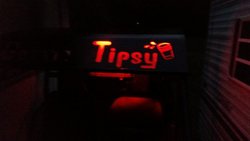
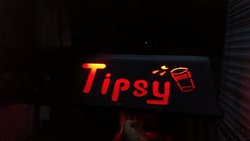
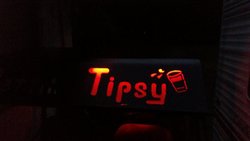
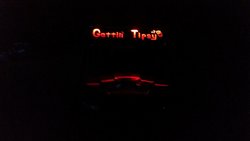
Ok i took a pic of the 'Tipsy' side right when it was about dark. It looks pretty good i guess. Im happy with it. I gotta finish the other side tomorrow and square away the wiring and the switch. The switch is just gonna be temporary until i order my rollbar mounted switch pod. Maybe tomorrow night i can take a pic and post it of the finished product with both sides glowing! :)

20170730 204410 20170730 204424 20170730 204429
 
  • Like
Reactions: Chooglin and lee
Bastardchild

Bastardchild

Well-Known Member
Nov 3, 2016
1,978
7,251
113
Orange Heights, fl
Ownership

  1. 500

  2. 1000-5
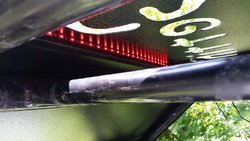
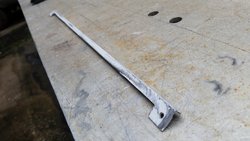
Ok i got out there today and finished the passenger side. I have to say im not real happy with the red tint. As i rolled the last of the tint onto the passenger side plexiglass i noticed there was lines in the film from the factory. I guess they did a s***ty job of rolling the film up, or putting the non stick film against the red sticky film, and it resulted in lines that i have to deal with now. Ive already decided that im going to order some plexiglass thats tinted red all the way through like i should have to begin with. Oh well, it will get me through the big ride we're going to at florida cracker ranch august 11th-13th. Ive got it wired without a switch for now. I just twist the hot wire to the wires that feed the l.e.d. lights with a wire nut. When my switch pod comes in with the switches i will run the wires into the pod to one of the switches. The pics im putting up are of the foam tape strips on the inside of the roof to keep it from rattling against the rollbars. Also the weird looking piece of aluminum angle with the hole drilled in each end is the bottom piece that holds the plexiglass up in the slots as well as the aluminum backing plate. The zip ties go in the holes on the end and hold it in the slots. Nothing is painted as of yet. I will come home this week after work and take it all apart and clean it up and paint it gloss black. Well, ive rambled enough. Heres some pics. When it gets dark i will take a pic of it glowing and post it up for yall to see.

20170731 103440 20170731 104553 20170731 113059 20170731 115225 20170731 133905
 
Bastardchild

Bastardchild

Well-Known Member
Nov 3, 2016
1,978
7,251
113
Orange Heights, fl
Ownership

  1. 500

  2. 1000-5
So i came home today and installed the switch to light the l.e.d. lights up and i noticed the tint was all crinkled up on one side, and had lines running through it on the other. I knew about a few lines, but a couple are new! A good friend of mine named Trigger warned me against using tint because he said the plexiglass gets hot and causes bubbles in the tint. I figured i would give it a go anyway just to see what happens. Well, lesson learned. Listen to Trigger lol. Its ok it will get me through the next couple of weekends of riding and camping then i will be pulling the tinted plexiglass out and using them as a template to lay on new plexiglass thats tinted all the way through. I'll just lay the old plexi on top of the new, trace around it, and cut. 10 minutes and i'll be done. Oh well. Live and learn. Here's a pic of the crappy tint. It still should be cool lit up at night though. Yall have a safe work week.

20170801 183558 20170801 183550 20170801 182620
 
trigger

trigger

Old Ironsides
Vendor
Lifetime Member
Supporting Member
Feb 13, 2016
25,107
185,551
113
Bay City, Michigan
www.quickshieldutv.com
Ownership

  1. 500
So i came home today and installed the switch to light the l.e.d. lights up and i noticed the tint was all crinkled up on one side, and had lines running through it on the other. I knew about a few lines, but a couple are new! A good friend of mine named Trigger warned me against using tint because he said the plexiglass gets hot and causes bubbles in the tint. I figured i would give it a go anyway just to see what happens. Well, lesson learned. Listen to Trigger lol. Its ok it will get me through the next couple of weekends of riding and camping then i will be pulling the tinted plexiglass out and using them as a template to lay on new plexiglass thats tinted all the way through. I'll just lay the old plexi on top of the new, trace around it, and cut. 10 minutes and i'll be done. Oh well. Live and learn. Here's a pic of the crappy tint. It still should be cool lit up at night though. Yall have a safe work week.

View attachment 50765 View attachment 50766 View attachment 50767

Nice work BC! That'll look BA at night. Yeah, I learned the hard way too.
 
Bastardchild

Bastardchild

Well-Known Member
Nov 3, 2016
1,978
7,251
113
Orange Heights, fl
Ownership

  1. 500

  2. 1000-5
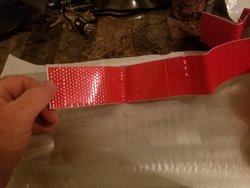
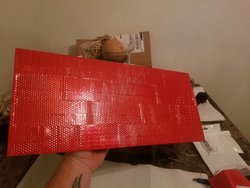
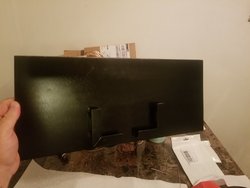
Ok im experimenting with my plexiglass inside the roof of sxs. I peeled the crappy red tint off of the plexiglass today. I cleaned up both sides of the aluminum backing plate that goes behind the plexiglass and i added a slot that will hold my cell phone on the side that faces me while im driving. Although my new phone is waterproof, i wanted it high and dry. I plan on getting a bluetooth soundbar to mount behind my head inside the roof and i wanted an easy to reach place to hold my phone so i can connect it via bluetooth to the future soundbar, but be able to reach up and tap the screen to skip a song or whatever. I made it easy to get the phone out by putting a thumb slot in the bottom of the aluminum angle so i can push the phone up and out. I also made a square hole on the inside vertical aluminum angle piece so a phone charger can be plugged into the phone. Whenever i make my switch pod in the overhead of my sxs im going to put in a 12volt receptacle in the side of the pod also so the phone can be plugged in and charged. Today i only worked on the drivers side backing plate, but the passenger side will probably get the same done to it. I painted it high heat black when i was done from a rattle can. On the inside of the aluminum backing plate, the side that will press up against the plexiglass, i put strips of that reflective red tape like you see on the sides of heavy equipment trailers. So, now my plexiglass is clear, with red reflextive tape pressing up against the backside of it. Im hoping the red l.e.d. lights will now shine down into the clear plexiglass and be enhanced by the red reflective tape that is behind the plexiglass. We'll see. Maybe i can get a pic this evening after the sun goes down to see if im a massive failure or not. Lol. Anyway, heres some pics.

20170821 121320 20170821 122449 20170821 162953 20170821 163425 20170821 164049 20170821 164111
 
advertisement

Similar threads

About us

  • Our community has been around for many years and pride ourselves on offering unbiased, critical discussion among people of all different backgrounds. We are working every day to make sure our community is one of the best.

User Menu

Buy us a beer!

  • Lots of time and money has gone into making sure the community is running the best software, best designs, and all the other bells and whistles. Care to buy us a beer? We'd really appreciate it!

    Beer Fund!

    Club Membership!