Hondasxs
Club Founder
Staff member
Lifetime Member
Supporting Member
The front shock spacer is a simple cheap mod that most anyone can do to there Honda Pioneer 700 in order to give it a bit more shock stiffness and a bit of extra ground clearance.
BIG THANK YOU to Spifyd for being the first to identify this easy mod in this topic HERE.
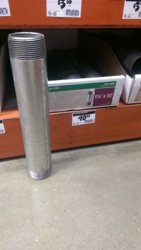
First, you need to head over to the Home Depot and buy a 1.5" x 10" galvanized schedule 40 water pipe nipple. The length does not really matter, I found 10" gives you enough hold to keep the pipe straight when cutting and some extra in case you mess up or need to re-cut.
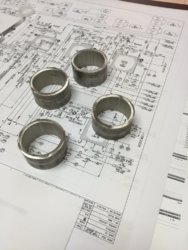
Pipe after it was cut
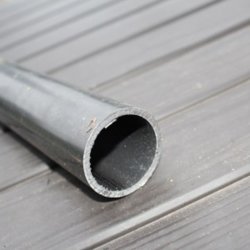
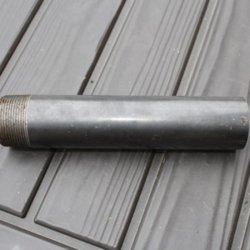
Next, decide on the dimensions you want the spacer to be. I chose 1" spacers and so far I have not bottomed out but the side effect is added stiffness. Others went with 5/8" and 3/4" and reported it worked for their needs with only occasionally bottoming out on the more aggressive spots. Be sure to cut them nice and straight. Once cut, clean them up and give them a nice paint job.
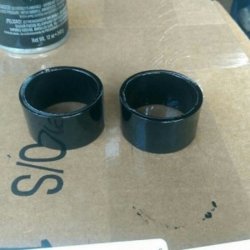
The next step is to remove the shock from the Pioneer. This is easy to do with only 2 bolts holding it on. Once done just set the shock somewhere clear with lots of work room.
It is recommended that you use a shock compressor to disassemble the shock from the spring. But since I do not have one available I will use the ratchet strap method!
I will try my best to explain how this was done. If you have a question just ask.
Thread the strap through the ratchet turnbuckle.
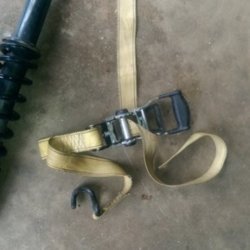
Then thread it into the spring as shown.
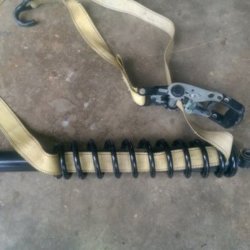
Now thread the end back through the ratchet turnbuckle and ratchet it snug with the ratchet centered as shown.
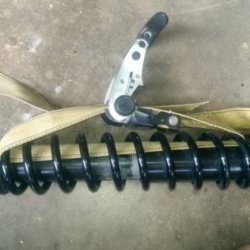
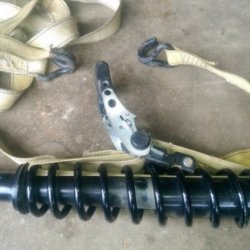
Repeat with the 2nd, 3rd, and 4th ratchet, only tightening them enough to hold.
Now you are ready to ratchet them. Only ratchet them 1-2 clicks at a time. Try to ratchet opposite from each other keeping the shock load balanced. Good luck on keeping the loose straps out of the way as you can see I didn't do such a good job going through the rotations of ratcheting them.
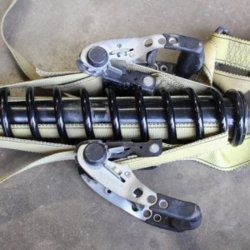
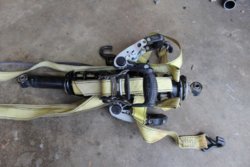
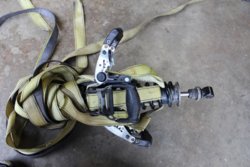
Once you get fairly tight you need to slow down to 1-2 clicks per rotation. Continue ratcheting them until there is enough of the rod extended for the spacer plus 1/4 inch. Pay attention to the inner cover. You see it road up and I over ratcheted by almost a 1/2 an inch. A tap with a hammer will push it back down. As you are ratcheting you can remove the C-clip, this is what holds the spring in place.
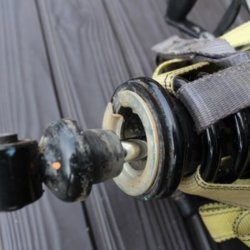
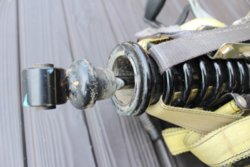
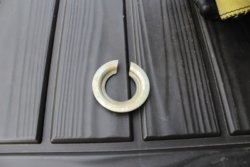
Once the C-Clip is removed the shock will slide out. Now you must remove the spring retainer. To remove just tap it with a hammer, once loose it will slide off, be sure not to damage the shock housing any.
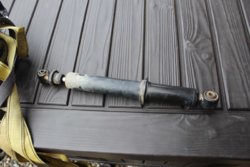
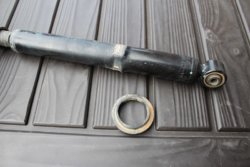
Now slide the new shock spacer on the shock placing the retainer on top.
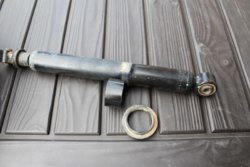
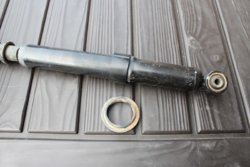
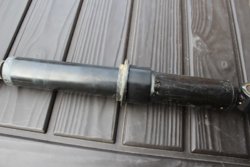
Slide the shock back through the spring installing the C-Clip retainer. This may require a few more clicks on the straps to get the clearance needed for the C-clip. Note: be sure the shock rod is fully extended.
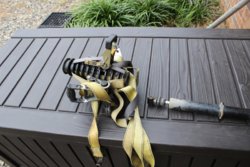
Next, release the straps a few clicks at a time, one strap at a time. Make sure you watch the loose strap tails as they will get caught between the rod head and the C-clip. Once loose remove the straps and you're done! Re-install the shock and you're ready to ride.
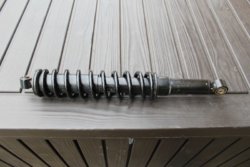
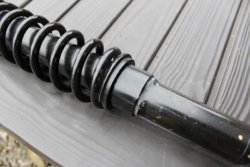
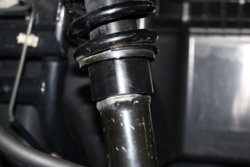
We are interested in hearing feedback on the walk-through.
Post below!
* Just a note here about the shock and some confusing with several people thinking there's was bad because it did not extend on its own. This "shock" is only a dampener. The spring provides all the push. Once the spring is removed the shock will stay in or out depending on where it gets pushed.
Thanks.
BIG THANK YOU to Spifyd for being the first to identify this easy mod in this topic HERE.
First, you need to head over to the Home Depot and buy a 1.5" x 10" galvanized schedule 40 water pipe nipple. The length does not really matter, I found 10" gives you enough hold to keep the pipe straight when cutting and some extra in case you mess up or need to re-cut.

Pipe after it was cut


Next, decide on the dimensions you want the spacer to be. I chose 1" spacers and so far I have not bottomed out but the side effect is added stiffness. Others went with 5/8" and 3/4" and reported it worked for their needs with only occasionally bottoming out on the more aggressive spots. Be sure to cut them nice and straight. Once cut, clean them up and give them a nice paint job.

The next step is to remove the shock from the Pioneer. This is easy to do with only 2 bolts holding it on. Once done just set the shock somewhere clear with lots of work room.
It is recommended that you use a shock compressor to disassemble the shock from the spring. But since I do not have one available I will use the ratchet strap method!
Locate 4 ratchet straps, hook-less is best if you happen to have a 4 of them. We are using 4 "normal" straps. Wide and thin straps are the best to use. Now pay attention to how the strap is threaded. This is important as we will not be using the hooks at all. In fact, we will only be using the adjustable strap and not the strap connected to the ratchet.CAUTION - This method can be dangerous if not done correctly.
CAUTION - Straps can break and cause serious injury.
CAUTION - Wear eye protection and gloves.
CAUTION - It is advised to have a second person help with this process.
NOTICE - This is posted for informational purposes ONLY!
I will try my best to explain how this was done. If you have a question just ask.
Thread the strap through the ratchet turnbuckle.

Then thread it into the spring as shown.

Now thread the end back through the ratchet turnbuckle and ratchet it snug with the ratchet centered as shown.


Repeat with the 2nd, 3rd, and 4th ratchet, only tightening them enough to hold.
Now you are ready to ratchet them. Only ratchet them 1-2 clicks at a time. Try to ratchet opposite from each other keeping the shock load balanced. Good luck on keeping the loose straps out of the way as you can see I didn't do such a good job going through the rotations of ratcheting them.


Once you get fairly tight you need to slow down to 1-2 clicks per rotation. Continue ratcheting them until there is enough of the rod extended for the spacer plus 1/4 inch. Pay attention to the inner cover. You see it road up and I over ratcheted by almost a 1/2 an inch. A tap with a hammer will push it back down. As you are ratcheting you can remove the C-clip, this is what holds the spring in place.


Once the C-Clip is removed the shock will slide out. Now you must remove the spring retainer. To remove just tap it with a hammer, once loose it will slide off, be sure not to damage the shock housing any.


Now slide the new shock spacer on the shock placing the retainer on top.


Slide the shock back through the spring installing the C-Clip retainer. This may require a few more clicks on the straps to get the clearance needed for the C-clip. Note: be sure the shock rod is fully extended.

Next, release the straps a few clicks at a time, one strap at a time. Make sure you watch the loose strap tails as they will get caught between the rod head and the C-clip. Once loose remove the straps and you're done! Re-install the shock and you're ready to ride.


We are interested in hearing feedback on the walk-through.
Post below!
* Just a note here about the shock and some confusing with several people thinking there's was bad because it did not extend on its own. This "shock" is only a dampener. The spring provides all the push. Once the spring is removed the shock will stay in or out depending on where it gets pushed.
Thanks.
Last edited:


