10246575_10205083315753749_8164701866099074591_n.jpg

P1000m5 AK_Centurion's P1000-5

A

AK_Centurion

Well-Known Member
Feb 12, 2016
271
330
63
Eagle River, AK
loving the 4x4 van...let's see some more pics of that machine!

Here ya go.


Added new tires, haven't snapped a pic off them yet.

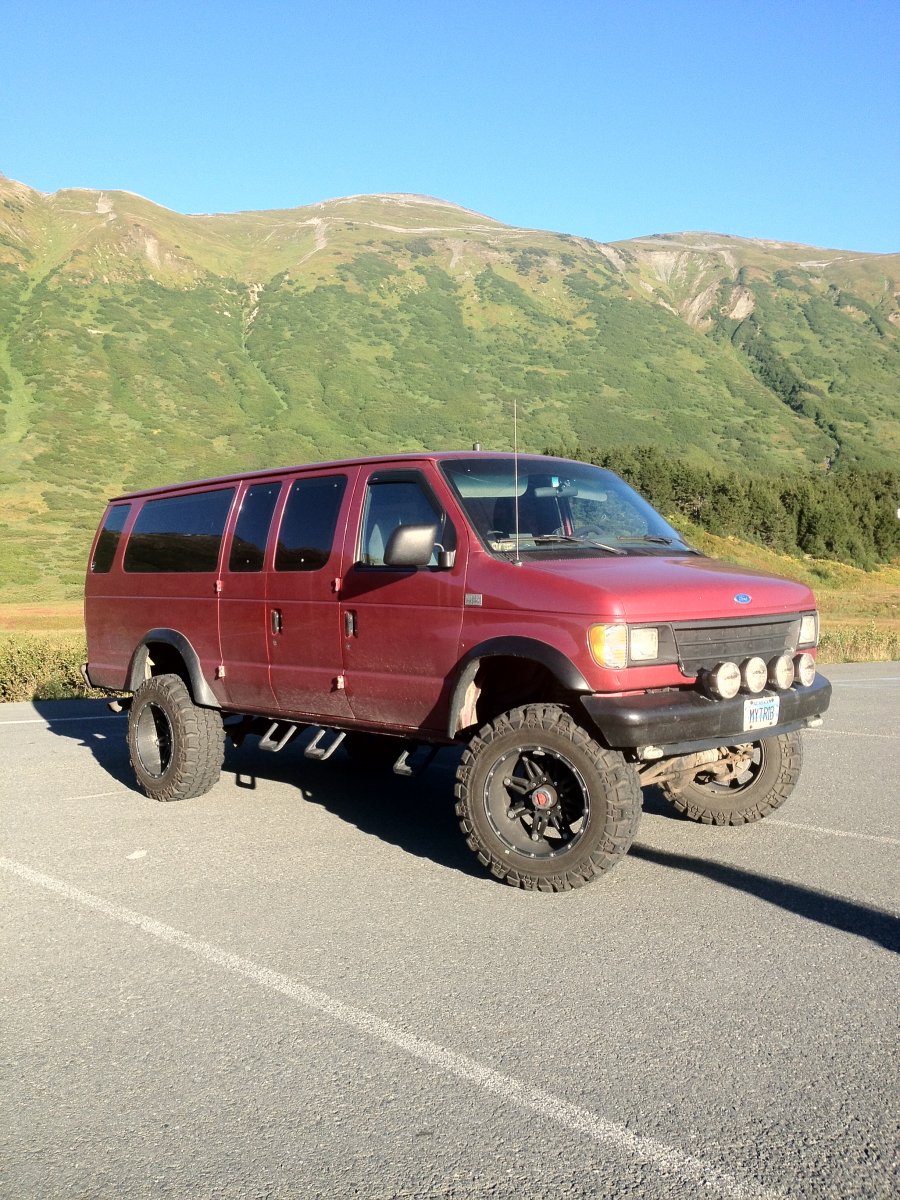
'94 Ford E-350 7.3L IDI w/ Hypermax turbo and exhaust, Quigley 4x4 w/ 8" total lift. 36x15.5 r20 MTZ on 20x12 Fuel Hostage wheels.
4.56 gears and Gear Vendors over/underdrive on the shelf waiting to be installed ( trying to find newer rear axle w/ disc brakes).
 
Itsalljake

Itsalljake

Active Member
Lifetime Member
Jan 27, 2016
141
50
28
Los Angeles
Got the dash mounted up last night. Still missing a few switches.
View attachment 10416
Key on, Lights on. Voltage on the main battery.
View attachment 10417
Key off, lights off. 12 volt power switch on. Voltage on Aux battery.
View attachment 10418
Key on, lights on, 12 volt switch on.

The horn trigger is wired to the ACC. Main power comes from the PDM relay.
All the other switches (except the winch in/out) are triggered off the 12 volt power switch. Main power coming from the PDM.
Dual meters will help me notice if there are any charging issues.

Wow, nice work brother.
 
Hometeam

Hometeam

Well-Known Member
Lifetime Member
Nov 26, 2015
1,011
4,248
113
Normal, IL
That van is Bad A. Love the way it sits and looks!! Great job on it! Oh and sweet trials with 1000 also!:D
 
A

AK_Centurion

Well-Known Member
Feb 12, 2016
271
330
63
Eagle River, AK
Noob for sure, but can you explain the need for the Tiger Tail? Sorry for the thread derail.

Keeps the tow rope readily available. No storage issues with dirty ropes. No more hooking and unhooking from the tow vehicle, just pull it out and hook to other machine. Self retracting, eliminates slack in the line which could be run over and tangled in the wheels. It's is costs a bit, but I'm sure I'll use it a lot pulling everyone else through the holes.
 
dale5740

dale5740

Well-Known Member
Lifetime Member
Supporting Member
Feb 4, 2016
886
417
63
mt airy md
Worked on getting rid of the squeak and rattles. Thanks to the info posted here: P1000 - Squeaks, Rattles and Other Adjustments

Few wraps of electrical tape on the door latches and turned out the rubber stops.

I did the bed latch a little different. I used some shrink wrap for battery cables where the latch catches under the bed.

Checked all the roll cage bolts, found a couple loose.

Didn't do the washers in the hinges yet, but I didn't have anymore noises on today's ride.
a good way to get rid of the bed rattle is to lower the brakes so bed has to be lower an tighter to grab it works perfect!!!!
 
A

AK_Centurion

Well-Known Member
Feb 12, 2016
271
330
63
Eagle River, AK
Got back from work and my replacement rear A-arms were waiting for me. Got the whole lift installed yesterday, about a 3 hour job if you have the tools and don't take any pictures (sorry I just wanted it done).
Note: This kit was not designed for use with the stock deluxe wheels. You may rub the inside of the wheels under a heavy load.

Rears arms were pretty straight forward.
Tools needed:
14,17 and19 mm sockets and wrenches.
15/16" wrench.
Pry bar
Punch or other tool for lining up bolt holes.
Jack and stands

During initial install I left the sway bar disconnected and only snugged up the rest of the bolts.

Steps:
1. Raise machine and support.
2. Remove wheels. 19mm socket.
3. Remove bottom shock bolt. 17mm
4. Remove sway bar nut. Pull link from mount and swing up out of the way. 14mm
5. Remove lower A arm to hub bolt. 14mm
6. Remove lower A arm to frame bolts (front and rear). 17mm
7. Do initial adjustment of Heim joints on new A arms. (I was told by Scott to start at 3 turns out)
8. Attach Heim joints to frame and leave jam nuts loose.
9. Attach A arm to hub.
10. Attach shock to A arm. Kit comes with longer bolts. 19mm
11. Reinstall tire.

Repeat for other side.

Front arm took a little more work.

Tools:
10,14,17,19,30mm sockets and wrenches.
15/16" wrench.
Pry bar
Punch
Hammer
Small flat screwdriver
Needle nose pliers
External ring pliers
Ball joint press

Steps:
1. Remove wheel. 19mm
2. Remove steering ball joint nut. 17mm w/ cotter pin
3. Apply upward pressure to tie rod and tap steering arm, should pop right out.
4. Remove lower shock bolt. 17mm
5. Remove brake hose clamps. 10mm
6. Remove brake caliper and support. 2 bolts. 17mm
7. Remove brake rotor. 30mm w/ cotter pin.
8. Remove lower A arm to frame bolts. 17mm
9. Pull out and up on lower A arm to free the axle shaft from the hub.
10. Remove upper A arm to frame bolt. 14mm
11. Remove A arms from hub. 17mm for upper ball joint and 19mm for lower w/ cotter pins
12. Remove ball joint from upper A arm. External ring pliers and press
13. Install ball joint in new upper A arm.
14. Attach upper A arm to hub.
15. Attach lower A arm to hub. Ball joint is pre installed, spacer goes under the nut. 17mm
16. Initial adjustment of 3 turns on the Heim joints.
17. Attach upper A arm to frame.
18. Feed axle shaft thru hub and attach lower A arm to frame.
19. Reinstall brake rotor.
20. Reinstall brake caliper.
21. Re attach shock.
22. Reattach steering ball joint.
23. Reinstall wheels.
24. Lower machine.

At this point your alignment will look way out of whack. You will need to drive a short distance to let the suspension settle. Make any camber adjustments with the Heim joints. Unfortunately, you will need to take some of this back apart to adjust the joints. (I had a slight negative camber on the rears and the front was plumb, so I called it good.) You should not need to make ANY toe in/out adjustments with the Heim joints. The upper arms are not adjustable, so turn your joints an equal amount.
For the steering, loosen the jam nut and rotate the tie rod. to adjust toe.

When you are happy with the alignment, Tighten the jam nuts on the Heim joints. 15/16"
Tighten the steering jam nut.
Re attach the rear sway bar.
Remove all the nuts on the A arms and apply thread lock. The new shock bolts have Nylocs. Tread lock the caliper bolts too.
Secure the front brake hoses to the upper A arms.

You should now be ready ride.
IMG 08101
IMG 08131
 
  • Like
Reactions: pct
A

AK_Centurion

Well-Known Member
Feb 12, 2016
271
330
63
Eagle River, AK
Worked on cleaning up Dual battery wiring under the hood today.
Still looking for terminal boots for the power wires.
IMG 08141


Still have access to the factory fuse box, but will have to move the PDM if I need to pull the 2nd Battery.
IMG 08151


Still have room for the extra tow rope, air pump/plug kit, and jumper cables.
IMG 08171
 
  • Like
Reactions: Tot and CashMoney
advertisement
sajnaj

sajnaj

Active Member
Jul 5, 2015
171
146
43
clinton indiana
Delton

Delton

Honda Fanboy
Vendor
Lifetime Member
Club Contributor
Jan 6, 2016
9,967
31,488
113
Middle TN
Ownership

  1. 1000-5
I remember when Ford first came out with the 4x4 van ( yeah I'm that old). Big 460 in that sucker. I bet yours really pulls with that 7.3.
 
A

AK_Centurion

Well-Known Member
Feb 12, 2016
271
330
63
Eagle River, AK
I remember when Ford first came out with the 4x4 van ( yeah I'm that old). Big 460 in that sucker. I bet yours really pulls with that 7.3.

It's a dog right now. Old school 7.3 and tires are too big for the 3.55 gears. Waiting to find a good deal on a newer rear axle with disc brakes, Have 4.56 gears and a Gear Vendors over/underdrive sitting on the shelf. Should be able to pull anything I want after that.
 
  • Like
Reactions: Delton and joeymt33
joeymt33

joeymt33

i4WD=imitated 4WD
Moderator
Lifetime Member
Supporting Member
Club Contributor
Mar 17, 2015
11,096
39,129
113
Guntersville, AL
Ownership

  1. 1000-3

  2. 1000-5
It's a dog right now. Old school 7.3 and tires are too big for the 3.55 gears. Waiting to find a good deal on a newer rear axle with disc brakes, Have 4.56 gears and a Gear Vendors over/underdrive sitting on the shelf. Should be able to pull anything I want after that.


The pioneer 1000 needs one of those over/under drive units!
 
Delton

Delton

Honda Fanboy
Vendor
Lifetime Member
Club Contributor
Jan 6, 2016
9,967
31,488
113
Middle TN
Ownership

  1. 1000-5
It's a dog right now. Old school 7.3 and tires are too big for the 3.55 gears. Waiting to find a good deal on a newer rear axle with disc brakes, Have 4.56 gears and a Gear Vendors over/underdrive sitting on the shelf. Should be able to pull anything I want after that.
I bet that is one full engine compartment. Good thing you ain't got sparkplugs to change regularly lmao
 
A

AK_Centurion

Well-Known Member
Feb 12, 2016
271
330
63
Eagle River, AK
Another fun ride at Knik Glacier today. RZR 1000 stock, RZR 1000 lifted, RZR 1000 4 seater, 700 Grizzly, and my 1000-5 and Rancher.

The Pioneer will hang with the RZRs until the moguls. Stays right with them running the narrow trails too.

I'm the only one that got stuck today, not once, but twice! All I can say is the 1000-5 is heavier than a RZR. Followed thier line across the ice and I broke through.
P1000 - Polar Bear Challenge

One flat on the 4 seater, luckily the lifted one is decked out and had a spare.
I need to hurry and build a tire carrier, won't be so lucky if I was the one with the flat.
 
  • Like
Reactions: pct
A

AK_Centurion

Well-Known Member
Feb 12, 2016
271
330
63
Eagle River, AK
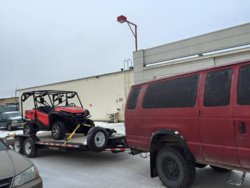
All loaded up and ready to roll out in the AM. Going to a place call Zero Lake. Looks like a possible mud fest. We will see how the Pioneer stacks up against RZRs and Rangers. Here is an idea of what the ride might be like.

 
advertisement

Similar threads

About us

  • Our community has been around for many years and pride ourselves on offering unbiased, critical discussion among people of all different backgrounds. We are working every day to make sure our community is one of the best.

User Menu

Buy us a beer!

  • Lots of time and money has gone into making sure the community is running the best software, best designs, and all the other bells and whistles. Care to buy us a beer? We'd really appreciate it!

    Beer Fund!

    Club Membership!