P500 Engine light please help... Code 1-1 MAP Sensor!

Neohio

Neohio

Beast of the East
Lifetime Member
Supporting Member
Club Contributor
Dec 22, 2016
13,349
64,934
113
Painesville Ohio
Ownership

  1. 1000-5
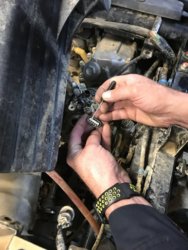
Might be able to get pins from your local Honda Automotive dealer as well. Pins tend to be universal along families.
 
G

Gassygordo

Well-Known Member
Oct 16, 2017
302
1,025
93
Fillmore, NY
Ownership

  1. 500
84CE027B DB45 4798 99FD 4942EF51020E
8F11A601 D347 4B62 8585 E9D691CE5AD6
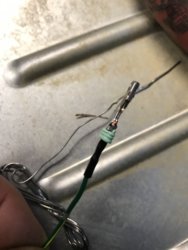
Was indeed a code for for the MAP/TPS. Apparently Honda insulates their wire with peanut butter.
View attachment 100666
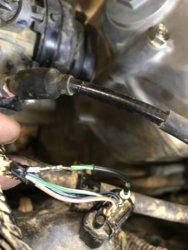
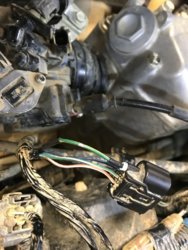
Don’t know how well it will show up on the pic but an inch and a half section of the mint green wire is gone from the plug to where it is taped like it was just cut off with side cutters. The way the plug goes in from the bottom I could not see any sign until I pulled the air box and removed the plug again. Once the plug was turned over I still had to look close to see it between the heat shield for the cat and carb.
Yup, danged critters got my Gold Wing a couple winters ago!!
 
Smitty335

Smitty335

Well-Known Member
Lifetime Member
Supporting Member
Oct 3, 2016
35,368
208,011
113
NWA Arkansas
Ownership

  1. 1000-3

  2. 1000-5
S

SouthernCivic

New Member
Dec 29, 2017
11
14
3
Ringgold Ga.
Ownership

  1. 500
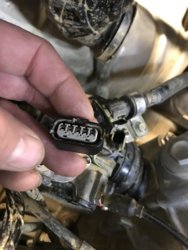
Snap a pic of the connector end. You should be able to repin it wih a short pigtail and crimp. Waiting on parts will be a few days though.
I have the plug apart had to run to work and get my other butane soldering pin, will try to post pics as repaired but it may be tomorrow before I get them posted
 
S

SouthernCivic

New Member
Dec 29, 2017
11
14
3
Ringgold Ga.
Ownership

  1. 500
Might be able to get pins from your local Honda Automotive dealer as well. Pins tend to be universal along families.
Yep playing with imports is how I knew how to get the pins out of the plug, they almost all use similar type weatherpack plugs.
 
Neohio

Neohio

Beast of the East
Lifetime Member
Supporting Member
Club Contributor
Dec 22, 2016
13,349
64,934
113
Painesville Ohio
Ownership

  1. 1000-5
Most of the plugs I have looked for on my 1000 are Sumitomo variants.
You are obviously well versed then. Hope you snap some pics for others to reference in the future!
 
DG Rider

DG Rider

Member: Triple Clutch Club
Lifetime Member
Aug 14, 2013
9,225
41,749
113
Casa Grande, AZ
Ownership

  1. 700-2
Bastard vermin chewed on little sections of my bed, but never touched the wiring. It's critical to get all the crumbs and food scraps out of the machine to keep them from "discovering" the machine. Tough on a 4 seater when the occupants have food fights mid ride.
 
  • Like
Reactions: Mudwing
S

SouthernCivic

New Member
Dec 29, 2017
11
14
3
Ringgold Ga.
Ownership

  1. 500
Sorry guys running way behind, been a crazy weekend. I will get those pictures of the repair up this afternoon after work.
 
  • Like
Reactions: Chooglin
S

SouthernCivic

New Member
Dec 29, 2017
11
14
3
Ringgold Ga.
Ownership

  1. 500
Sorry it took so long to get these up hope this helps someone.

Keep in mind that these plugs are plastic and too much force can stretch or break them. It is important to be patient and take your time. They are not hard to get apart but sometimes they come apart quick and sometimes the process can be time consuming.
B26D19CE 3704 4D8B 9231 34CBC725B273
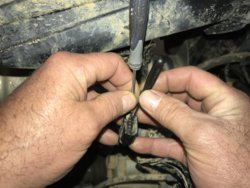
Picture above is of me using a small screwdriver and gently prying the white insert out of the plug. This insert keeps the tabs that hold the pins in the plug from releasing the pins.C4423DDA 2E60 480E AF66 1F84FB657558
The next step requires two small screwdrivers or one small screwdriver and a straight pick. The small black screwdriver in the pic is used to insert into the hole exposed when you removed the white insert in the first pic, it is used to pry in order to release the tabs at the bottom of the pin and release the pin. You have to feel for the tabs because you can’t see them. As you pry the tab use the other screw driver to keep pressure straight down on the pin, when the tab releases the pin will slide down and out the back side of the plug.
F2BA4FAD E7E8 46FD 952D C6210E44D0C1
This is the exposed pin while it was out of the plug after soldering on the new piece of wire. Sorry I didn’t get a pic before the soldering.
E6EF090D 3FC6 4588 A1FC BBA641CF17C8
This pic is just the pin locked back in place and the white insert back in the plug.
AA07C03E 224D 4630 B954 C4721786B7E9
This is a pic of the second solder joint before sliding down the heat shrink to cover it. If you can see it in the pic, I could not get the rubber seal all the way back in the back of the plug due to the heat shrink put on the first solder joint making the wire so thick. To solve this I put a small amount of RTV around the wire and pushed the seal in as far as I could get it. It is important to do everything you can to seal out moisture.
46415EA7 FCC1 4815 A099 400B9D5186B0
This is the final picture of the repair. The only thing I did after this was used electrical tape from about an inch and a half back on the factory tape and wrapped the wires all the way to the plug.
 
advertisement
Smitty335

Smitty335

Well-Known Member
Lifetime Member
Supporting Member
Oct 3, 2016
35,368
208,011
113
NWA Arkansas
Ownership

  1. 1000-3

  2. 1000-5
Sorry it took so long to get these up hope this helps someone.

Keep in mind that these plugs are plastic and too much force can stretch or break them. It is important to be patient and take your time. They are not hard to get apart but sometimes they come apart quick and sometimes the process can be time consuming.
View attachment 101379
Picture above is of me using a small screwdriver and gently prying the white insert out of the plug. This insert keeps the tabs that hold the pins in the plug from releasing the pins.View attachment 101380
The next step requires two small screwdrivers or one small screwdriver and a straight pick. The small black screwdriver in the pic is used to insert into the hole exposed when you removed the white insert in the first pic, it is used to pry in order to release the tabs at the bottom of the pin and release the pin. You have to feel for the tabs because you can’t see them. As you pry the tab use the other screw driver to keep pressure straight down on the pin, when the tab releases the pin will slide down and out the back side of the plug.
View attachment 101381
This is the exposed pin while it was out of the plug after soldering on the new piece of wire. Sorry I didn’t get a pic before the soldering.
View attachment 101382
This pic is just the pin locked back in place and the white insert back in the plug.
View attachment 101383
This is a pic of the second solder joint before sliding down the heat shrink to cover it. If you can see it in the pic, I could not get the rubber seal all the way back in the back of the plug due to the heat shrink put on the first solder joint making the wire so thick. To solve this I put a small amount of RTV around the wire and pushed the seal in as far as I could get it. It is important to do everything you can to seal out moisture.
View attachment 101384
This is the final picture of the repair. The only thing I did after this was used electrical tape from about an inch and a half back on the factory tape and wrapped the wires all the way to the plug.
They make tools for pin removal and reassembly. And they work great!
 
S

SouthernCivic

New Member
Dec 29, 2017
11
14
3
Ringgold Ga.
Ownership

  1. 500
They make tools for pin removal and reassembly. And they work great!
I have tools for the round pin plugs because they can be a PITA, but I’ve never had trouble getting the square pin plugs apart. If you deal with these plugs daily I could see where the tools could be handy.
 
Neohio

Neohio

Beast of the East
Lifetime Member
Supporting Member
Club Contributor
Dec 22, 2016
13,349
64,934
113
Painesville Ohio
Ownership

  1. 1000-5
I figured I would take some closer up pics of how to remove the pin on that style connector. Mine is only 2 positions vs your 5, but it is the same family.
This in the fuel injector plug on the 1000.
I am using a new one, as well as an old damaged one to try and show where the pin retainer is.
IMG 20190107 2004041


Insert a small flat jeweler's screwdriver here to remove the gray lock.
IMG 20190107 2004187


Pic with lock removed.
IMG 20190107 2005328


Where the terminal lock is located. Old broken connector I cut the sides off to show lock. Shove your flat head down and catch the edge of the lock, I tend to wrap my fingers around the wire and apply tension pulling wire from plug, this usually helps to remove the lock.
IMG 20190107 2010478


Connector with terminal removed.
IMG 20190107 2006360


Pointing to where the connector locks into terminal.
IMG 20190107 2012210


Any questions feel free to ask.
 
Last edited:

About us

  • Our community has been around for many years and pride ourselves on offering unbiased, critical discussion among people of all different backgrounds. We are working every day to make sure our community is one of the best.

User Menu

Buy us a beer!

  • Lots of time and money has gone into making sure the community is running the best software, best designs, and all the other bells and whistles. Care to buy us a beer? We'd really appreciate it!

    Beer Fund!

    Club Membership!