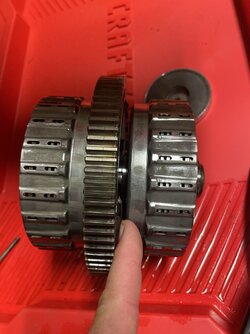
I did this last week to my '18 Pioneer 1000. It took me closer to six hours, but I took apart the valve body and checked the screens, cleaned the solenoids, etc. I was getting both AT and MT lights on full-time, and it would not initialize, so I went a little deeper while I was in there.
A few notes from my experience:
The two nylon rings on the shaft are not mentioned in the initial parts list! I noticed that someone mentioned it a while back, and it was acknowledged to be missing, but it has not been added to the parts list. I didn't have new ones as a result, but I did put it back together and run with the older ones. They looked in decent shape.
Also, I'd recommend marking or otherwise familiarizing yourself with the front/back clutch packs and the gears that go into them. Following the method in the instructions suggests that one just remember up/down by what you did last, and that can get lost in your head quickly. Especially since you may find yourself removing them and starting over a few times while trying to re-assemble and get it all the way in. The gear on the inside clutch pack tends to wiggle itself out while installing.
The service manual does not give a torque spec for the 8 clutch cover bolts, but it does specify 10 ft lbs for the valve body cover, and the general spec for 6mm flange bolts in the manual is 9 lbs, so you can figure 9-10 lbs will be good.
Overall, not too bad of a job to DIY. As mentioned, the hardest part is getting the assembly back in all the way. It took me about 4 times of removing and starting over. I could probably do it in 2-3 hours next time.
Thanks for the instructions @CumminsPusher !


