P700 New Custom Snorkel

SuperYeti

SuperYeti

Well-Known Member
May 11, 2015
220
375
63
Vancouver, BC
Ownership

  1. 700-4
Well after my last trip, and tearing off my first try at a snorkel on the narrow trails around me, I decided I needed something a little more substantial, and tucked away inside away from the trails. I went and grabbed some 3" 1/16" wall pipe, and some 16ga steel, and started fabbing away.

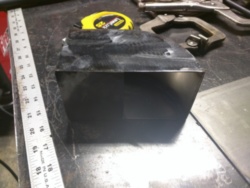
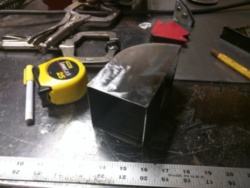
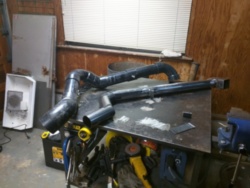
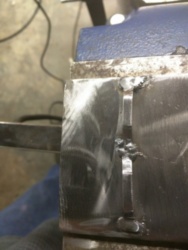
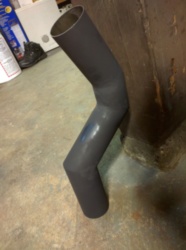
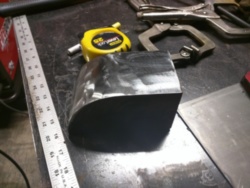
First I built a snorkel intake, with a nice radius to try and keep the air flow smooth.
IMG 20160112 115425 zpsmswurosf
IMG 20160112 115435 zps1qlkapzd
IMG 20160112 115440 zpsqypudlvv

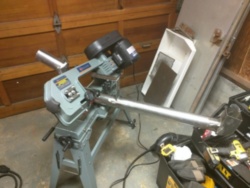
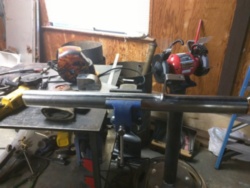
Then i cut the intake pipe to approximate length, and figured out a mount to tie it into the seat mount
IMG 20160112 131607 zpsvov9x3p7

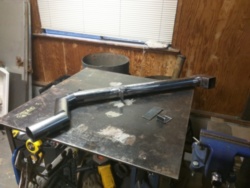
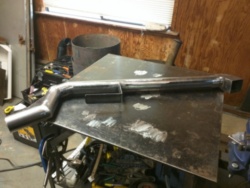
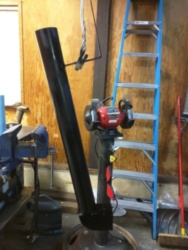
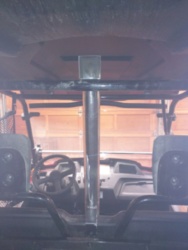
Then i cut the pipe to the correct angle and length for the snorkel, and tacked it in place, removed and went to town welding it.
IMG 20160112 135809 zpscw8gyvqm
IMG 20160112 135753 zpszlbmbsut

Pretty happy with how it's coming out so far, still need to finish up cutting and welding up the bends to tie into the intake between the rear seats, more to come.
 
d_b

d_b

Active Member
Lifetime Member
Supporting Member
Oct 24, 2015
302
240
43
Utah
Liking this. Good job, I'll be watching.
 
SuperYeti

SuperYeti

Well-Known Member
May 11, 2015
220
375
63
Vancouver, BC
Ownership

  1. 700-4
Got a bit more work done on the snorkel today, almost everything is all cut and fitted, all that's left now is to cut a piece to extend the mounting bracket a bit, weld everything together, paint, remove the old snorkel, and mount the new one. Looking good! I also managed to eliminate a bunch of bends from the snokel, the old one was 315 degrees, this one is 230, that, and less rough areas inside the pipe should increase airflow drastically!
IMG 20160115 154909 zpsrn8tnzxf
 
SuperYeti

SuperYeti

Well-Known Member
May 11, 2015
220
375
63
Vancouver, BC
Ownership

  1. 700-4
Got the old one out tonight, I was wrong, it was 360 degrees of bend :eek:, yet it still ran as good or better than the stock intake :) Can't wait to get it out with the new one.

IMG 20160115 214942 zpsogduuwko
 
  • Like
Reactions: Tflynn
H

Hardwaterflyer

Active Member
Lifetime Member
Sep 22, 2015
65
102
33
West Central Minnesota
Ownership

  1. 1000-5
That looks awesome. Not a welder so I hope a kit like this comes out. Using Tracks throws snow all over so this snorkel is a good option.
 
SuperYeti

SuperYeti

Well-Known Member
May 11, 2015
220
375
63
Vancouver, BC
Ownership

  1. 700-4
That looks awesome. Not a welder so I hope a kit like this comes out. Using Tracks throws snow all over so this snorkel is a good option.
Once I finish it and test it and verify it works and fits well I'll probably be putting up a site to selling these and anything else I come up with. This one was built in mild steel as it's a bit cheaper a and more forgiving during initial build and design, but was thinking probably stainless and maybe a powder coated option for those that don't like the stainless look. I'll be posting here as I progress.
 
  • Like
Reactions: Tflynn
SuperYeti

SuperYeti

Well-Known Member
May 11, 2015
220
375
63
Vancouver, BC
Ownership

  1. 700-4
I was just sitting here thinking, I'm going to be extending my fuel tank breather while I'm in here, would it make sense to vent it into the snorkel? Then when the machine and gas tank are warm , I wouldn't have to smell gas fumes like I do now, I guess it could cause the AFR to get a bit richer, but that's not necessarily a bad thing, anybody have any reasons why I shouldn't be doing that?
 
Tflynn

Tflynn

Not a liberal
Lifetime Member
Club Contributor
Jan 12, 2015
2,501
3,833
113
Northern California
Ownership

  1. 700-2
I thought that is what most people do. Seems like a good way to do it
 
advertisement
SuperYeti

SuperYeti

Well-Known Member
May 11, 2015
220
375
63
Vancouver, BC
Ownership

  1. 700-4
Most I've seen on the other thread here suggested just tucking it into the seat, i was thinking of going with a little filter and mounting that to the snorkel, and then it dawned on me, just weld a little nipple right into the snorkel.
 
Tflynn

Tflynn

Not a liberal
Lifetime Member
Club Contributor
Jan 12, 2015
2,501
3,833
113
Northern California
Ownership

  1. 700-2
That's what I'd do. You never know when that water crossing might drop off and suddenly you are in water over the seat. Besides it doesn't make sense to me to snorkel the intake so high and everything else low. I'm sure I've read of someone else doing exactly what you're thinking, plumbing all the vent lines into the main snorkel. It may have been @Hondasxs?
 
SuperYeti

SuperYeti

Well-Known Member
May 11, 2015
220
375
63
Vancouver, BC
Ownership

  1. 700-4
After reading through a few threads on that this week, I've decided to go with bellows for the diffs and sub transmission. It was just the fuel vent i was still undecided on.
 
d_b

d_b

Active Member
Lifetime Member
Supporting Member
Oct 24, 2015
302
240
43
Utah
If you decided to sell these, I may be able to move a few for you. Maybe put together a full kit including bellows and all.
 
SuperYeti

SuperYeti

Well-Known Member
May 11, 2015
220
375
63
Vancouver, BC
Ownership

  1. 700-4
If you decided to sell these, I may be able to move a few for you. Maybe put together a full kit including bellows and all.
That's a great idea, once all the parts show up and I verify what other odds and ends I need, I'll absolutely do that.
 
SuperYeti

SuperYeti

Well-Known Member
May 11, 2015
220
375
63
Vancouver, BC
Ownership

  1. 700-4
Got it all welded up this morning, looks like I'm going to need 1 coupling cut in to get the mount over the back of the seat lol. Will update later once I get final pieces and get it installed.

IMG 20160117 124815 zps4czseasg
 
SuperYeti

SuperYeti

Well-Known Member
May 11, 2015
220
375
63
Vancouver, BC
Ownership

  1. 700-4
Some more progress and pictures

Got the snorkel cut so I can install it
IMG 20160117 155032 zpsnsr60ntk

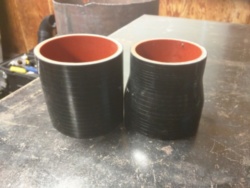
Got some silicone couplings to connect the 2 pieces and to what's let's of the old intake
IMG 20160117 155049 zpsaaaemr3v

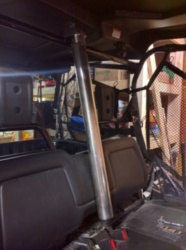
Got some tabs fabbed and attached to the bottom of the scoop for the gear clamps to attach it to the rops.
IMG 20160117 164330 zpsfiyj0wts

Lower section cleaned up, sanded and first coat of header paint on it.
IMG 20160117 171201 zps7fp83ghg

Just waiting for paint to dry and have to finish fitting up the mount for the upper section, more to come.
 
  • Like
Reactions: d_b and Tflynn
SuperYeti

SuperYeti

Well-Known Member
May 11, 2015
220
375
63
Vancouver, BC
Ownership

  1. 700-4
First coat of paint on the big piece here
IMG 20160117 214535 zpss52agbtk

Just did the second coat, 1 more when it dries and ready for heat gun, then installation!
 
Tflynn

Tflynn

Not a liberal
Lifetime Member
Club Contributor
Jan 12, 2015
2,501
3,833
113
Northern California
Ownership

  1. 700-2
Everything is looking good. I'm ready for some pictures of the finished product!
 
d_b

d_b

Active Member
Lifetime Member
Supporting Member
Oct 24, 2015
302
240
43
Utah
I agree I'm ready also.
 
advertisement

About us

  • Our community has been around for many years and pride ourselves on offering unbiased, critical discussion among people of all different backgrounds. We are working every day to make sure our community is one of the best.

User Menu

Buy us a beer!

  • Lots of time and money has gone into making sure the community is running the best software, best designs, and all the other bells and whistles. Care to buy us a beer? We'd really appreciate it!

    Beer Fund!

    Club Membership!