P1000m5 P-1K5 upgrade thread

Jankyeye

Jankyeye

Well-Known Member
Lifetime Member
Dec 17, 2021
829
4,007
93
Tampa, Fl.
Ownership

  1. 1000-5

  2. Talon R LV
After 2 years on the forum I guess its time to consolidate all the things I've added to the buggy. I'll preface this thread by saying I like to tinker, (not be a tinker...) I can never seem to leave anything alone. there is always some little thing I have to add, can't help it I get stir crazy if I don't have a project to work on.

With that said, I picked up a base model 2022 in June of 22. It was the first available to me locally and while I cant say it was a steal, I was still happy to find it. Within the week I was already racking up the mod expenses thanks to the fine people on this forum.

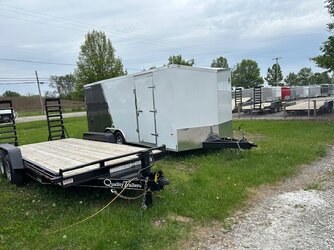
The very first purchase was a new trailer to bring it home. 7x10 single axle aluminum sure-trac. While the trailer pulls nice, the P-1k just fit so luckily I didn't have any tongue weight adjustments to make. I will mention I have had to have the trailers axle mount rewelded twice now. Both times under warranty but still disappointing/scary considered what I paid for the trailer and the cost of replacing the things I use it for.
1710335630921


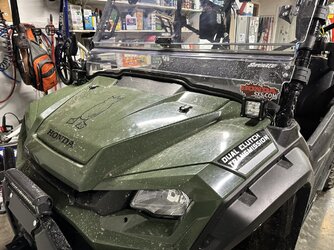
First things I added were a tusk roof, SATV flip up windshield and side mirrors. I wanted as low a profile roof as I could get to fit in the toy hauler (which I still have never used to transport it). I figured I was done mod'ing and took it for a ride.

1710335981111


Needless to say I was not nearly as prepared as I thought I was so started shopping for a winch. Settled on the Viper V2 6k wide spool from the club store. Install wasn't too difficult and it tucked under factory bumper nice and tight. I'd like to say it works great, but honestly I've not needed it once since the install. (knock on wood)

1710336294831
 
Last edited:
Jankyeye

Jankyeye

Well-Known Member
Lifetime Member
Dec 17, 2021
829
4,007
93
Tampa, Fl.
Ownership

  1. 1000-5

  2. Talon R LV
From there I started on some electrical upgrades. I had plans to make this Ohio street legal for putting around the neighborhood so I installed a Turnpro signal kit with Horn and plate mount.

1710336717790

1710336835002


And of course I had to add the bilge fan under the seat. Even with the 22+ "heat reduction updates" it was still pretty toasty.

1710337163922
 
Last edited:
Jankyeye

Jankyeye

Well-Known Member
Lifetime Member
Dec 17, 2021
829
4,007
93
Tampa, Fl.
Ownership

  1. 1000-5

  2. Talon R LV
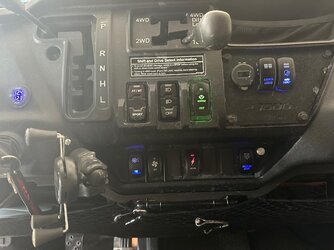
Other Miscellaneous updates from the club store include:
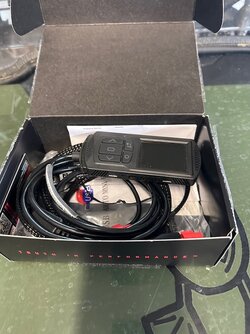
ACC cable pigtail
Rear back up lights with work light trigger
Dual battery isolator kit with volt meter and fuse block
Light bar with high beam trigger
Switch plate adapters
Fan override switch
Seatbelt safety delete
Hillbilly brake
Key/Aux power switch
Lighted headlight switch

1710338099999
IMG 7555 IMG 7556
 
Jankyeye

Jankyeye

Well-Known Member
Lifetime Member
Dec 17, 2021
829
4,007
93
Tampa, Fl.
Ownership

  1. 1000-5

  2. Talon R LV
Misc non-club store updates include:
- Cube lights
- Under dash storage
- Cubby net
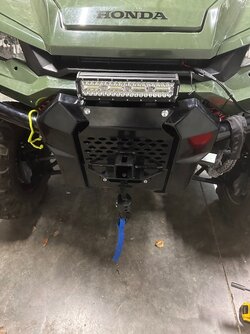
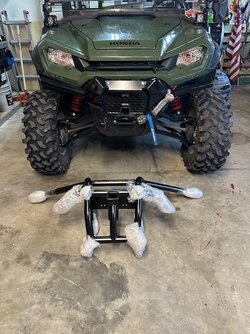
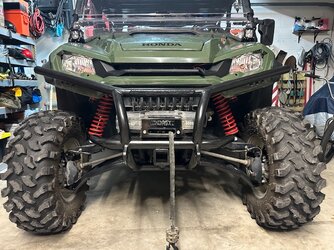
- KFI Grill guard/front hitch receiver
- Interior lights
- Winch remote safety cut off switch
- Aux beam LED headlight bulbs
- Throttle Max
- Kemi moto rear mesh
- Mud Buster XL fender flares

IMG 6060 IMG 5967 IMG 6108
 
Last edited:
Jankyeye

Jankyeye

Well-Known Member
Lifetime Member
Dec 17, 2021
829
4,007
93
Tampa, Fl.
Ownership

  1. 1000-5

  2. Talon R LV
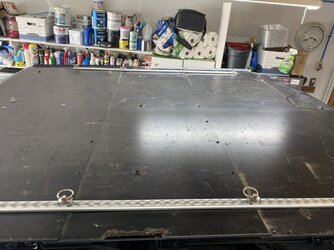
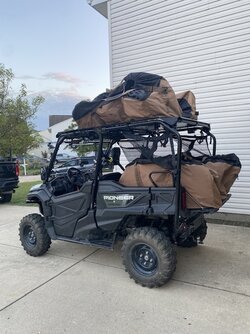
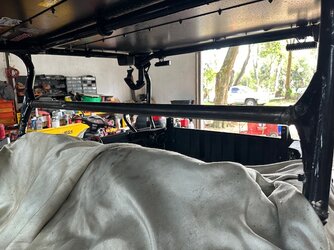
I initially bought the buggy to help my out of shape ass carry goose decoys into the fields. With that in mind I added some extra carrying capacity. Started with (2) 4 foot sections of L track on the Tusk roof in order to strap down some decoy bags.

IMG 5320 IMG 5488

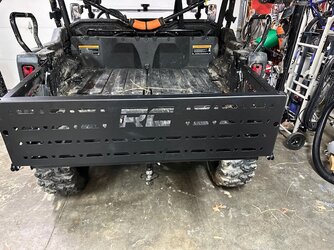
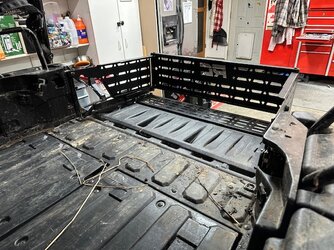
I also added a Rough Country bed extender to squeeze a little more room out of it.

IMG 6098 IMG 6099
 
Last edited:
Jankyeye

Jankyeye

Well-Known Member
Lifetime Member
Dec 17, 2021
829
4,007
93
Tampa, Fl.
Ownership

  1. 1000-5

  2. Talon R LV
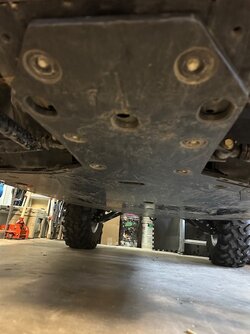
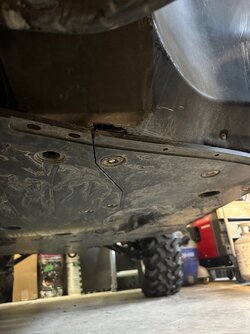
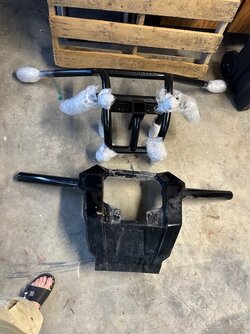
Next, although I had not ridden much rocky terrain, the fine folks here convinced me I needed to upgrade my skid plate. This led to Super ATV and their Black Friday sale prying a few more dollars out of my hand. During install, the directions tell you to leave off the two metal brackets protecting the front edge of the skid plate due to the updates in the 22+ front wheel well areas. I'd still like to find a way to make them work but haven't decided if I want to notch the brackets or the plastic on the buggy.

IMG 7557 IMG 7558

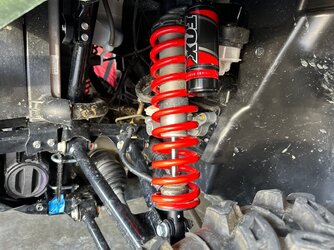
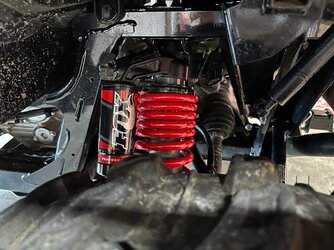
And while I was in the spending mood, I jumped on a set of used FOX shocks. By far the biggest improvement in ride comfort I've made.

68513506514  251C6C50 80B9 494C 8DC2 BB498AF652F9 IMG 5524
 
Last edited:
Jankyeye

Jankyeye

Well-Known Member
Lifetime Member
Dec 17, 2021
829
4,007
93
Tampa, Fl.
Ownership

  1. 1000-5

  2. Talon R LV
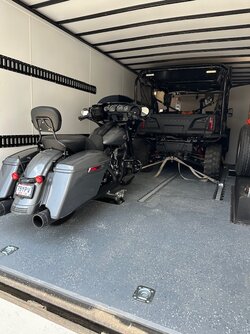
Shortly after, life happened and my wife got orders (active duty AF) to Florida putting mods on hold for a while. However it did give me a reason to get a 20x8 +6" enclosed trailer to get the buggy and the motorcycle from Ohio to Florida in one trip.

IMG 6615 IMG 6761
 
Last edited:
Jankyeye

Jankyeye

Well-Known Member
Lifetime Member
Dec 17, 2021
829
4,007
93
Tampa, Fl.
Ownership

  1. 1000-5

  2. Talon R LV
After we got settled in we took our first Florida ride in Ocala national forest. Much different riding than the the hills of Ohio/Indiana. Pretty flat and mostly loose sand. Immediately decided that we needed a trigger shield in addition to the bilge fan. It is warm down here.

1710353980214


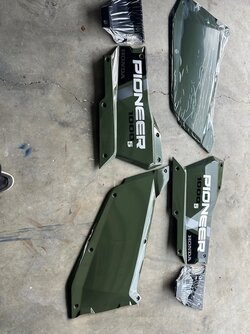
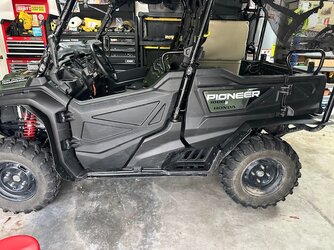
My only regret when purchasing a base unit was the lack of color panels on the doors/bed. Always seemed unfinished to me. Initially the high cost of green panels kept me from adding them but I finally broke down and spent the money. Much better!

IMG 7129 IMG 7130 IMG 7131
 
Last edited:
Jankyeye

Jankyeye

Well-Known Member
Lifetime Member
Dec 17, 2021
829
4,007
93
Tampa, Fl.
Ownership

  1. 1000-5

  2. Talon R LV
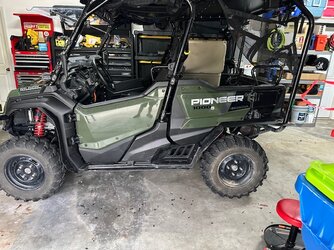
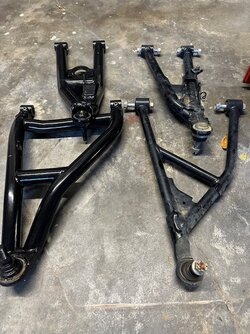
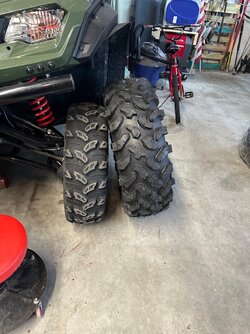
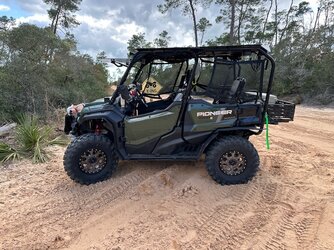
I had been debating on what wheel and tire set up I wanted to go with since I bought this thing. I went round and round several times on 28x10 all the way around, 29 and different widths front and back, or 30" on R15 rims with A arms. In the end I went for broke and decided to bite the bullet on some new A arms, 30" tires and wheel spacers.

XTR 370 30-10r15 on System 3 Bead lock 15x7 5+2 rims.
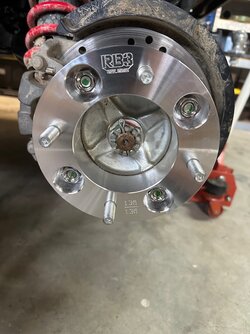
SATV Atlas pro A arms front and rear and RB3 wide track spacer kit.

IMG 7269 IMG 7357 IMG 7366 IMG 7387
 
Last edited:
Jankyeye

Jankyeye

Well-Known Member
Lifetime Member
Dec 17, 2021
829
4,007
93
Tampa, Fl.
Ownership

  1. 1000-5

  2. Talon R LV
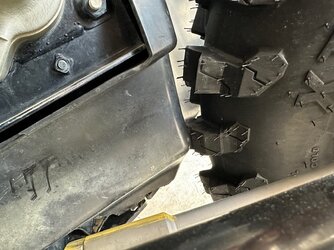
The SATV A arms did come with a steering stop to prevent rubbing which I opted to not install. Without the spacers the 30" 5+2 offset wheel/tires rubbed hard on the fwd A arms at less than full lock. With the RB3 spacers (1" front, 1.5" rear) they easily cleared the A arms but still rubbed slightly on the inner fender well. I suspect 16-21 models would be fine but the added material in the 22+ models reduces the clearance. The rubbing in the front is pretty minor and will likely go away as the tires start to wear.

IMG 7367 IMG 7368

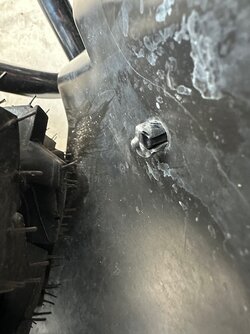
The rear tires rubbed on the Mud buster bolt/nut at full compression. This was only an issue if I ran the shocks on setting 1, changing them to setting 2 prevented the rub. I also tried swapping the offending bolt to a shorter one but it still rubbed on setting 1.

IMG 7559
 
Last edited:
advertisement
Jankyeye

Jankyeye

Well-Known Member
Lifetime Member
Dec 17, 2021
829
4,007
93
Tampa, Fl.
Ownership

  1. 1000-5

  2. Talon R LV
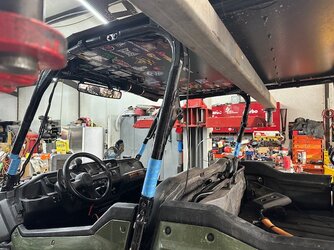
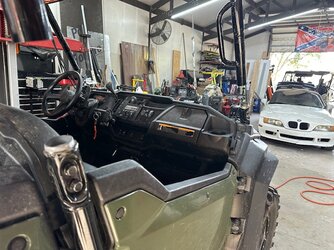
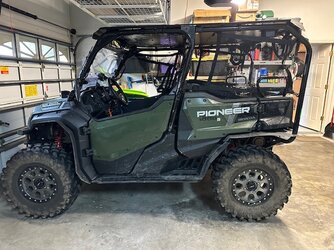
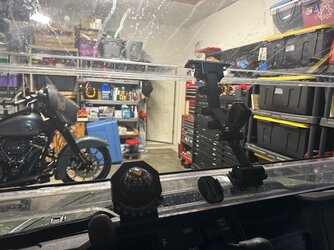
I have wanted to chop the cage on this thing since I seen pictures of @Remington 's P-1K. Being on the shorter side, all the extra head room seemed to be a waste anyway and just made fitting under a garage/trailer door sketchy. After asking around for Fab Shop recommendations (because I have zero welding skills) I was pointed to @knuckledeep who so graciously agreed to help me out. He chopped 4" from the front, 4.5" from the center and ~5" from the rear. Did not take anything from the top between A and B pillars, just gave it some "love" to slip back onto the factory bungs.

Removing the height from the lower part of the pillars as opposed to the upper part lowered the seatbelt height ~4.5" which made them way more comfortable. Doing it this way also allowed him to remove the center V brace and replace it with a harness bar.

All in all I am super happy with it. It looks better and the seatbelts are way more comfortable. So comfortable in fact I have not yet invested in 4 point harness's....yet.

IMG 7476 IMG 7477 IMG 7478 IMG 7482 IMG 7516
 
Last edited:
Jankyeye

Jankyeye

Well-Known Member
Lifetime Member
Dec 17, 2021
829
4,007
93
Tampa, Fl.
Ownership

  1. 1000-5

  2. Talon R LV
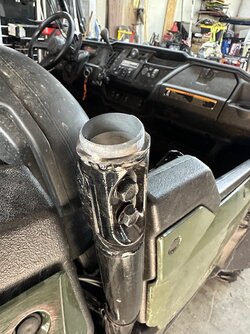
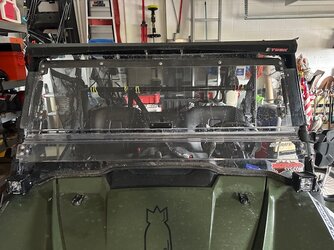
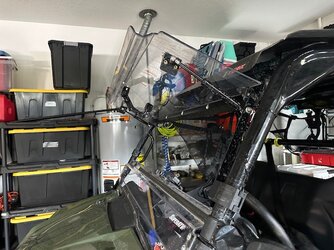
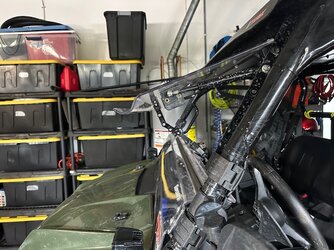
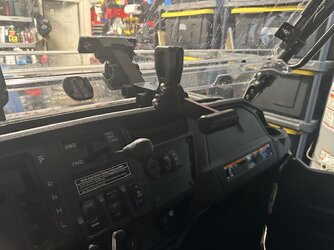
@knuckledeep also made quick work of trimming the SATV flip up windshield. Almost like he had done a few dozen of these... The down side of cutting/repositioning the struts is it seems like the windshield opens a bit too far. Stock it would only open to ~90 degrees or so, now it goes well past that and I am a bit concerned about it being ripped off by a low hanging branch.

IMG 7562
IMG 7563

To help with that, I added an extended handle to hold it. While it doesn't open the full 90 degrees it did before, its plenty far enough to let me see while allowing plenty of airflow.

IMG 7564 IMG 7538 IMG 7537
 
Last edited:
Jankyeye

Jankyeye

Well-Known Member
Lifetime Member
Dec 17, 2021
829
4,007
93
Tampa, Fl.
Ownership

  1. 1000-5

  2. Talon R LV
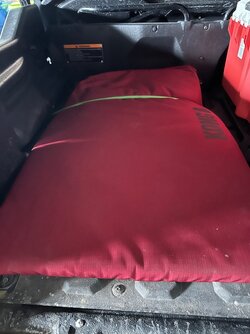
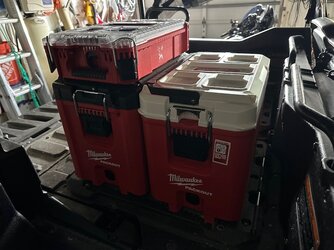
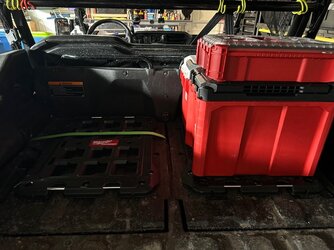
As the list of things to do dwindles down, I found myself envious of some of the Milwaukee Packout set ups on here. So I thought I'd start one of my own. A double plate on the back of each seat was easy enough. Trying to decide which boxes to add takes a bit more thought. Settled on a small cooler, matching box for tools and a smaller box for creature comfort (bug spray, sun tan lotion, Band-Aids etc...) They fill up faster than I thought they would. I'm still playing with what to put in them. And since I added bases to both sides, I had to find a way to make the dog comfortable.

IMG 7566 IMG 7565 IMG 7567
 
Last edited:
Jankyeye

Jankyeye

Well-Known Member
Lifetime Member
Dec 17, 2021
829
4,007
93
Tampa, Fl.
Ownership

  1. 1000-5

  2. Talon R LV
With the 30" tires I could feel a little loss of power. Since most of my riding now days is in loose sand I was concerned about the clutches so I decided a tune was in order.

Picked up a PV-3 with "Mud and Sand Tune" from Florida Cracker Performance. It does recommend 91+ octane. I only had room for about 3 gallons first trip out and it ran ok. Hopefully better once I get all the 87 out of it.


From their website:

Mud and Sand Tune:

This tune was designed for riding in thick sand or mud. The overall demand on your SXS is much higher than typical trail riding. It is slow paced with a high load. They tend to want to hunt for gears, run hot and lack that low end torque that is needed. A lot of this type of riding generally is in a SXS that has much more aggressive, heavier and larger tires often with portals. All this including the terrain is just much more taxing on the engine, cooling system, clutches and performance. Keeping all this in mind I wanted to keep this a trail tune. Engine calibrations were done to help increase throttle response, low-end torque, overall power, and help keep things a little cooler in the engine and exhaust so it might relieve a little pressure off the cooling system. Every bit of what was done was to help improve the overall performance, but the number one objective was to retain the reliability and longevity of the engine and clutches.

Engine calibrations were designed to help increase throttle response, low-end torque, overall power, lower on/off radiator fan temps were changed to help engine cooling. Every bit of what was done was to help improve the overall performance by optimized fueling for power and keeping cylinders cooler, timing was optimized for low to mid-range power, The fuel and timing changes not only help with the snap in the throttle but also help engine and exhaust temperatures. The number one objective was to retain the reliability, longevity of the engine and clutch health. But still give you the added performance you want.

Clutch calibrations on this tune can be a little aggressive on take-off, it can be jumpy on hard ground where you are getting good traction and doing a lot of start and stop riding. Although it is safe to use even on the hard top. You will not notice the jumpiness when you are on soft ground like it was designed for or with a lot of gear reduction. The shift pressures were also increased, they are less firm at light throttle then the harder you are in the throttle the firmer they become. The steady pressure was also increased to help keep the clutches from slipping in those high demand situations and clutches are fully engaged. All of this is done to limit the slip time on take-off and shifts to ultimately help keep your clutches cooler and healthy.

Transmission calibrations were made to hold the gears longer when in light throttle so when you are in auto in thick sand it helps keep it from hunting for a gear or shifting too early causing it to lug. The harder you are in the throttle the more it will hold the gear. It also has a slightly more aggressive downshift but not as aggressive as sport mode. Overall, you will notice much better shift points that change by demand.

All FCP tuning comes with reverse shifting in auto mode. This makes it nice having to back out a long trail, in those situations backing up a slick hill or getting out in a mud hole it will shift gears and getting some much-needed wheel spin (Especially in those builds with a lot of gear reduction). Manual mode will give you much more control than factory, it will allow you to upshift earlier and hold the gear you selected. The only time it will down shift is when you come under 15 mph in 6th gear and then it will continue to downshift as you slowdown from there till it reaches first gear. This feature is nice when cruising as it won't downshift when you let off the throttle eliminating engine braking. So, you get full control of your shifts up and down.

91 OR BETTER OCTANE

IMG 7568
 
Jankyeye

Jankyeye

Well-Known Member
Lifetime Member
Dec 17, 2021
829
4,007
93
Tampa, Fl.
Ownership

  1. 1000-5

  2. Talon R LV
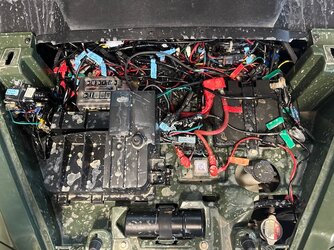
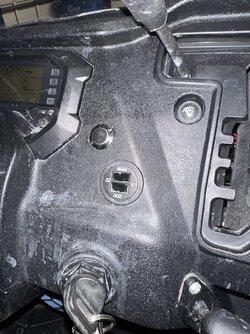
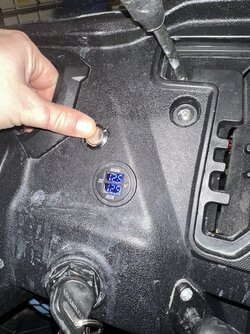
Well the forum good idea fairy got me again. A few recent post talking about a push to test button for the dual volt meter had me scrounging in the garage for a switch. In hind sight, I picked a horrible location for the button. Real PITA to screw the backing nut on the switch with all the BS I got shoved under the hood.

IMG 7595 IMG 7594
 
Jankyeye

Jankyeye

Well-Known Member
Lifetime Member
Dec 17, 2021
829
4,007
93
Tampa, Fl.
Ownership

  1. 1000-5

  2. Talon R LV
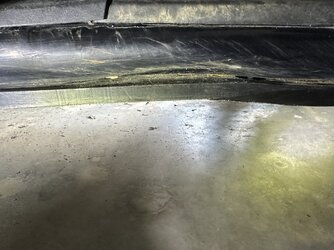
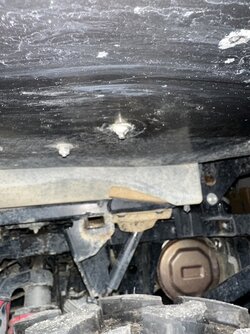
I have always been skeptical of those that say a skid plate could flex enough to damage component’s. Well now I am a believer. Passenger side frame took a beating on something.

IMG 8001
 
advertisement

About us

  • Our community has been around for many years and pride ourselves on offering unbiased, critical discussion among people of all different backgrounds. We are working every day to make sure our community is one of the best.

User Menu

Buy us a beer!

  • Lots of time and money has gone into making sure the community is running the best software, best designs, and all the other bells and whistles. Care to buy us a beer? We'd really appreciate it!

    Beer Fund!

    Club Membership!