P500 p5 suspension

JWB

JWB

Well-Known Member
Lifetime Member
Oct 3, 2016
797
2,012
93
California MD
Ownership

  1. 500
View attachment 86443 hey guess what i am still running the progressives without adjusting a thing and beat my machine 4xs as yours so again everyone can do the math and this or that but still the original is the best and im the first ever to modify the p5 suspension and the research ive done is still the best you can do ...... cheaper then the WEs and no where close to the problems of the airs sooooo yea i have more longevity more travel more reliability just more everything with none of the negatives ........ so ....... yea the rhino shocks still better no matter how you swing it or how you try and sell it i still use the same shocks on my lifts which are stretched
alot of custom everything
Got it. Thanks. Very cool set up! You've done really nice work with that!
 
  • Like
Reactions: Remington
jak9922

jak9922

hot headed wopolock
Vendor
Lifetime Member
Jun 2, 2015
3,296
5,681
113
pittstown ny
im only F ing with you on you air suspension i can never honestly knock what you have done and you commit to it lol i just need to stur the pot my man
 
  • Like
Reactions: JWB
JWB

JWB

Well-Known Member
Lifetime Member
Oct 3, 2016
797
2,012
93
California MD
Ownership

  1. 500
im only F ing with you on you air suspension i can never honestly knock what you have done and you commit to it lol i just need to stur the pot my man
It's all good Brother! Gotta give a bit back ya-know;). I'm totally serious about what you've done- I truly appreciate good craftsmanship, and I know how much effort you've had to put in to that project. It sets you apart. There are fewer and fewer people able to do what you've done. Keep on keepin on!!
Have you got a Torq-Locker yet?
 
  • Like
Reactions: jak9922
jak9922

jak9922

hot headed wopolock
Vendor
Lifetime Member
Jun 2, 2015
3,296
5,681
113
pittstown ny
It's all good Brother! Gotta give a bit back ya-know;). I'm totally serious about what you've done- I truly appreciate good craftsmanship, and I know how much effort you've had to put in to that project. It sets you apart. There are fewer and fewer people able to do what you've done. Keep on keepin on!!
Have you got a Torq-Locker yet?
no for my riding there are few spots where id need it that skill wont cover like ppl getting lost with a gps not knowing how to read a map
 
  • Like
Reactions: JWB
JWB

JWB

Well-Known Member
Lifetime Member
Oct 3, 2016
797
2,012
93
California MD
Ownership

  1. 500
Just got home from the shop, and finishing the install of the new shocks and limiters. I ended up taking the limiters off the front- there's just too much risk of interference damage from the limiters when the suspension is fully compressed. So I'm not sure what to do about limiters at this point. I could be over-reacting to having one shock fail after 2 years, and in retrospect, I may have damaged them while testing the auto locker, as I was running with all the shocks at near max pressure and ride height to in an effort to mimic the stock suspension. So, I have all new shocks, and will continue to think about some way to install limit straps that won't interfere with everything else... Meanwhile, there's an f'n hurricane coming, and everyone wants their boats out tomorrowo_O!
 
M

mtnsapo

New Member
Jul 31, 2018
1
1
3
here and now
Ownership

  1. 500
I'm going to start a new thread dealing strictly with the air-shock mod, so anyone who wants to do it, can get all the info in one place, and not have to read through the whole suspension thread.

Thank you so much! Sent you a pm. I really think u should be rewarded for sharing all your knowledge with us, i look forward to that diy thread and will start my own biuld as soon as u post it
 
  • Like
Reactions: JWB
pFive

pFive

Well-Known Member
May 3, 2016
670
1,267
93
Greenwood IN
Ownership

  1. 500
I don't think it's a big deal, but I guess I would run one if I could get the install to make me happy. (Jeep JK rear straps are 13.5") We could run the limiter cable through a light spring, like from a screen door etc.. that would keep it from flopping around and touching anything? Another thing I just cannot recall clearly is where I saw a cable that was using a light spring to keep tension on it at all times, but I cannot remember the application, it carried no load itself, it just held a few inches of the cable inside the body of the spring to prevent flappage... (That's a word I made up, technically all words are made up)
 
J

jmcampbell54

Well-Known Member
Feb 3, 2018
292
628
93
Texas
8a95cffbd57dd0015d401082879c1140

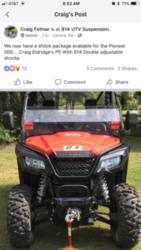
814 Suspension released the shock kit for the P500


Sent from my iPhone using Tapatalk
 
  • Like
Reactions: JWB
JWB

JWB

Well-Known Member
Lifetime Member
Oct 3, 2016
797
2,012
93
California MD
Ownership

  1. 500
I don't think it's a big deal, but I guess I would run one if I could get the install to make me happy. (Jeep JK rear straps are 13.5") We could run the limiter cable through a light spring, like from a screen door etc.. that would keep it from flopping around and touching anything? Another thing I just cannot recall clearly is where I saw a cable that was using a light spring to keep tension on it at all times, but I cannot remember the application, it carried no load itself, it just held a few inches of the cable inside the body of the spring to prevent flappage... (That's a word I made up, technically all words are made up)
:)
 
D

Duckhunt

Guest
I did a quick video just to show the difference with and without the control arm bushing teeth. Okay now back to the garage and start on the rears.
EDIT: I also had the anti sway bar removed on the rear.
 
Last edited by a moderator:
JWB

JWB

Well-Known Member
Lifetime Member
Oct 3, 2016
797
2,012
93
California MD
Ownership

  1. 500
I did a quick video just to show the difference with and without the control arm bushing teeth. Okay now back to the garage and start on the rears.
Excellent comparison!
I would suggest replacing the stock bolts with longer bolts as well, to get the threaded section of the bolts out of the mount tab, and don't squeeze the mount at all when you tighten everything. I haven't done all mine yet (bolts) The threaded section of the bolt, and the mount tab, don't seem to get along well, and eat each-other. It eventually causes the the bolts to start getting sawed through, and makes the hole in the tab bigger, causing a lot of sloppiness and camber changes. The damage is done on mine, so I'm gonna have to either weld the holes shut and re-drill, or weld thick washers (easier I think) to the tabs to tighten it all up again.
Actually, the real cure would be bearing type bushings, but......:rolleyes:
This is another one of the mods that should probably be done to any machine not running bone stock suspension- particularly if you run it hard!:D
 
J

jmcampbell54

Well-Known Member
Feb 3, 2018
292
628
93
Texas
Excellent comparison!
I would suggest replacing the stock bolts with longer bolts as well, to get the threaded section of the bolts out of the mount tab, and don't squeeze the mount at all when you tighten everything. I haven't done all mine yet (bolts) The threaded section of the bolt, and the mount tab, don't seem to get along well, and eat each-other. It eventually causes the the bolts to start getting sawed through, and makes the hole in the tab bigger, causing a lot of sloppiness and camber changes. The damage is done on mine, so I'm gonna have to either weld the holes shut and re-drill, or weld thick washers (easier I think) to the tabs to tighten it all up again.
Actually, the real cure would be bearing type bushings, but......:rolleyes:
This is another one of the mods that should probably be done to any machine not running bone stock suspension- particularly if you run it hard!:D

So what exactly do we need to perform this modification?


Sent from my iPhone using Tapatalk
 
  • Like
Reactions: Shadesmn
D

Duckhunt

Guest
Excellent comparison!
I would suggest replacing the stock bolts with longer bolts as well, to get the threaded section of the bolts out of the mount tab, and don't squeeze the mount at all when you tighten everything. I haven't done all mine yet (bolts) The threaded section of the bolt, and the mount tab, don't seem to get along well, and eat each-other. It eventually causes the the bolts to start getting sawed through, and makes the hole in the tab bigger, causing a lot of sloppiness and camber changes. The damage is done on mine, so I'm gonna have to either weld the holes shut and re-drill, or weld thick washers (easier I think) to the tabs to tighten it all up again.
Actually, the real cure would be bearing type bushings, but......:rolleyes:
This is another one of the mods that should probably be done to any machine not running bone stock suspension- particularly if you run it hard!:D
That's good input @JWB. I honestly thought about it but figured it would be fine so I'm glad you spoke up. Thanks!

I got all the stock bushings out of the Hijackers and installed Energy Suspension 9.8116 poly bushings. They are exact-fit replacements. I should have gotten the split ES bushings. But anyway, should have the air ride soon! Tomorrow if I get to it before Vikings. Priorities. Just starting out with 2 valves to combine front and rears, plan is to go to on-board compressor and multi-valves if works out. Again I like the fact it requires minimal mods to install. I also made bushings to accommodate stock diameter bolts (12mm x 140 rear, 10mm x 130 front). Trying to keep it real!

Also, You have no idea how many times this week I tried to think how I could "burn" out the molded rubber bushings and install poly bushings with floating bearing-inserts. LOL!!!!

EDIT: I am combining the fronts together, and the rears together. Side-to-side, NOT fronts and rears together. Poorly worded on my part.
 
Last edited by a moderator:
  • Like
Reactions: JWB
D

Duckhunt

Guest
So what exactly do we need to perform this modification?


Sent from my iPhone using Tapatalk
I'd take your wheels off, shocks off, then do each control arm at time. On the fronts you can leave the front knuckle attached and rotate the arms out. The rears you'll also want to grind the teeth off the knuckle bushings so take the arms completely off. My fronts I had completely off since I was doing locker install. I used a sanding disk on a 4.5" grinder on the teeth, worked perfect. I also lightly hand sanded the frame mounts where the teeth dug in. I was going to install a washer on each side of the control arm bushing but only needed one. If it matters I installed the washer on rear side of arm. That has the most pressure (driving fwd). I do agree 100% with @JWB getting longer bolts so no threads are in-between the mounts. Then just put bearing grease on bolts, bushings, washer, pivot points, etc. Anyway that's my $0.02. I'm late to the game, others have far more experience. Mine's just fresh!!!!
 

About us

  • Our community has been around for many years and pride ourselves on offering unbiased, critical discussion among people of all different backgrounds. We are working every day to make sure our community is one of the best.

User Menu

Buy us a beer!

  • Lots of time and money has gone into making sure the community is running the best software, best designs, and all the other bells and whistles. Care to buy us a beer? We'd really appreciate it!

    Beer Fund!

    Club Membership!