BOX1

P500 P500 windshield build

Bastardchild

Bastardchild

Well-Known Member
Nov 3, 2016
1,978
7,250
113
Orange Heights, fl
Ownership

  1. 500

  2. 1000-5
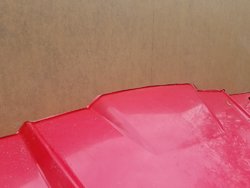
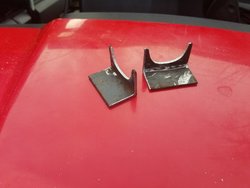
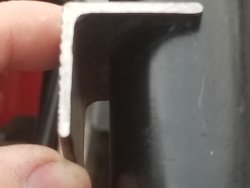
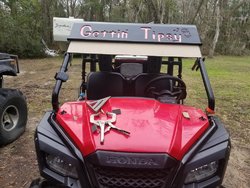
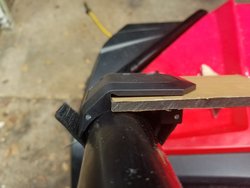
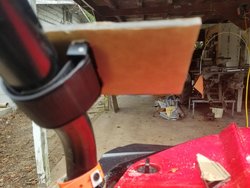
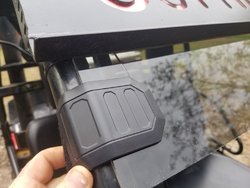
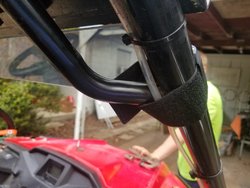
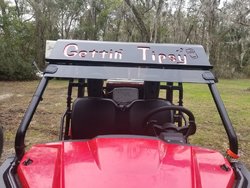
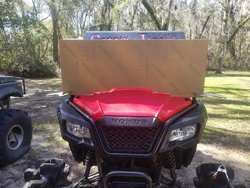
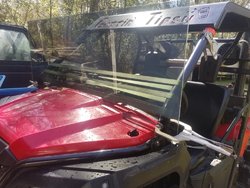
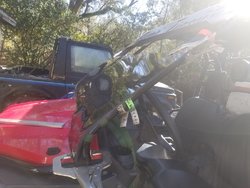
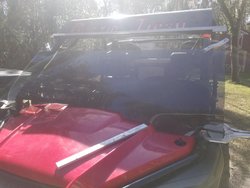
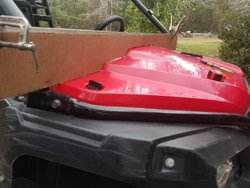
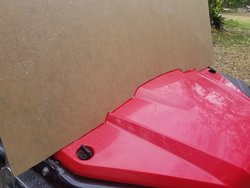
Ive been wanting to build a windshield for my P5 forever now, so last week i ordered a piece of tinted acrylic sheet. Its a 2' x 4' sheet thats 1/4" thick. It came in yesterday so i figured id start messing with it. I want it to go from my roof overhang down the front bars and be contoured to the hood. I traced the hood contour onto a long piece of cardboard and transfered the pattern to the acrylic. Cut it out with the cut off wheel pretty close to the lines i traced and then brought it down to the line with a flap wheel. I made some tabs out of angle iron and cut the contour of the rollbar into one side of the tab. I picture the tab holding the acrylic snug against the rollbar, maybe with some weather stripping or something between it to keep it from rattling. Finished product i want it to look like a mud truck windshield with the slot cut in it so you can see no matter how muddy the windshield gets. I may just have an upper windshield and a lower windshield with about a 3" or 4" gap between them instead of cutting slots in the big sheet. I plan on using my heat gun to bend the acrylic sheet towards the bottom where the front rollbars go down and bend right before the bolted connection by the hood. Anyway, im sure yall are tired of reading. Heres some pics.
20180127 152006 20180127 154703 20180127 154739 20180127 164951 20180127 165110
 
HUCK

HUCK

Well-Known Member
Lifetime Member
Jun 21, 2016
1,047
2,314
113
ARIZONA
Ownership

  1. 500

  2. Talon X
Very nice . How are you going to open your hood ?
 
Bastardchild

Bastardchild

Well-Known Member
Nov 3, 2016
1,978
7,250
113
Orange Heights, fl
Ownership

  1. 500

  2. 1000-5
Very nice . How are you going to open your hood ?
Was thinking of small hinges possibly at the top of the lower windshield, or drill through the acrylic sheet into the rollbar, and tap the holes in the rollbars and add a couple little threaded thumbwheels. Its like a bolt with plastic wingnuts at the top, kinda like on a gopro camera mount, you loosen the plastic thumbwheel, change angle of camera, then tighten thumbwheel back. Something along those lines. I actually bought 4 of those velcro strap windshield holder thingys from amazon, once i got them though i couldnt picture using them on the windshield.
 
  • Like
Reactions: RumpRocket
R

RumpRocket

Well-Known Member
Dec 23, 2017
189
295
63
USA
Ownership

  1. 500
Looking good.....keep us updated.
 
HUCK

HUCK

Well-Known Member
Lifetime Member
Jun 21, 2016
1,047
2,314
113
ARIZONA
Ownership

  1. 500

  2. Talon X
Was thinking of small hinges possibly at the top of the lower windshield, or drill through the acrylic sheet into the rollbar, and tap the holes in the rollbars and add a couple little threaded thumbwheels. Its like a bolt with plastic wingnuts at the top, kinda like on a gopro camera mount, you loosen the plastic thumbwheel, change angle of camera, then tighten thumbwheel back. Something along those lines. I actually bought 4 of those velcro strap windshield holder thingys from amazon, once i got them though i couldnt picture using them on the windshield.
Sounds great !
 
AlR

AlR

Well-Known Member
Nov 14, 2016
470
1,166
93
Nanaimo, British Columbia
Ownership

  1. 500
When I made my plexi windscreen I used a sheet metal break to put the bend at the bottom. I also bent an angle at the top to stiffen it up. I left a one foot gap at the top to see over when it gets too muddy. Came out nice and clean. I have never tried a heat gun and am not sure how that would work.
 
R

RumpRocket

Well-Known Member
Dec 23, 2017
189
295
63
USA
Ownership

  1. 500
When I made my plexi windscreen I used a sheet metal break to put the bend at the bottom. I also bent an angle at the top to stiffen it up. I left a one foot gap at the top to see over when it gets too muddy. Came out nice and clean. I have never tried a heat gun and am not sure how that would work.
Utube has a number of good videos on how to made DIY sheet metal brake
 
  • Like
Reactions: Bastardchild
Bastardchild

Bastardchild

Well-Known Member
Nov 3, 2016
1,978
7,250
113
Orange Heights, fl
Ownership

  1. 500

  2. 1000-5
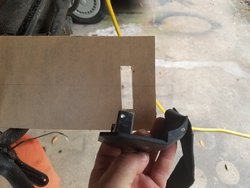
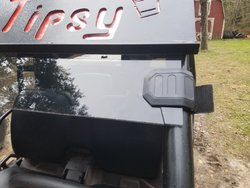
Well i made a couple of bone head moves today. Normally i think far enough ahead in a build project to minimize screw ups, but not today. If i would have went ahead and used the metal tabs i cut out, everything would be fine, but i decided to use the velcro strap things i ordered, which i dont like. I cut the top windshield to fit and then i knew i had to cut rectangle slots in the windshield for the strap things, so i decided to cut a practice slot in a piece of scrap, and then use that scrap piece as a template on the windshield. Well i cut the practice slot in the template and it worked like a charm. Transfered the slot from the template to the windshield no prob. Kept filing slot in windshield with a file until it felt 'right' when installing the strap buckle thing and 'pop'!! Dammit!! I said i screwed that side up and im gonna need a new upper piece of acrylic now. I also popped the other side 5 minutes later! F it! Lol I also didnt think about the passenger side 'oh s***' handle. Its right in the way of the strap going around. Lol. Oh well, i will order another piece somewhere down the road and use this one as a template to lay on top of the new piece and trace it out. I just wont use the strap things, ill use my metal tab things i made. If i dont screw up the bottom windshield i will end up with a 1/2 windshield like a lot of people run until i order the other piece to do the top piece. Well im too frustrated to continue today, i promised the wife i would strip a bunch of parts off of her P7-4 and box them up so i can bring them to the powdercoat shop in Gainesville tomorrow. Maybe that and a few frosty adult beverages will make me forget about my screw up. Heres some pics of what not to do lol! Yall be good!

20180128 112333 20180128 114656 20180128 114714 20180128 114721 20180128 122606 20180128 124511 20180128 124523 20180128 124529 20180128 125402
 
R

RumpRocket

Well-Known Member
Dec 23, 2017
189
295
63
USA
Ownership

  1. 500
You could repair the crack's by gluing a smaller piece over them on both sides, thus enforcing it, you'd have to recut the slots.
 
trigger

trigger

Old Ironsides
Vendor
Lifetime Member
Supporting Member
Feb 13, 2016
20,470
150,979
113
Bay City, Michigan
www.quickshieldutv.com
Ownership

  1. 500
Well i made a couple of bone head moves today. Normally i think far enough ahead in a build project to minimize screw ups, but not today. If i would have went ahead and used the metal tabs i cut out, everything would be fine, but i decided to use the velcro strap things i ordered, which i dont like. I cut the top windshield to fit and then i knew i had to cut rectangle slots in the windshield for the strap things, so i decided to cut a practice slot in a piece of scrap, and then use that scrap piece as a template on the windshield. Well i cut the practice slot in the template and it worked like a charm. Transfered the slot from the template to the windshield no prob. Kept filing slot in windshield with a file until it felt 'right' when installing the strap buckle thing and 'pop'!! Dammit!! I said i screwed that side up and im gonna need a new upper piece of acrylic now. I also popped the other side 5 minutes later! F it! Lol I also didnt think about the passenger side 'oh s***' handle. Its right in the way of the strap going around. Lol. Oh well, i will order another piece somewhere down the road and use this one as a template to lay on top of the new piece and trace it out. I just wont use the strap things, ill use my metal tab things i made. If i dont screw up the bottom windshield i will end up with a 1/2 windshield like a lot of people run until i order the other piece to do the top piece. Well im too frustrated to continue today, i promised the wife i would strip a bunch of parts off of her P7-4 and box them up so i can bring them to the powdercoat shop in Gainesville tomorrow. Maybe that and a few frosty adult beverages will make me forget about my screw up. Heres some pics of what not to do lol! Yall be good!

View attachment 63168 View attachment 63169 View attachment 63170 View attachment 63171 View attachment 63172 View attachment 63173 View attachment 63174 View attachment 63175 View attachment 63176

I can work a lot of different materials and even own a brake but I've never messed with plexi. Lol...after seeing your frustration, glad I just bought one. :D
 
Bastardchild

Bastardchild

Well-Known Member
Nov 3, 2016
1,978
7,250
113
Orange Heights, fl
Ownership

  1. 500

  2. 1000-5
I can work a lot of different materials and even own a brake but I've never messed with plexi. Lol...after seeing your frustration, glad I just bought one. :D
Haha yeah, i always do stuff the hard way. Why buy something already made for $250 when you can spend $100 in materials and $7,000.00 worth of your personal time?!! Lol I probably wont be messing with it for a while, tomorrow i get my portals!! Ill be putting them on this week and going down to buy tires friday hopefully!
 
iowaguy

iowaguy

Well-Known Member
Lifetime Member
Sep 22, 2014
624
1,424
93
Eastern Iowa
Ownership

  1. Other Brand
Well i made a couple of bone head moves today. Normally i think far enough ahead in a build project to minimize screw ups, but not today. If i would have went ahead and used the metal tabs i cut out, everything would be fine, but i decided to use the velcro strap things i ordered, which i dont like. I cut the top windshield to fit and then i knew i had to cut rectangle slots in the windshield for the strap things, so i decided to cut a practice slot in a piece of scrap, and then use that scrap piece as a template on the windshield. Well i cut the practice slot in the template and it worked like a charm. Transfered the slot from the template to the windshield no prob. Kept filing slot in windshield with a file until it felt 'right' when installing the strap buckle thing and 'pop'!! Dammit!! I said i screwed that side up and im gonna need a new upper piece of acrylic now. I also popped the other side 5 minutes later! F it! Lol I also didnt think about the passenger side 'oh s***' handle. Its right in the way of the strap going around. Lol. Oh well, i will order another piece somewhere down the road and use this one as a template to lay on top of the new piece and trace it out. I just wont use the strap things, ill use my metal tab things i made. If i dont screw up the bottom windshield i will end up with a 1/2 windshield like a lot of people run until i order the other piece to do the top piece. Well im too frustrated to continue today, i promised the wife i would strip a bunch of parts off of her P7-4 and box them up so i can bring them to the powdercoat shop in Gainesville tomorrow. Maybe that and a few frosty adult beverages will make me forget about my screw up. Heres some pics of what not to do lol! Yall be good!

View attachment 63168 View attachment 63169 View attachment 63170 View attachment 63171 View attachment 63172 View attachment 63173 View attachment 63174 View attachment 63175 View attachment 63176
You need to use polycarbonate not Plexiglas, It cost more but it won't break or crack ,I cut mine with a jigsaw and used 4 Honda quick clamps to hold it on.
 
Bastardchild

Bastardchild

Well-Known Member
Nov 3, 2016
1,978
7,250
113
Orange Heights, fl
Ownership

  1. 500

  2. 1000-5
You need to use polycarbonate not Plexiglas, It cost more but it won't break or crack ,I cut mine with a jigsaw and used 4 Honda quick clamps to hold it on.
I bought tinted acrylic. I dont know if thats good or bad. I was thinking it was a step up from plexiglass and that it was more scratch resistant than plexi, but im not an expert on the subject.
 
Bastardchild

Bastardchild

Well-Known Member
Nov 3, 2016
1,978
7,250
113
Orange Heights, fl
Ownership

  1. 500

  2. 1000-5
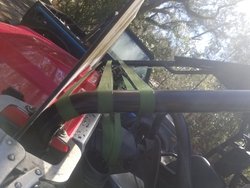
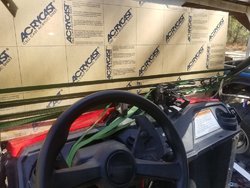
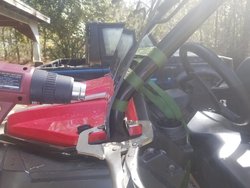
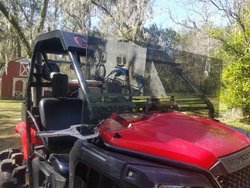
So i messed with the windshield a little more today. Its kinda going as planned. I took the protective film off of the acrylic and clamped it to the front rollbars. Ive got tie down straps going around the rollbars at the bend points so when the acrylic sheet heats up and starts bending over it will lean against the straps and not sag in the middle and go between the bars. Im not sure if it would, its just what i came up with. Its very time consuming doing it with a heat gun and the bottom of the acrylic that started out conformed to the ridges in the hood needs to be tweaked. Im going to let it stay clamped to the rollbars until this coming weekend and then i think im gonna switch up strategies. I think im gonna get a scrap piece of 6" pipe from work and lay the curve of the acrylic over the pipe and heat it up and let it take the shape of the pipe then move it to the rollcage and let it cool. I figure a 6" pipe radious would be pretty close to the bend it goes around at the bottom of the rollcage. Anyway, heres some pics.
20180205 131004 20180205 131014 20180205 131020 20180205 131503 20180205 131534 20180205 134454 20180205 145715 20180205 145719
 
BOX2
box3

About us

  • Our community has been around for many years and pride ourselves on offering unbiased, critical discussion among people of all different backgrounds. We are working every day to make sure our community is one of the best.

User Menu

Buy us a beer!

  • Lots of time and money has gone into making sure the community is running the best software, best designs, and all the other bells and whistles. Care to buy us a beer? We'd really appreciate it!

    Beer Fund!

    Club Membership!