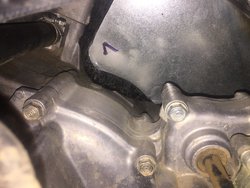
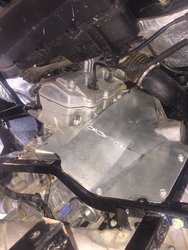
P1000 Rear Seat Heatshield

Rambo

Rambo

Well-Known Member
Supporting Member
Dec 29, 2016
339
822
93
Southern Indiana
Ownership

  1. 1000-5
I added adhesive backed heat sheild to the no step panel. That was the one I noticed to be warm

View attachment 54087
Some diamond plate aluminum sheet metal lined with the heat and sound absorbing dynamat, then line the edges and open spot with aluminum tape. Just happened to be what ever was laying around
Thanks for the response! I was going to just add the peel and stick shielding, but I think in this case I'll do both.
 
Smitty335

Smitty335

Well-Known Member
Lifetime Member
Supporting Member
Oct 3, 2016
35,445
208,731
113
NWA Arkansas
Ownership

  1. 1000-3

  2. 1000-5
I used dynamat extreme I think, real sticky stuff then sealed edges with actual silver duct tape. I rode pretty hard and they showed no sign of melting or falling off, with plastic as always devil is in the prep, power wash clean with rubbing alchohol and apply. Wear gloves when you place the stuff or it will look like a piranha made love to you hands that thin foil will cut you easy
So, did I understand that you used dynamite xtream and dynaliner? What thickness on the dynaliner? Did you put the dynamite xtream on the bottom that is exposed to the elements?
 
K

Karholler

New Member
Mar 26, 2017
2
0
1
Nabb In
Ownership

  1. 1000-3
Received letter in mail from Honda. They are offering heat shields at dealership
 
Smitty335

Smitty335

Well-Known Member
Lifetime Member
Supporting Member
Oct 3, 2016
35,445
208,731
113
NWA Arkansas
Ownership

  1. 1000-3

  2. 1000-5
Received letter in mail from Honda. They are offering heat shields at dealership
Uh huh, and they work, call your dealership, they can't order one until a customer requests one, go figure? And while your at it, request clutch mod # 3 Sept/17
 
ToddACimer

ToddACimer

Pioneer 1005-2
Lifetime Member
Oct 7, 2016
3,746
15,859
113
Oshkosh, Wi
Ownership

  1. 1000-5

  2. Talon X
I wrapped my rear panels today and I like the result. I let the machine idle for 20 minutes and felt no change in temp on the panels I added the sheild. It will be a few weeks before I ride again.

Stock under foot panel in rear seat
IMG 20170917 152216591 HDR

Heat sheild adhered
IMG 20170917 162601898 HDR


No step panel in place
IMG 20170917 162700618 HDR
 
  • Like
Reactions: Tigermark
Smitty335

Smitty335

Well-Known Member
Lifetime Member
Supporting Member
Oct 3, 2016
35,445
208,731
113
NWA Arkansas
Ownership

  1. 1000-3

  2. 1000-5
Kilo427

Kilo427

Not about the destination Its about the journey
Lifetime Member
Dec 10, 2015
1,543
6,440
113
Dynamat extremed to top side bare metal to bottom. I also placed dynamat extreme to all the plastic bottom parts some what like todd above has pictured.
 
  • Like
Reactions: Smitty335
Smitty335

Smitty335

Well-Known Member
Lifetime Member
Supporting Member
Oct 3, 2016
35,445
208,731
113
NWA Arkansas
Ownership

  1. 1000-3

  2. 1000-5
Dynamat extremed to top side bare metal to bottom. I also placed dynamat extreme to all the plastic bottom parts some what like todd above has pictured.
No dynaliner on top side and dyanamat on bottom?
 
advertisement
Kilo427

Kilo427

Not about the destination Its about the journey
Lifetime Member
Dec 10, 2015
1,543
6,440
113
dynamat on top of the metal piece, with bare metal under as it sits very close to exhaust. Then dynamat to the bottom of the plastic pieces.
 
Smitty335

Smitty335

Well-Known Member
Lifetime Member
Supporting Member
Oct 3, 2016
35,445
208,731
113
NWA Arkansas
Ownership

  1. 1000-3

  2. 1000-5
dynamat on top of the metal piece, with bare metal under as it sits very close to exhaust. Then dynamat to the bottom of the plastic pieces.
What thickness did you use on the Daynamat? Sorry I should have asked that earlier.
 
Kilo427

Kilo427

Not about the destination Its about the journey
Lifetime Member
Dec 10, 2015
1,543
6,440
113
not sure dynamat extreme whatever thickness that is
 
CMH

CMH

Member
May 17, 2017
25
42
13
Montana
Ownership

  1. 1000-5
Uh huh, and they work, call your dealership, they can't order one until a customer requests one, go figure? And while your at it, request clutch mod # 3 Sept/17

Smitty - can you elaborate on whether these are for front seat, back seat, or both? I haven't been on for a bit, but haven't seen anything on the #3 clutch mod either. Can you enlighten me a little?
 
  • Like
Reactions: dotman1
Smitty335

Smitty335

Well-Known Member
Lifetime Member
Supporting Member
Oct 3, 2016
35,445
208,731
113
NWA Arkansas
Ownership

  1. 1000-3

  2. 1000-5
Smitty - can you elaborate on whether these are for front seat, back seat, or both? I haven't been on for a bit, but haven't seen anything on the #3 clutch mod either. Can you enlighten me a little?
For the front seat, but they attached heat deflectors on the back of the front seat that seems to take some of the heat away from the back. It still has heat coming out around the top of the air box, but way less than before. Hope this helps.
 
Poppaj

Poppaj

Member
Apr 29, 2017
16
40
13
SE Oklahoma
Ownership

  1. 1000-5
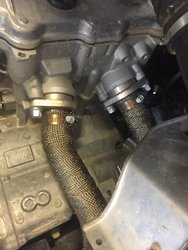
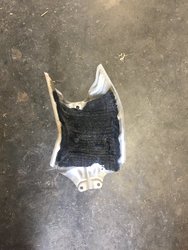
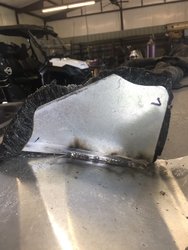
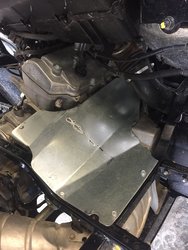
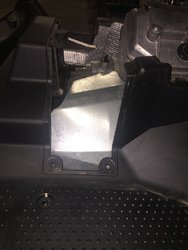
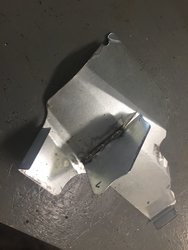
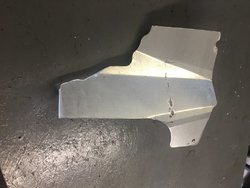
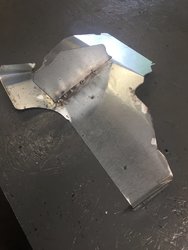
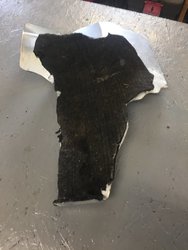
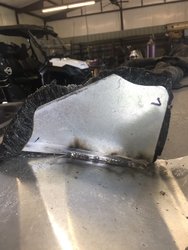
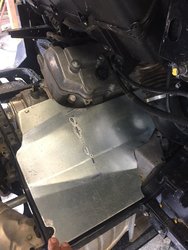
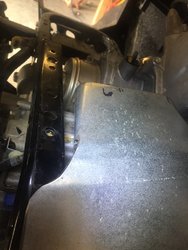
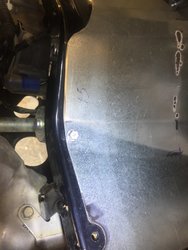
Got the heatshield, the dynamat, installed a 6" fan under the seat. Still too hot. Burned my grandkid's foot. Let my wife ride in back, Man, that was not a good day! Decided that this was just going to be a winter only buggy. Today, I wrapped the pipes, and built a shield. IMG 0585 IMG 0586 IMG 0591 IMG 0595 IMG 0596 IMG 0597 IMG 0600

I took the existing shields off and glued a piece of welding blanket to the underneath side. Then I noticed that there was enough room for another shield under there, soooo,

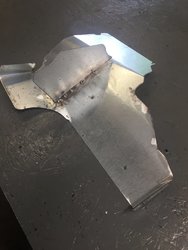
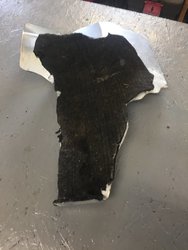
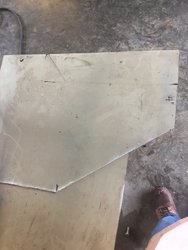
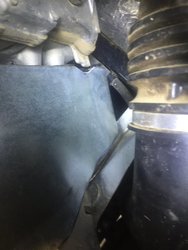
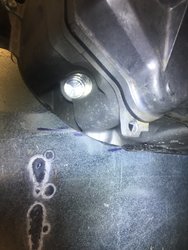
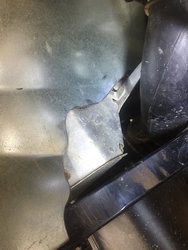
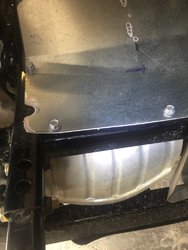
I started with a 15" x 20" piece of 18 ga. galvanized plate. Started trimming and breaking until I got it to fit. Once I got it fit in place, I noticed that the fan would be blowing the heat right onto the solenoid (shifter?). Made a mark and tacked a piece between the rear header and solenoid. Used high heat glue to glue a piece of a welding blanket (looks like wool, don't know for sure what the material is, but i've had it wrapped around stuff a lot hotter than this will ever get.)

Anyone wants to try this for your buggy, I have attached the photos.

The picture showing the tacked on piece also shows the blanket sticking up past the plate. I left it so it would rest on the engine case and seal the air moving to the solenoid.
 
  • Like
Reactions: Landman and Rambo
Smitty335

Smitty335

Well-Known Member
Lifetime Member
Supporting Member
Oct 3, 2016
35,445
208,731
113
NWA Arkansas
Ownership

  1. 1000-3

  2. 1000-5
Got the heatshield, the dynamat, installed a 6" fan under the seat. Still too hot. Burned my grandkid's foot. Let my wife ride in back, Man, that was not a good day! Decided that this was just going to be a winter only buggy. Today, I wrapped the pipes, and built a shield. View attachment 84368 View attachment 84372 View attachment 84373 View attachment 84374 View attachment 84375 View attachment 84376 View attachment 84377

I took the existing shields off and glued a piece of welding blanket to the underneath side. Then I noticed that there was enough room for another shield under there, soooo,

I started with a 15" x 20" piece of 18 ga. galvanized plate. Started trimming and breaking until I got it to fit. Once I got it fit in place, I noticed that the fan would be blowing the heat right onto the solenoid (shifter?). Made a mark and tacked a piece between the rear header and solenoid. Used high heat glue to glue a piece of a welding blanket (looks like wool, don't know for sure what the material is, but i've had it wrapped around stuff a lot hotter than this will ever get.)

Anyone wants to try this for your buggy, I have attached the photos.

The picture showing the tacked on piece also shows the blanket sticking up past the plate. I left it so it would rest on the engine case and seal the air moving to the solenoid.
More pictures would be great! Thanks!
 
Poppaj

Poppaj

Member
Apr 29, 2017
16
40
13
SE Oklahoma
Ownership

  1. 1000-5
IMG 0590 IMG 0592 IMG 0593 IMG 0591 IMG 0595 IMG 0596 IMG 0594 IMG 0601 IMG 0603 IMG 0604 IMG 0606 IMG 0607 IMG 0608 IMG 0609 IMG 0615

started with a 15 x 20 piece of plate and cut a 7 x 10 triangle out of the lower left corner.. I used that piece to weld underneath. I have a break, but a sturdy table and some angle iron will let you do the same thing. Put everything back together this afternoon, looks like it may work for the rear passenger floor. Wondering if the 3's have the same degree of heat problem as the 5's? Haven't seen one, but you might could make this much bigger on a 3 and really knock down some of that heat. Will let you know how this works as soon as I try it out, maybe this weekend.
 
  • Like
Reactions: JTW
advertisement

About us

  • Our community has been around for many years and pride ourselves on offering unbiased, critical discussion among people of all different backgrounds. We are working every day to make sure our community is one of the best.

User Menu

Buy us a beer!

  • Lots of time and money has gone into making sure the community is running the best software, best designs, and all the other bells and whistles. Care to buy us a beer? We'd really appreciate it!

    Beer Fund!

    Club Membership!