Just finished up last night. Suffice it to say, the install (sans leak) was no walk in the park. I expected it to be a lot of work, and it didn't disappoint.
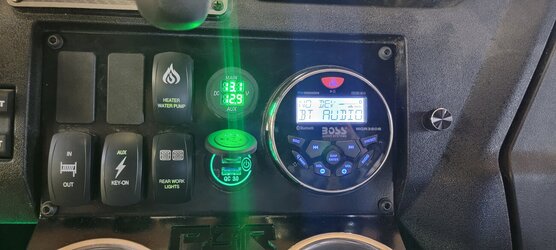
I couldn't install the two vents that would normally be located in the warning plate area, as I have a PBR Products dash plate with cut outs for switches, voltmeter and radio. My choices were to cap it off and not use it or try to run elsewhere. The challenge with relocating the vents is that there is very little room left to run duct work, no place to cut the hole(s) on the dash and limited space in front of the heater to be able to do it. I ended up cutting a 2" hole in the area wherr the factory 12v receptacle was (the heater installs right behind there, so you have to remove it and put a rubber cap in it, which is provided with the heater kit). I had about 2" to work in to connect the duct, zip tie it and run it thru the hole I cut out. Not easy. The rest of the duct work installed as it should, but BOY is it a tight fit routing some of it! The instructions don't detail exactly HOW to route it, so that was a challenge.
Coolant line splicing for the Y connectors was OK, other than very little room to clamp, cut and install them, most significantly the one at the oil cooler bypass location. I bought the optional clamps (to pinch coolant lines so you don't have to drain the system), but I ended up using some needle nose Vice-Grips at that tight location.
Coupers Products actually sold me a new option they are going to replace the Max Stat option with: an electric water pump (it's from a Toyota Prius). It circulates coolant (especially at idle) through the heater even when the engine thermostat is closed. It installs under the drivers seat (mounting plate mounts to the two aluminum coolant lines that go to the front of the vehicle). I had to drop the front OEM skid plate (soon to be replaced with Trail Armor) in order to tighten the nuts & bolts and for that. Otherwise, it was OK.
Fitting the heater up under the dash was a challenge. Remove (optionally relocate) the 12v outlet. The heater slides up in that otherwise unused space, but it's a tight fit. For newer model year Pioneers, you have to drill the "alternate mounting holes", as the hard plastic engine air intake doesn't allow the standard mount holes to be drilled. This results in the unit not being square, but canted about 5 degrees. It all worked out, you just have to decide which mount holes to use before you drill then (I did).
The fan switch and (optional) flow control valve were difficult to install, as you had to get your hands in yet another tight location behind the dash. The flow control valve is an old school cable driven valve, which kinds limits where you install it (the covered cable isn't terribly flexible). Again, as expected, but a bit difficult nonetheless.
Having to remove the front clip to do the install wasn't too bad. As many times as I R&R'd it due to the leaking heater core, I can do it in my sleep. What made it more of a challenge was that I already installed a second battery, relay, isolator, fuse block and winch. Each time I removed or replaced the clip, I had to contend with all that. Advice: Install any in-dash heater BEFORE doing the dual battery setup.
I made the install even more challenging: The dash vents assume the standard dash. I previously added the Honda OEM under dash storage. I had to cut out holes in THAT storage panel for three 2" vents and the 1"x4" plate that the fan switch knob and flow control valve knob are mounted to.
Others have said THIS heater was about a 12 beer install. Without the flow control valve, without having to reroute one of the three ducts, without having to contend with a leaking heater core that required me to disassemble and reassemble the front end twice (and remove and replace all the plastic in the cab floor and seat front looking for a leak that wasn't there), and without having to undo and redo my aforementioned dual battery/relay/isolator/fuse block/winch wiring, I'd say that it was an easy 12-15 hour job.


