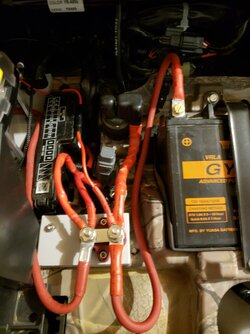
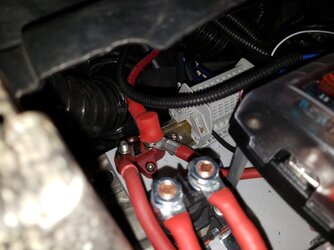
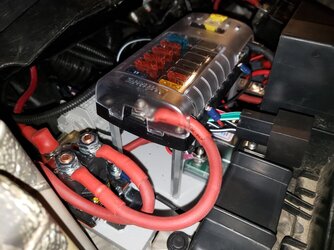
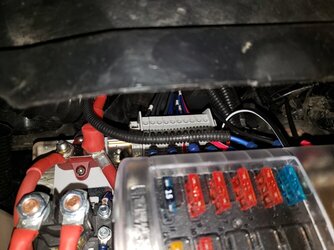
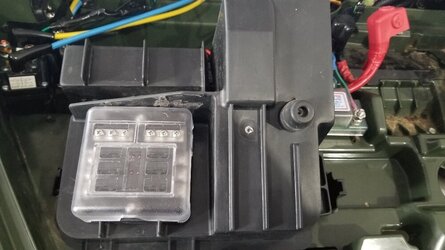
Correct, The lead goes to a small buss that terminates wires from the battery under the seat, a wire from the isolator and a wire from the stinger. The separate busses are a convenience, not a necessity. They are nice
IF you have the space. Fortunately I did.
I added some items that made my installation easier for me, and I found the space to do it by putting the second battery under the driver seat and using the second battery box space under the hood for a wiring panel. Definite not required, but I thought it made the installation easier in the long run. My installation had a few extra details that complicated the installation. I also wanted to make the wiring easily disconnected if I ever had to remove the front clip. My second battery is a full size 775CCA AGM battery mounted under the drivers seat.
View attachment 254590
Battery tray under driver seat
View attachment 254599
775 CCA AGM battery for aux, adding winch(es) next!
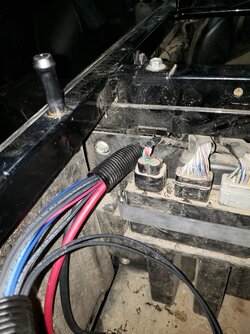
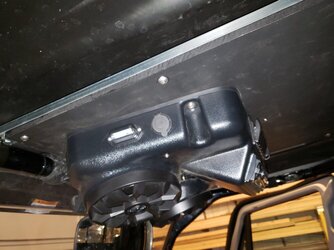
I ran a 1” flex conduit from under the hood to that location, and continued up the ROPS frame to an overhead console that I have my switch bank and stereo mounted in.
View attachment 254600
1" conduit from under driver seat to overhead console
View attachment 254601View attachment 254603
Overhead console with switch bank, stereo, dome lights and aux power outlets
View attachment 254664
1" conduit routed from battery location to under the hood
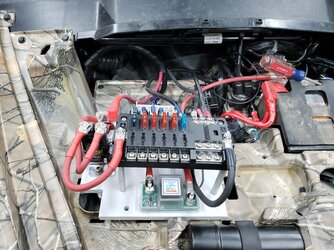
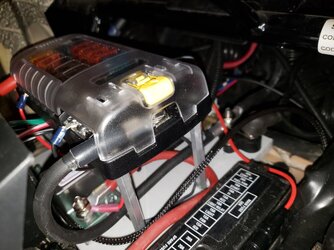
I added the two busses as a convenient way to terminate the #6 AWG that I used for the high amperage cables. The terminal block provides easy connection to the overhead wiring console. I ran a few extra conductors for future additions
View attachment 254588
I made a termination panel that fits in the second battery bay tightly and is secured in place with two 1/4-20 threaded rods to the bottom of the second battery box enclosure. The control wiring from the overhead console is terminated on the terminal block at the back of the panel
I didnt like the multiple cables crimped together on the positive battery terminal, and adding another cable from the battery to isolator made it difficult to terminate all of them on the battery, so I separated them and terminated them on a separate buss.
View attachment 254594
I like how it turned out and there is unused wiring in place that allows for future changes and additions.
View attachment 254584 View attachment 254587 View attachment 254593 View attachment 254595 View attachment 254596 View attachment 254597 View attachment 254598 View attachment 254602


