P1000m3 Bilge blower finally

D

Dasmoeturhead

Guest
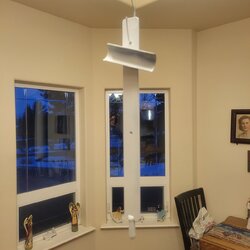
After 4.5 years of procrastination, I finally installed the blower. It really does help. Don't put this off like I did. Thanks to all the folks who have done this, and provided info on this install. Put a new 6 gang switch plate in the dash as well.
 
D

Dasmoeturhead

Guest
I need photos.
As requested,
0627201519c HDR
0627201519a HDR
0627201519 HDR
 
Kisssofdeath

Kisssofdeath

Active Member
Jun 7, 2020
55
128
33
Greer, SC
Ownership

  1. 1000-3
If done properly, the heat shield works pretty good. The 1st one I made didn't work that great. This time I pushed the material up under the seat back, and this works good.
How much was the heat shield?
 
  • Like
Reactions: Lady01
L

LarryAmboy

Well-Known Member
May 14, 2017
904
2,010
93
Castalian Springs, Tennessee
Ownership

  1. 1000-5
How much was the heat shield?


Sent from my iPad using Tapatalk
 
  • Like
Reactions: Kisssofdeath
BWAF

BWAF

I get paid to pass gas
Lifetime Member
Jan 24, 2018
8,864
42,478
113
Carthage MO
Ownership

  1. 1000-5
Thanks for the link.
 
D

Dasmoeturhead

Guest
How much was the heat shield?
I just went to Wallyworld in the auto dept, and found the best windshield sun screen, and used that. Cut to fit. I kinda used the bottom,of the seat for a template, and made sure I had extra so I could custom fit it. It might have cost $15.00. This is the 2nd one I made. This time I took the seat belts off so when I put it back together I would just have a small cut out where you re attach the belts to the mounting bolt. This for me worked easy, and I don't have a slit to large. I also pushed the shield up and between the seat back and plastic . working pretty good.
 
advertisement
TexasJackKin

TexasJackKin

Well-Known Member
Nov 22, 2020
401
3,314
93
Dayton, NV
Ownership

  1. 1000-5
everyone says Bilge Blower, but I don't recall any part numbers or sources....... Any help?

 
  • Like
Reactions: Lady01
P1K5Dave

P1K5Dave

Well-Known Member
Lifetime Member
Club Contributor
Jul 11, 2020
2,260
8,463
113
Petoskey, MI
Ownership

  1. 1000-5
I might do one of these as a down the road project. Here in MI, the heat isn't generally unbearable, but it might be nice to add a litte heat removal in the Summer.

But the idea of making it reversible when it's cold makes it a real consideration.
 
  • Like
Reactions: Lady01 and BigOL3
Amre2me2

Amre2me2

Well-Known Member
Aug 11, 2016
381
1,423
93
Colorado
Ownership

  1. 1000-3
I just went to Wallyworld in the auto dept, and found the best windshield sun screen, and used that. Cut to fit. I kinda used the bottom,of the seat for a template, and made sure I had extra so I could custom fit it. It might have cost $15.00. This is the 2nd one I made. This time I took the seat belts off so when I put it back together I would just have a small cut out where you re attach the belts to the mounting bolt. This for me worked easy, and I don't have a slit to large. I also pushed the shield up and between the seat back and plastic . working pretty good.
No need to remove seatbelts. Just make a slit and slide the belt through it.
 
  • Like
Reactions: Lady01
bumperm

bumperm

Well-Known Member
May 7, 2021
1,908
6,791
113
Gardnerville, NV
Ownership

  1. 1000-5
I might do one of these as a down the road project. Here in MI, the heat isn't generally unbearable, but it might be nice to add a litte heat removal in the Summer.

But the idea of making it reversible when it's cold makes it a real consideration.

This may end up a little frustrating. Most high efficiency fans and blowers use curved blades, like an airfoil. When you run them backwards, efficiency plummets, so the CFM is in the toilet. Maybe not completely worthless as a reverse blower, but not really very good.

I'm doing my first service, so while it's apart, I'm also installing a blower and heat shield. I'll post more pictures when it's installed, but the fan mount follows the format of the one Dasmoeturhead posted, . . . with a few changes. I prefer to not use a U-bolt as it would tend to dent the thin lateral tubing. Instead, my mounting bracket has a round channel (half a scrap of 3/4 tubing, welded to a 1" X 1/8" thick bar. The half round tube section will allow the bracket assembly to be clamped to the lateral frame member using two common SS hose clamps (pictures will follow when it's assembled). The other end of the bar has a steel pin welded to the end. This pin will be captured by a bit of tubing stuck into the round "cut out" between the two black plastic air intake resonator chambers. The 3/4" half round tube is welded to the flat stock bar with about 1/4 gap at the trailing edge in order to angle the bar, and thus the blower, downward by about 10 degrees. This points the blower more directly at the header pipes than would occur with blower level.

Here's the mounting bracket with paint drying in the house (too cold in the shop!). More pictures later, when it's installed.

20211210 170308
 
bumperm

bumperm

Well-Known Member
May 7, 2021
1,908
6,791
113
Gardnerville, NV
Ownership

  1. 1000-5
Here it is installed. Goes in and removes easily, just loosen and slide off two hose clamps. I did line the half tube part with some very thin sheet rubber I had (not necessary, but nice!). When the hose clamps are snugged, the blower and mount are rigid, no noticeable flexure at all.

There's a good amount of space at the inlet side, so it's not obstructed. However, what little I know about fluid dynamics (really not a lot) suggests there may be some gain in CFM to be had by removing the hose size reducer from the inlet side. as the fan diameter is larger than both inlet and outlet. On the outlet side, that makes sense, as it speeds up the airflow as it compresses the air. On the inlet side it's less clear the reduced area helps anything, and more so given that I'll never run the fan in reverse or duct the inlet anywhere. I think the inlet area reduction presents a more turbulent flow to the fan blades. I know from aircraft props that what the prop or fan wants to see, for optimal performance, is clean laminar to the extent possible.

Any fluid dynamics engineers, or others here, who can weigh in?

Edit to add: WARNING!! Do not cut off the "intake" portion of the housing as questioned above! This will reduce output by about 14%. Leave it as is.

20211210 212543
 
Last edited:
bumperm

bumperm

Well-Known Member
May 7, 2021
1,908
6,791
113
Gardnerville, NV
Ownership

  1. 1000-5
View attachment 308409
View attachment 308414

A couple year's ago..

I've since added spacers to lower it about 4" and added metal dryer hose to kick hot air below headers. Helped.
Made my own under heat shield out of heat - sound deadening material and cut this visor on top of Honda's factory heat fix. Need to do the back of the seat.
Didn't use my thermal dynamics training, just what others have tried in the Pioneer past.
Nice & clean!

Wondering if there's any gain to be had by putting the new reflective heat barrier under the factory rubber sheet as opposed to on top. With it under, would the reflective material do a better job of reflecting and blocking radiant heat?
 
  • Like
Reactions: Shelly and Lady01
bumperm

bumperm

Well-Known Member
May 7, 2021
1,908
6,791
113
Gardnerville, NV
Ownership

  1. 1000-5
Heat shield / sound insulation is under Honda's rubber. It makes little measurable difference above or below, as I've moved it around.
I'm not disputing what you're saying . . . just wondering if you took measurements both ways to quantify any difference. Otherwise there are a number of factors, like driving conditions and outside air temperature that could factor in. My butt's sensitive, but not all that precise!

As to the question I posed a couple of posts back about taking off the intake restriction on the bilge blower:

Before, stock condition, powered by a 13.3 volt lithium battery, current draw is 3.8 amps. Both intake and exhaust in free air (no restrictions) peak output flow of 36 mph measured at the opening in several positions (center to edge) and as far as 6" away.

After cutting off intake restriction, measured peak flow is 30 mph. In picture below, about the only advantage of cutting off the intake would be less intake restriction. Conclusion, on this particular bilge blower, cutting off the intake is not all that good an idea! I've had bigger failures, and way bigger successes (!!!), so I won't sweat this one. :)

The new blower bracket is quick and easy to remove, but in any case doesn't block the sub-trans fill opening.

20211213 153122
 
advertisement

About us

  • Our community has been around for many years and pride ourselves on offering unbiased, critical discussion among people of all different backgrounds. We are working every day to make sure our community is one of the best.

User Menu

Buy us a beer!

  • Lots of time and money has gone into making sure the community is running the best software, best designs, and all the other bells and whistles. Care to buy us a beer? We'd really appreciate it!

    Beer Fund!

    Club Membership!