View attachment 2829
Tools needed:
- Flat Head Screw Driver or Fender Clip Removal Tool to remove the clips
- Phillips Screw Driver for the Screws
- 17mm Ratchet for Oil Drain Plug
- 8mm Ratchet for Oil Filter Cover
- Torque wrench
- Small end funnel
Supplies needed:
- Filter Part Number - 15412-HM5-A10 - Buy Here
- Oil Reqired - 4 Liters (3.2 required) - Pro Honda GN4 4-Stroke Motor Oil Buy Here
- A Few Rags
- Oil Catch Pan
Optional Parts
- Large Cover O-RING (54X2.4), Part#91302-KF0-003
- Small Cover O-RING (11X1.9), Part#91303-HA0-004
- SPRING, Part#15414-KF0-000
- BOLT, FLANGE (6X18), Part#96001-06018-00
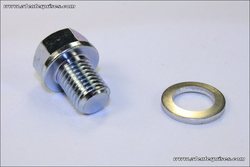
- DRAIN PLUG BOLT (12MM), Part# 92800-12000
- DRAIN PLUG WASHER (12MM), Part# 94109-12000
- Fender Clips, Part# 90653-HC4-900
Prepare the work area and the SxS:
Locate a safe and level spot to park the SxS.
Operate the SxS long enough to engage the 4x4.
Drive to selected spot.
Engage the park brake. Because it is in 4x4 the front wheels will break.
Seat Removal:
Bottom Seat: Pull the rear bottom of the seat upward then slide slightly backward and set to the side.
Back Cushion: Pull the bottom of the cushion outward the push up and set to the side
View attachment 2811
Seats removed. There are hooks on the outside part of the seats and grommets on the inside.
View attachment 2813
Cab without Seats.
View attachment 2814
Remove Under Seat Panels:
Remove the Rear Center Panel
View attachment 2818
Remove the Right Seat Bottom Cover from the passenger side of the cab..
View attachment 2815
The clips and screws must be removed. There should be 13 clips and 3 screws that need to be removed.
View attachment 2812
Not a bad idea to buy a fender clip removal tool to remove those stubborn clips. This tool can be bought at most auto part stores. You may also want to purchase some additional clips. They can be purchased at your local dealer or online here:
Honda Fender Clips
Once the clips and screws are removed you can flip up the tray under the passenger seat to access the filter cover and filter. Be very careful with the ECU, it should flip up with the tray.
View attachment 2816
Draining the OIL:
Jack the rear of the SXS500M2 to gain easy access to the oil drain plug.
Open the oil fill dip stick to help with the drain.
Place your oil drain pan under the plug and remove the plug with a 17mm ratchet. Allow oil to drain. Replace the washer drain plug and sealing washer. Torque to plug to 25N.m (2.5 kgf, 18 lbf.ft)
View attachment 2819
Replacing the Filter:
Under the passenger seat place an old rag under the cover, oil will leak. Remove the three bolts on the oil filter cover.
View attachment 2820
Remove the filter and dispose of properly. Replace with new filter in the correct order. Wet the O-rings with a light coating of oil.
View attachment 2817
Re-install filter cover and torque the Oil Filter Cover Bolts to 9 lbf.ft (12N.m , 1.2 kgf.m)
Replacing the OIL:
Replacing the Oil with the recommended oil
View attachment 2831
After Draining/Filter Change =
3.2 Liters
Remove the jack so the SXS500M2 is level.
Place a funnel in the oil fill/dipstick hole under the drivers seat and refill with 3.2 Liters of the recommended oil as shown above.
View attachment 2830
Checking the Oil
Park SxS on level surface, Start and run the engine at idle for 3-5 minuets. Stop the engine and allow to sit for 2-3 minuets.
Check the oil level is filled properly using the dip stick.
View attachment 2832
Remove the dip stick and wipe clean. Insert the dip stick into the hole
without screwing it in. Remove after 1/2 second.
Check level by looking for oil between the UPPER and LOWER mark as shown below.
View attachment 2827
If low, re-do the check. If still low, add oil until reading is between the UPPER and LOWER marks.
DO NOT OVER FILL!
Install dip stick.
Be sure to check back to insure there is no leaks.
The last step Maintenance Minder Indicator
The Maintenance Minder Indicator will appear in the main display when you have reached a maintenance period suggested by the Honda maintenance schedule.
The wrench will appear in the display at the following periods:
- Initial Maintenance – 100 miles
- Regular Maintenance Interval 1 – 600 miles
- Regular Maintenance Interval 2 – 600 miles after interval 1 is displayed
View the
full Maintenance Schedule HERE
View attachment 2828
Resetting it
To shut the Maintenance Minder Indicator Off
Place the ignition switch in the off position. Hold the mode button on the display down and move the ignition switch to the on position. Remain holding the mode button until the wrench starts to flash (2 seconds) and the Maintenance Minder will disappear.
Now you are all set and ready to hit the trail.
Good luck and be safe.
*If you see a error please let me know.
Props to Paul for helping put this together.
THANK YOU PAUL
Thanks.


