D
Deleted member 3748
Guest
I finally broke down and ordered the Moose Utility 2" receiver hitch to replace the 1.25" hitch. Well, it doesn't really replace it because the 1.25" hitch remains installed. I'll probably put a D-ring just in case I need to tow someone home.
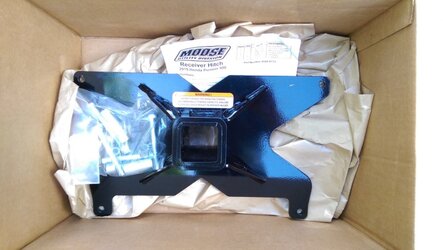
This is what comes in the box. 2" receiver hitch, all necessary hardware and instructions.
No modifications need to be done to install the hitch. You use the lower A-arm bolts and the existing holes in the frame.
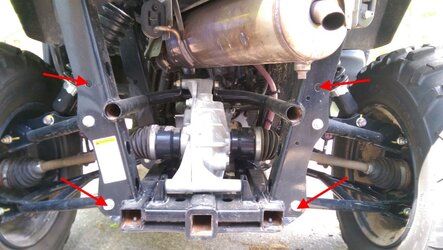
Jack up the rear of the Pioneer until the rear wheels are just off the ground. Remove the nuts from the lower A-arm bolts using a 14mm socket and wrench.
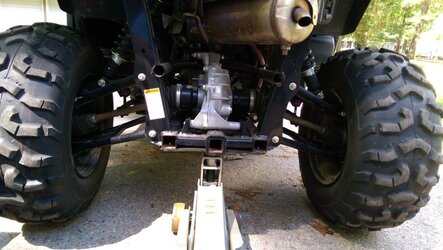
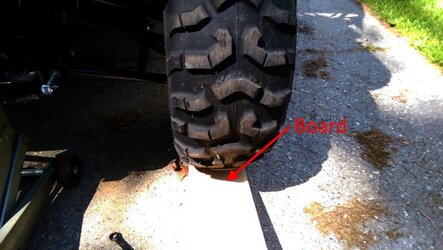
To remove the lower A-arm bolts, you need to relieve the pressure from the rear wheels. You can have someone help you with this or you can wedge a board under one tire and lift until you can easily slide the bolt out.
To avoid having to realign the A-arm after the bolt comes out, I slid another bolt in from the other side. Then I inserted the longer bolt that came with the kit, pushing out the temporary bolt.
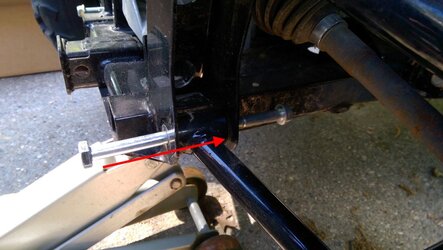
Install the included spacers on the bottom.
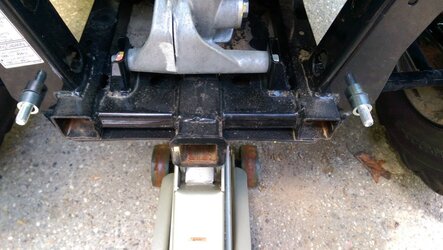
The upper holes get the same spacer, plus an additional long spacer in the pocket of the frame.
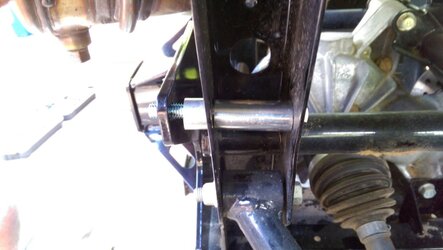
Align the hitch if needed and tighten all of the bolts. The lower A-arm nuts use the same 14mm socket, however, the bolts have a 17mm head. The uppers use a 9/16" socket and wrench. Lower your Pioneer and you're done.
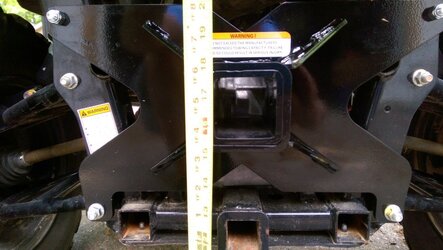
The new receiver hitch is almost as high as my F150 receiver hitch.
This is what comes in the box. 2" receiver hitch, all necessary hardware and instructions.

No modifications need to be done to install the hitch. You use the lower A-arm bolts and the existing holes in the frame.

Jack up the rear of the Pioneer until the rear wheels are just off the ground. Remove the nuts from the lower A-arm bolts using a 14mm socket and wrench.

To remove the lower A-arm bolts, you need to relieve the pressure from the rear wheels. You can have someone help you with this or you can wedge a board under one tire and lift until you can easily slide the bolt out.

To avoid having to realign the A-arm after the bolt comes out, I slid another bolt in from the other side. Then I inserted the longer bolt that came with the kit, pushing out the temporary bolt.

Install the included spacers on the bottom.

The upper holes get the same spacer, plus an additional long spacer in the pocket of the frame.

Align the hitch if needed and tighten all of the bolts. The lower A-arm nuts use the same 14mm socket, however, the bolts have a 17mm head. The uppers use a 9/16" socket and wrench. Lower your Pioneer and you're done.
The new receiver hitch is almost as high as my F150 receiver hitch.


